


You can change your guitar strings yourself, on either an acoustic or electric, using a fresh string set, a tuner, and a pair of wire cutters. No workshop, no technician, no waiting around. Follow the sequence below and you’ll have a fully strung, stable-tuning guitar in under 30 minutes.
-
Loosen and remove the old strings one at a time or all together
-
Fit and seat the new strings at the bridge, then feed them to the tuning post
-
Wind, tune, and stretch until the pitch holds, then trim the tails
MusicStreet builds guides like this one alongside respected tutors such as Justin Sandercoe of JustinGuitar, and the core kit is simple: a string winder and a decent pair of cutters.
Pro Tip: On an acoustic, press down firmly on each bridge pin as you bring the string up to pitch — pins that aren’t fully seated tend to pop loose the moment you get near standard tuning.
Key Takeaways
Changing your own guitar strings comes down to three things: correct bridge seating, a locked winding technique, and a proper stretch-and-tune cycle.
| Point | Details |
|---|---|
| Basic tools are enough | A string winder, wire cutters, and a tuner cover nearly every job on acoustic or electric guitars. |
| Bridge-pin orientation matters | Fit the pin groove facing the neck so the ball end seats correctly and the pin doesn’t pop loose. |
| Lock your winding | Wrap over the tag once, then under it for every wrap after, and keep it to 2 to 5 wraps per post. |
| Stretch before you trust the tuning | Pull each string gently and retune two or three times so pitch settles faster. |
| Get help when needed | MusicStreet offers professional setups and fitting for buzzing, gauge changes, or tremolo balancing issues. |
Table of Contents
What tools do you actually need to change guitar strings?
You need three things: a new set of strings matched to your instrument, wire cutters, and a tuner (a clip-on works fine). Everything else is optional but makes the job faster and safer for your guitar’s finish.
-
Essential: replacement strings, wire cutters, tuner
-
Strongly recommended: a string winder with a bridge-pin notch, a soft cloth or towel to rest the guitar on
-
Nice to have: a neck rest or cradle, a dedicated string cleaner
You genuinely don’t need a workshop full of gear. Justin Sandercoe himself points out that a string winder and cutters make things much easier but aren’t strictly required, so don’t let a bare toolbox put you off starting.
Protect the finish while you work: lay a towel across the body, take off rings or watches that might scratch the top, and rest the neck on something soft rather than balancing it on your knee. Use real cutters rather than household pliers. Pliers tend to mangle the string end and scratch tuners or the headstock, which is an easy mistake to avoid with the right tool. Keep old bridge pins in a small dish so you don’t lose one mid-job.
Pro Tip: Keep the packaging from your new strings until the change is finished — it’s the fastest way to check gauge and brand if something feels off later.
How do you remove old guitar strings safely?
Two methods work well, and which one suits you depends on your guitar and your confidence level.
-
One at a time (recommended for beginners): loosen, remove, and replace each string before moving to the next. This keeps tension on the neck throughout and is the safer choice on floating bridges.
-
All at once: loosen every string fully, then pull them all off together. This is quicker and gives you full access for cleaning, but only use it on fixed bridges, and detune gradually rather than all in one go.
The removal sequence itself is straightforward:
-
Detune the string until it’s slack
-
Cut it in the middle if you want to remove it faster (optional)
-
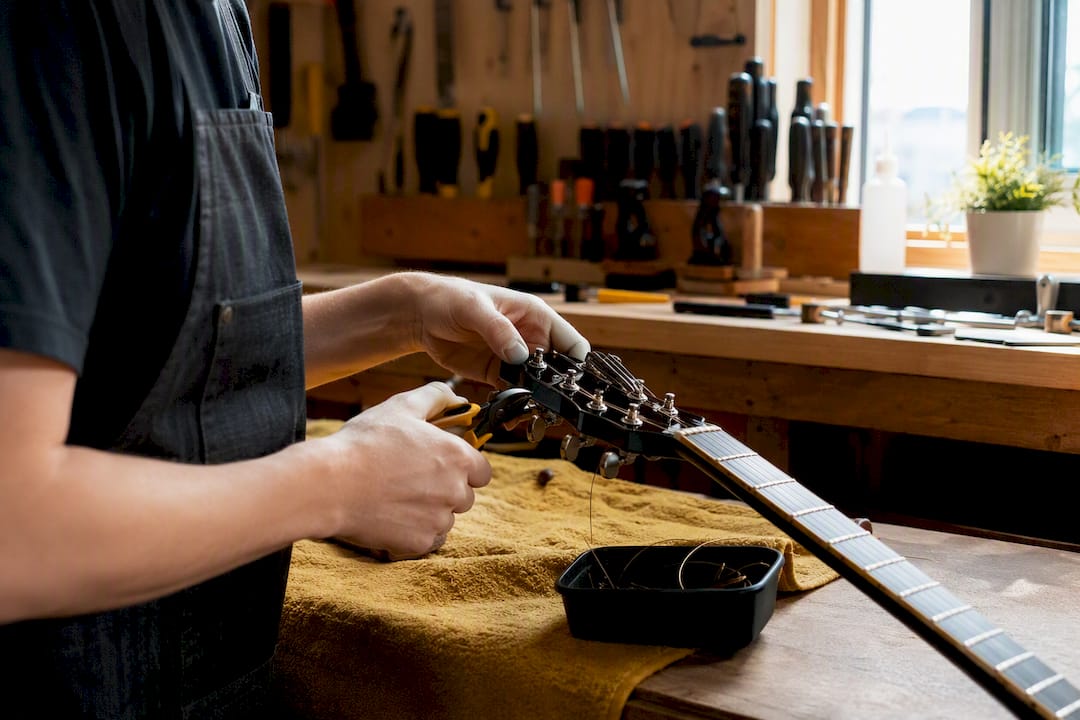
Pull the bridge pin free (acoustic) or unthread it from the bridge or tailpiece (electric)
-
Unwind the loose end from the tuning post
With everything off, take five minutes to clean. Wipe the fretboard with a lint-free cloth, apply a small amount of fretboard oil if the wood is unfinished (don’t overdo it), and clear away grime around the saddle and bridge plate. On electric guitars, the method you choose depends partly on bridge type: floating bridges want one string swapped at a time, while fixed bridges tolerate a full strip-down.
Pro Tip: Cut string ends curl sharply and can draw blood if you grab them carelessly. Bin them straight away rather than leaving loose ends lying on the workbench.
How do you fit new guitar strings correctly?
Fitting is where acoustic and electric guitars genuinely diverge, so treat each separately.
On an acoustic:
-
Drop the ball end into the bridge hole
-
Insert the bridge pin with its groove facing the neck, not the tailpiece
-
Pull the string gently upward while pressing the pin down, until you feel the ball seat against the underside of the bridge plate
-
Hold the pin in place with light pressure as you begin winding
Getting the pin groove backwards is one of the most common beginner mistakes. Guitar World notes that an incorrectly oriented pin can pop out under tension or put uneven stress on the bridge plate over time. Get the groove right and this problem mostly disappears.
On an electric:
-
Through-body: feed the string in from the back of the guitar, through the body, and out the other side
-
Top-load: the string clips into a slot at the back of the bridge itself
-
Tailpiece (Tune-o-matic style): loop the string over the tailpiece bar, then run it toward the nut
-
Floyd Rose and other locking systems: cut the ball end off entirely and clamp the bare string end into the saddle block
Whichever bridge you have, leave slack before winding. A practical rule: pull the string to where it would sit at a moderate amount of slack past the post you’re winding onto. Too little slack and you won’t get enough wraps to lock the string; too much and you’ll be winding forever.
How do you wind strings so they don’t slip?
Winding technique is what separates a string change that holds tune from one you’re fighting with all evening.
-
Wind so the coils travel downward the post, toward the headstock’s centre line
-
On most headstocks, bass strings wind anticlockwise and treble strings wind clockwise, or vice versa depending on your tuner layout, so check which way keeps the string running straight to the nut
-
Lock the wind: bring the string over the tag on your first wrap, then under it for every wrap after that, creating a mechanical clamp
-
Aim for 2 to 5 neat wraps per post. More than that adds slack, not stability
This locking approach is the same one StewMac teaches for acoustic restringing: one wrap over, the rest under, kept tight and tidy rather than stacked in a loose coil. Watch the nut slots as you wind, too. A string that binds there instead of sliding freely will throw your tuning off no matter how good the winding looks.
Pro Tip: If a string keeps sliding loose after you’ve locked the wind, you’ve probably left the tag too long before the first wrap. Trim a touch more slack next time.
How do you stretch and tune new strings properly?
New strings go flat almost immediately after your first tuning pass, and that’s normal, not a fault.
-
Tune each string roughly to pitch, always approaching the note from below (tune up to it, never down)
-
Gently pull each string away from the fretboard along its length, a few centimetres at most, then retune
-
Repeat the stretch-and-tune cycle two or three times per string
-
Once a string holds pitch after stretching, trim the excess tail to about 0.5 inches (1.3cm) from the post
Stretching by hand and retuning a couple of times helps new strings settle faster, cutting down the amount of drift you’ll get mid-song later. Use a clip-on or pedal tuner rather than trusting your ear here, especially while the strings are still bedding in. And handle the trimmed ends with care. A freshly cut string end is sharp enough to catch a fingertip if you brush past the headstock carelessly.
What changes with tremolos, locking nuts and nylon strings?
Standard technique doesn’t fully apply once you’re dealing with a floating bridge, a locking nut, or classical strings.
-
Floating tremolo systems: change strings one at a time rather than removing them all. Pulling full tension off every string at once lets the bridge tip forward and throws the whole setup out of balance
-
Locking nuts (Floyd Rose and similar): clamp the string at the bridge first, then cut the ball end off only once it’s securely clamped. Reset the fine tuners to their mid-point after bringing the string back to full tension
-
Classical and nylon-string guitars: strings tie in knots at the bridge rather than using a ball end, and the headstock winding pattern differs too. Avoid using metal string cutters directly against nylon; a clean pull or scissors works better and won’t fray the string
For locking-nut and floating-bridge systems specifically, rebalancing the bridge as you go and resetting fine tuners afterward saves you from chasing tuning instability for days.
Pro Tip: If you own a Floyd Rose, keep a small wooden block or wedge handy to prop the bridge level while you’re between strings. It saves a lot of frustration.
How often should you change your guitar strings?
Most players get the best tone and feel by changing strings at least once a month, though how long yours actually last depends on how much you play, how much you sweat, and how bright you want your tone.
-
Heavy daily players: every 2 to 4 weeks
-
Occasional players: every 2 to 3 months
-
Gigging musicians: before any important show, regardless of calendar time
Gauge matters too. Lighter gauges are easier to bend and fret, kinder on your fingers, but thinner in tone and lower in tension. Heavier gauges push back more, carry fuller tone, and put more strain on the neck, which is one reason a big gauge jump sometimes calls for a truss rod check. Most beginners do well starting on a light or medium set.
Coated strings cost more but resist grime and sweat, so they hold their tone longer between changes. Uncoated strings sound slightly brighter fresh out of the packet but dull faster. If you play often, coatings usually pay for themselves in fewer changes over time.
Simple upkeep between changes: wipe strings down after every session, store the guitar somewhere dry rather than a damp case, and if you’ve jumped gauge significantly, get the neck checked rather than assuming it’ll settle on its own.
Why do new strings buzz or slip out of tune?
Strings keep slipping: check your winding. Not enough wraps, or wraps in the wrong direction, are the usual culprits. Unwind, retension with a proper lock, and stretch again.
Buzzing or dead notes: check the string is seated properly at both the nut and the saddle, and look for dust trapped underneath. If it persists after that, the intonation may need a proper look.
Breakage right after fitting: inspect for sharp edges at the saddle or nut slot, confirm the ball end is fully seated, and avoid overtightening while winding.
Not sure if it’s a setup issue? Play an open chord, then compare the 12th-fret harmonic to the fretted note at the same spot. A mismatch there usually points to intonation, not your string change.
When should you book a professional guitar setup instead?
If buzzing persists after a fresh set, you’ve made a big gauge jump, or you’re wrestling with a floating tremolo that won’t sit level, it’s worth booking a setup rather than fighting it alone.
A full setup typically covers neck relief, string action, intonation, a fret condition check, and any bridge or saddle adjustment needed to match your new strings. MusicStreet offers exactly this, including fitting the strings themselves if you’d rather leave the whole job to someone else.
Why bother learning to change your own strings?
There’s something genuinely satisfying about hearing your guitar come back to life under a fresh set you fitted yourself. It sharpens your ear for tone, builds real confidence with your instrument, and means you’re never stuck waiting on someone else before you can practise. The first change takes a while. By your third, it’s a five-minute habit you barely think about.
Get the right kit or let MusicStreet handle the fitting
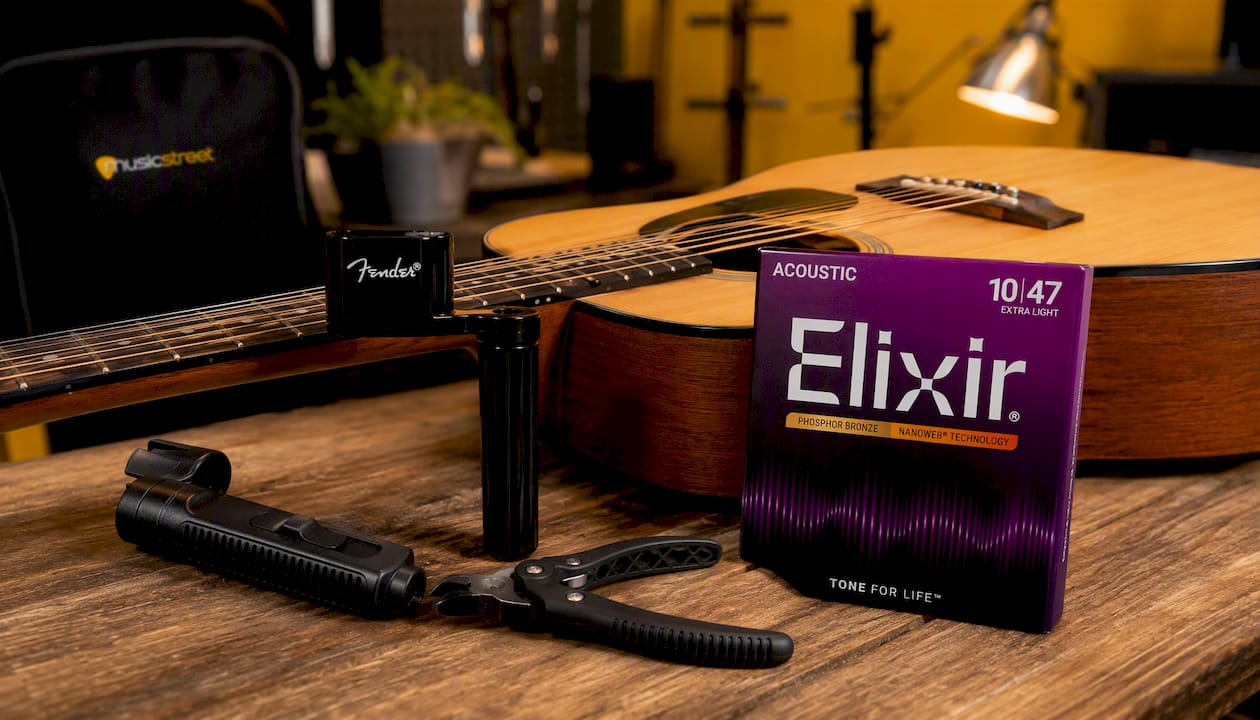
Prefer to buy once and be sorted for years? The CruzTools Groovetech Guitar Player Tech Kit packs a string winder, cutter, and bridge-pin tool into one compact case, and it’s a sensible first purchase for anyone who plans to keep restringing their own guitar. Acoustic players specifically will get more out of the CruzTools Groovetech Acoustic Guitar Player Tech Kit, built around bridge-pin removal.
Not every player wants to spend an evening learning bridge-pin angles and wind direction, and that’s fine too. MusicStreet’s in-store team fits strings and runs full setups, covering neck relief, action, and intonation, on both new and pre-owned instruments, including guitars like the Yamaha FGX5 Acoustic Guitar. If you’d rather hand the job over, drop into the Huntingdon store or get in touch to book a setup, and you’ll walk out with a guitar that’s properly strung, properly tuned, and ready to play.
Sources
For video demonstrations and deeper technique, JustinGuitar offers a full walkthrough, StewMac covers workshop-grade winding technique, and Guitar World breaks down bridge-pin seating in detail. MusicStreet’s own guides, including the full step-by-step string change article and the electric-specific restringing guide, cover the same ground with more photos.
FAQ
Can you change your own guitar strings?
Yes. You only need a new string set, wire cutters, and a tuner, and the whole process typically takes under 30 minutes once you’ve done it once or twice.
What is the best way to change guitar strings?
Remove strings one at a time (safest for beginners and floating bridges), seat the new string correctly at the bridge, lock the winding with an over-then-under wrap, then stretch and retune two or three times before trimming the tails.
Do you need special tools to change guitar strings?
No special tools are strictly required, though a string winder and dedicated wire cutters make the job faster and reduce the risk of scratching your tuners or headstock.
How do you replace your guitar strings on an electric guitar?
Feed the new string through the body, top-load slot, or tailpiece depending on your bridge type, leave enough slack for 2 to 3 wraps around the post, then wind, tune, and stretch exactly as you would on an acoustic.
How often should you change your guitar strings?
At least once a month for regular players, though sweat, humidity, and how bright you want your tone to sound all affect how quickly strings wear out.








Share:
Types of Les Paul guitars: which one should you buy?
How to tune a bass guitar: a step-by-step guide