
Did you know that over 80 percent of guitarists say fresh strings improve their sound instantly? If your electric guitar feels dull or hard to play, a proper string change can make a huge difference. With a careful process and the right tools, anyone can give their guitar better tone and a smoother feel. This guide will show you each step, making the task straightforward even for beginners.
Quick Summary
| Key Point | Explanation |
|---|---|
| 1. Prepare a clean workspace | A clear, well-lit area is essential for changing strings effectively and avoiding damage to your guitar. |
| 2. Use proper tools for string change | Essential tools include a polishing cloth, wire cutters, string winder, new strings, and eye protection for safety. |
| 3. Remove strings gradually and safely | Loosen each string before cutting to prevent injury and maintain guitar tension; remove one string at a time. |
| 4. Clean fretboard and hardware | Take advantage of string removal to clean the fretboard and hardware, improving performance and longevity of your guitar. |
| 5. Stretch and tune new strings | After installing new strings, stretch and tune them multiple times to ensure stable pitch and optimal sound quality. |
Table of Contents
- Step 1: Gather Essential Tools And Materials
- Step 2: Remove Old Strings Safely
- Step 3: Clean The Fretboard And Hardware
- Step 4: Install New Electric Guitar Strings
- Step 5: Tune And Stretch The New Strings
- Step 6: Check String Stability And Playability
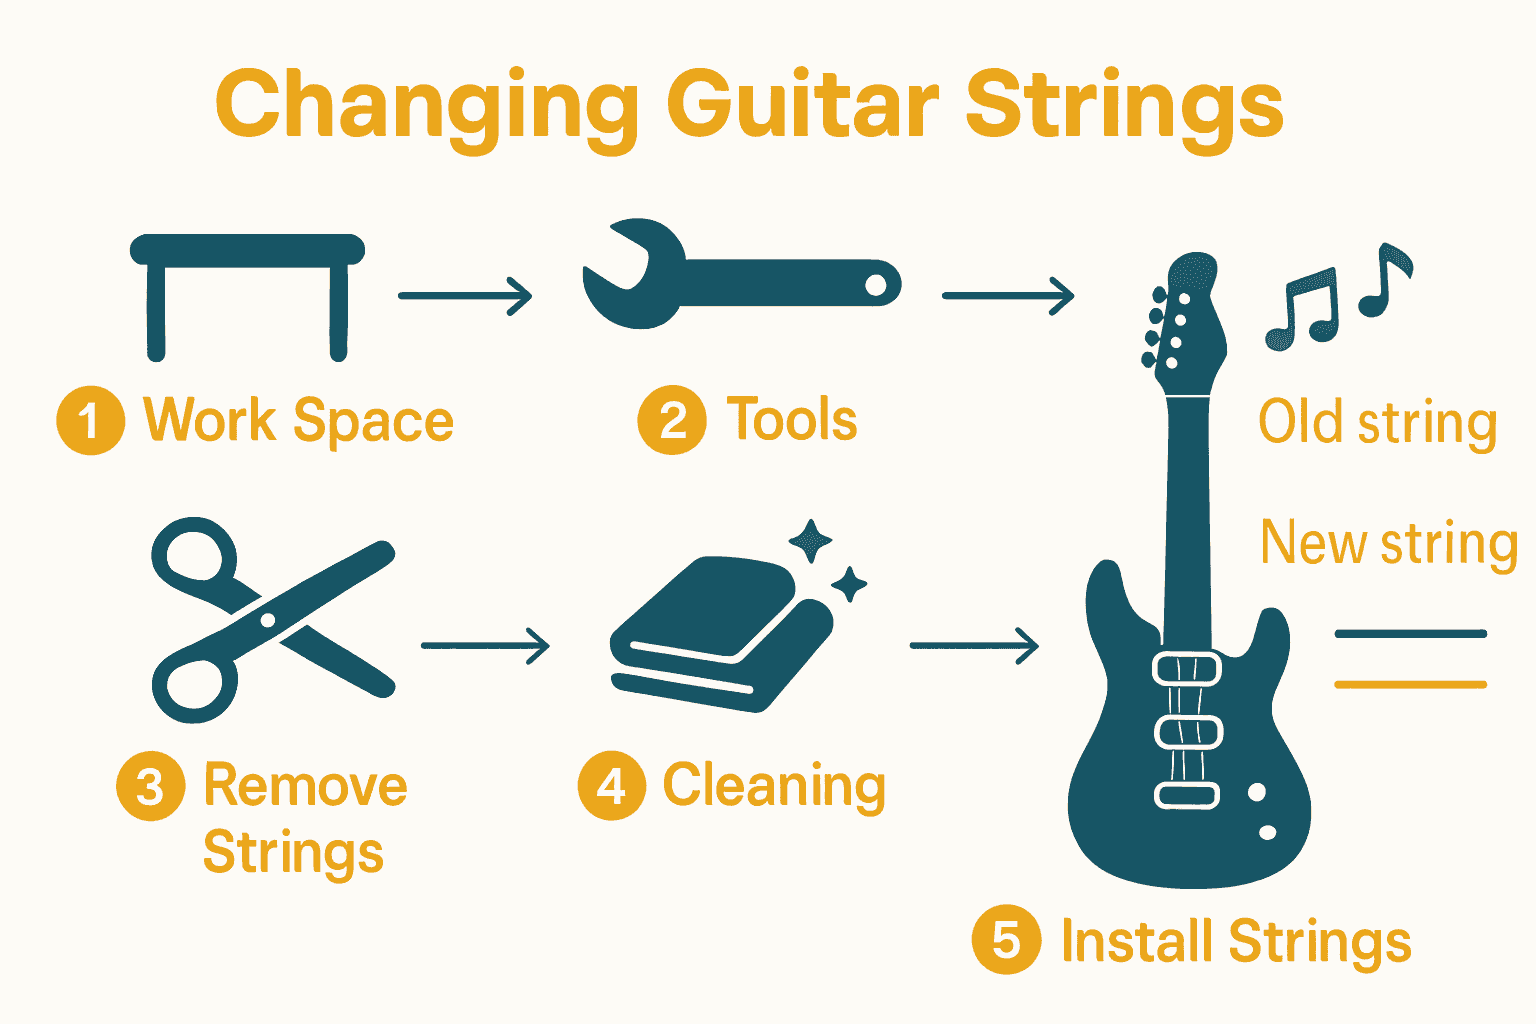
Step 1: Gather Essential Tools and Materials
Before diving into changing your electric guitar strings, you need to gather the right tools and supplies. This preparation will make the entire process smoother and more efficient, helping you achieve professional results right in your own space.
Start by clearing a clean, flat workspace where you can comfortably spread out your materials. A sturdy table or workbench works perfectly. According to research from Gibson, you’ll want to set up a workspace that provides good lighting and enough room to manoeuvre.
Here are the essential tools you’ll need:
- A clean polishing cloth
- Wire cutters
- String winder (manual or electric)
- Eye protection
- New guitar strings matching your preferred material
- Neck support (a guitar stand or soft pillow works well)
When selecting strings, pay attention to the material. According to Real Brave Audio, nickel-plated steel strings offer brightness, while coated strings provide longer life. Your choice depends on your tonal preferences and playing style.
Here’s a summary of essential tools and their purposes:
| Tool | Purpose | Additional Tips |
|---|---|---|
| Polishing cloth | Clean and polish guitar surface | Use microfibre to prevent scratches |
| Wire cutters | Cut old guitar strings | Always cut strings after loosening them |
| String winder | Speed up string removal and installation | Manual or electric versions available |
| Eye protection | Prevent injury from snapping strings | Wear throughout string changes |
| New guitar strings | Replace old strings for fresh tone | Match gauge and material to your preference |
| Neck support | Stabilise guitar during maintenance | Soft pillow or guitar stand works well |
Pro Tip: Always have a spare set of strings on hand. Nothing is more frustrating than starting the process and realising you’re missing a critical component.
With your tools assembled, you’re now ready to begin the string replacement process. Take a moment to ensure everything is within reach and you feel comfortable at your workspace.
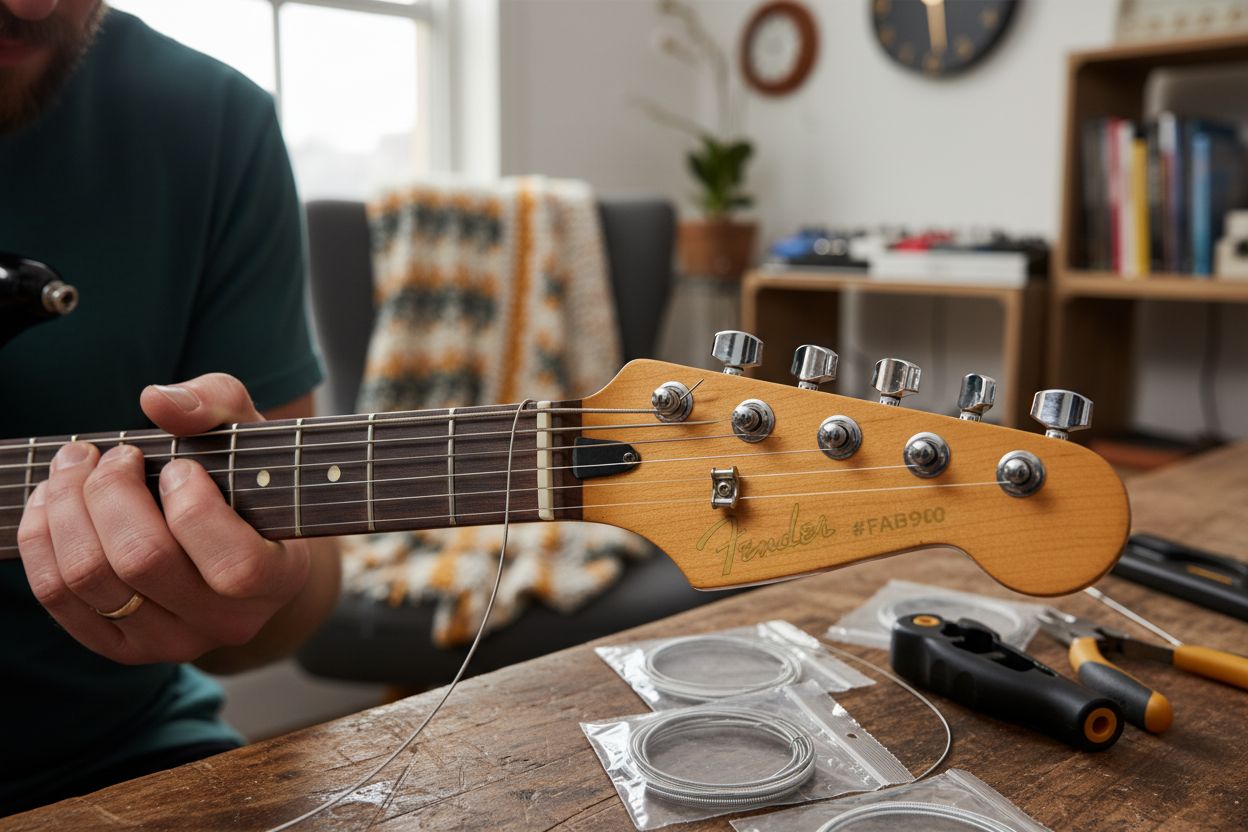
Step 2: Remove Old Strings Safely
Now that your workspace is prepared, it is time to remove the old strings from your electric guitar. This stage requires careful attention to protect your instrument and prepare it for fresh strings.
Begin by loosening each string gradually to reduce tension. According to Gibson’s research, it is crucial to loosen strings before cutting to prevent potential injury. Start at the tuning pegs and slowly turn each machine head, allowing the string to go slack.
Once the strings are sufficiently loose, use your wire cutters to clip the strings near the bridge. Work carefully and avoid sudden movements. If you are changing a full set of strings, MusicRadar recommends an interesting technique: use blue masking tape to secure bridge and tailpiece components before removing all strings. This prevents small parts from getting lost and helps maintain the guitar’s setup.
Pro tip from experienced guitarists: remove and replace strings one at a time rather than all at once. According to MusicRadar, this approach helps maintain neck tension and allows the neck to stabilise more quickly during the restringing process.
Safety Warning: Always wear eye protection when cutting strings. They can snap unexpectedly and potentially cause eye injury.
With the old strings removed, your guitar is now ready for the next exciting phase of the restringing process. Take a moment to inspect the fretboard and clean any accumulated grime before installing new strings.
Step 3: Clean the Fretboard and Hardware
With the old strings removed, you have an excellent opportunity to give your electric guitar some much needed care and attention. Cleaning the fretboard and hardware will help maintain your instrument’s performance and longevity.
Start by using a soft microfibre cloth to gently remove any accumulated dirt, dust, and grime from the fretboard. If you notice stubborn buildup, use a specialised fretboard cleaner appropriate for your guitar’s wood type. Work carefully along the neck, paying extra attention to areas around the frets where debris tends to collect.
For the hardware like tuning machines, bridge, and pickups, use a clean cloth to wipe away dust and oxidation. Be gentle and precise to avoid scratching delicate metal surfaces. You can learn more about guitar maintenance tips to ensure your instrument stays in prime condition.
According to research from Country Instruments, applying a string lubricant can significantly improve your guitar’s performance. These sprays or pastes reduce friction, slow down corrosion, and make string bends and slides smoother while also preserving your hardware’s finish.
Pro Tip: Always use products specifically designed for musical instruments to prevent potential damage to your guitar’s delicate surfaces.
With your fretboard and hardware now clean and protected, you are ready to move on to the next exciting step of restringing your electric guitar.
Step 4: Install New Electric Guitar Strings
With your guitar cleaned and prepped, you are now ready to install fresh strings that will bring new life and vibrant tone to your instrument. Understanding guitar string installation is crucial for maintaining optimal sound quality.
According to Gibson’s research, the string installation process is straightforward but requires careful attention. Begin by threading the new string through the bridge hole, pulling it up towards the corresponding tuning machine. Leave a bit of slack beyond the tuning post to allow for proper winding.
As you start winding the string, create a small bend near the tuning post to help secure the string. MusicRadar recommends using 2 to 4 turns around the tuner post for optimal tuning stability. Wound strings typically require fewer turns to prevent excessive buildup.
Apply gentle downward pressure while winding to ensure neat, overlapping wraps. This technique helps maintain string tension and prevents slippage. Work methodically and consistently for each string, maintaining even tension throughout the process.
Pro Tip: Wind each string in the same direction around the tuning post for a cleaner, more professional appearance and improved mechanical performance.
Once all strings are installed, you are almost ready to bring your guitar back to life and enjoy its refreshed sound.
Step 5: Tune and Stretch the New Strings
Now that your new strings are installed, the final crucial step is tuning and stretching them to ensure stable pitch and optimal performance. Learn more about guitar tuning techniques to master this essential skill.
Begin by using a reliable electronic tuner to bring each string to standard pitch. According to Gibson’s research, the process does not end with initial tuning. After achieving the correct notes, you will need to manually stretch the strings to help them settle.
MusicRadar recommends pulling each string gently up from its mid-length point. Apply moderate pressure and lift the string away from the fretboard, being careful not to pull too hard and risk breaking it. This technique helps the string adjust and reduces the likelihood of going out of tune during playing.
After stretching, retune the string to its correct pitch. You will likely notice the string has dropped in tension. Repeat the stretching and tuning process for each string until the pitch remains stable after stretching. This might require 2 to 3 repetitions per string.
Pro Tip: Be patient and consistent. New strings need time to settle and will naturally stabilize with playing and continued stretching.
With your strings now tuned and stretched, your electric guitar is primed to deliver optimal tone and performance.
Step 6: Check String Stability and Playability
After tuning and stretching your new strings, it is time to evaluate their performance and ensure your electric guitar is playing smoothly. This final assessment will help you fine-tune your instrument and maintain its optimal sound quality.
According to MusicRadar, tuning stability depends on several factors. Check the number of string windings around the tuner post. Aim for 2 to 4 neat, overlapping turns that provide secure tension without overcrowding. To reduce friction at the nut, consider applying a small amount of pencil graphite to the nut slots, which can improve tuning behaviour.
Play through various techniques such as chords, single notes, and bends to assess the strings’ responsiveness and tone. Listen for consistent pitch and check that the strings feel comfortable and stable across the fretboard.
Guitar Templates recommends a simple maintenance routine to preserve your strings’ brightness and playability. Always wash your hands before playing to reduce oil and dirt transfer. After each playing session, wipe down the strings with a clean cloth to remove moisture and prevent premature corrosion.
Pro Tip: Keep a microfibre cloth dedicated to your guitar for quick post-play cleaning.
With your strings now installed, stretched, and verified for stability, your electric guitar is ready to deliver exceptional sound and performance.
Discover Your Freshest Sound at MusicStreet.co.uk
You have just learned how to change electric guitar strings for a brighter, more reliable tone, but achieving truly optimal performance relies on quality tools and components. Many players face the frustration of using old or mismatched strings, or struggle with unreliable gear. Even a perfect restringing technique cannot make up for inferior equipment.

Why settle for less when upgrading your guitar experience is simple and immediate? Visit MusicStreet.co.uk to choose from a curated selection of new, premium-quality guitars and essential accessories that match your setup needs. Whether you are seeking guidance on the right strings or looking for expert advice, our guitar guides and tips are designed to help you play, maintain, and sound your best. Explore in-store for professional services and enjoy the confidence that comes from trusted expertise. Make each restring count – shop now, and experience your guitar at its very best today.
Frequently Asked Questions
How do I know when to change my electric guitar strings for optimal tone?
Changing your electric guitar strings is generally needed when they sound dull, feel rough, or have visible signs of wear, such as discoloration or fraying. Inspect your strings regularly and consider changing them every 1-2 weeks if you play frequently, or every month for less active playing.
What tools do I need to change electric guitar strings correctly?
To change electric guitar strings, gather a polishing cloth, wire cutters, a string winder, eye protection, new strings, and neck support. Ensure you have these tools ready before starting the process to make it smoother and more efficient.
Can I change all my electric guitar strings at once?
It’s recommended to change strings one at a time to maintain neck tension and prevent destabilization. Removing one string at a time allows the neck to adjust more gradually, resulting in a better setup and enhanced overall performance.
How can I properly clean the fretboard before installing new strings?
Use a soft microfibre cloth to wipe away dust and grime from the fretboard, and employ a proper fretboard cleaner if there’s stubborn dirt. Clean it gently while paying attention to areas around the frets, making sure to prepare the surface for the new strings.
What is the best way to stretch my new guitar strings after installation?
After installing new guitar strings, gently pull each string upward from its mid-length point to help them settle into place. Repeat this stretching and tuning process a couple of times to ensure they maintain stable pitch and improve their playability.
How can I ensure my new strings stay in tune effectively after changing them?
Check that there are 2 to 4 neat windings around each tuner post, as this will enhance tuning stability. After tuning, play your guitar and re-check the tuning; this process helps ensure that the strings remain sharp and in tune as you play.


Share:
Best Guitars Under £1000 in 2025: Expert Recommendations
Fender vs Gibson: Which Brand is Right for You? – Expert Comparison 2025