

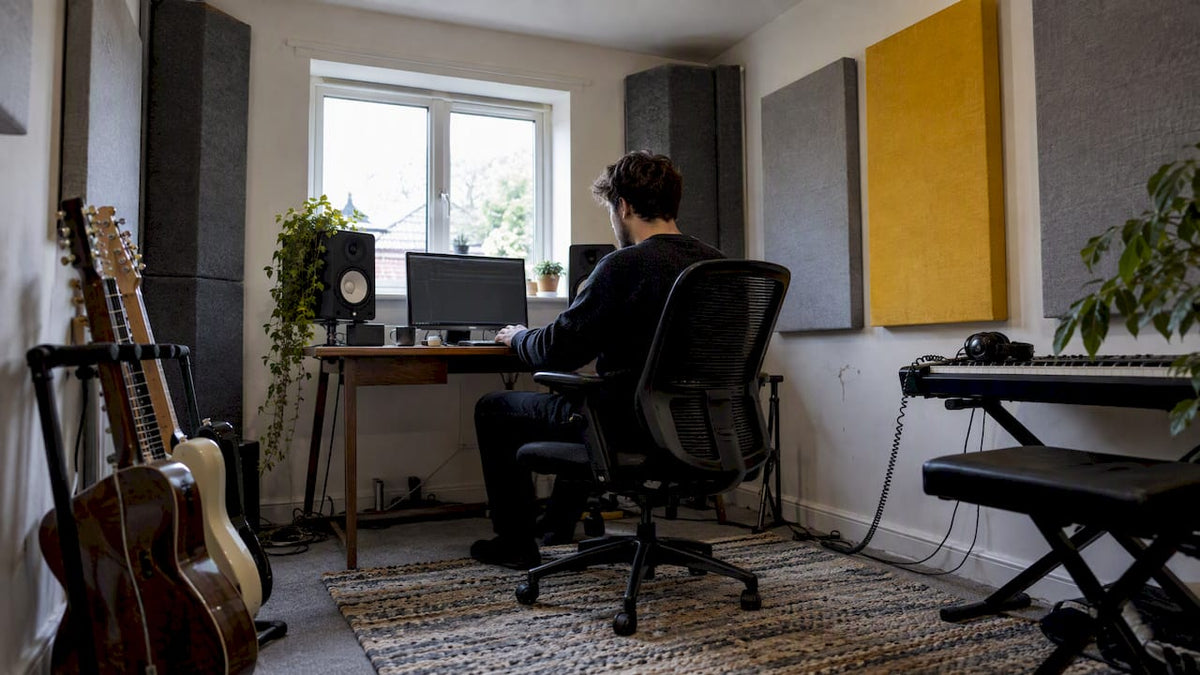
To create a working home studio, pick the quietest, most regularly shaped room available, fit it with a compact core of kit (computer and DAW, audio interface, a microphone and calibrated monitors), and treat the room acoustically before you worry about anything else. Budget roughly £1,440 to £8,409 for equipment and treatment together, and expect acoustic treatment to take the biggest bite.
Table of Contents
- How to choose and prepare the room for recording
- Essential equipment: computer, interface, microphones and monitors
- Monitoring: correct placement and quick calibration
- Acoustic treatment: first reflections, bass control and panel placement
- Signal flow and a simple session workflow to start recording today
- Budget guide and realistic cost ranges
- How MusicStreet can help you set up: services, starter kits and in-store support
- Power supply and cable management to ensure clean signal and safety
- Choosing suitable instruments and amplifiers for home recording
- Ergonomic furniture and studio desk setup for comfort and efficiency
- Software plugins and virtual instruments integration
- Backup and data management strategies to prevent loss
- Author perspective: priorities when building a studio
- Get started with MusicStreet: recommended kits and next actions
- FAQ
- Sources
How to choose and prepare the room for recording
The room matters more than almost any single piece of gear. A rectangular room with hard parallel walls creates standing waves and flutter echo that no amount of expensive microphones will fix, so the physical space you choose dictates how hard you will have to work afterwards.
Size and shape both count. A larger room with a slightly irregular layout, or one with furniture and soft furnishings already in it, behaves better than a small square box. Background noise matters just as much as shape: a room over a busy road, next to a boiler, or sharing a thin wall with a teenager’s drum kit will fight you at every stage. AITone’s guide to setting up a home studio notes that calibrated monitoring and a sensible signal chain only pay off once the room itself behaves predictably.
Before committing to a room, run a quick inspection:
- Measure length, width and height, avoiding rooms where two dimensions are identical or simple multiples of each other.
- Check which walls are shared with neighbours, bathrooms or stairwells, since these carry the most unwanted noise.
- Look for large, uncovered windows, which reflect sound and let outside noise in.
- Note ventilation and heating sources that hum or rattle during a take.
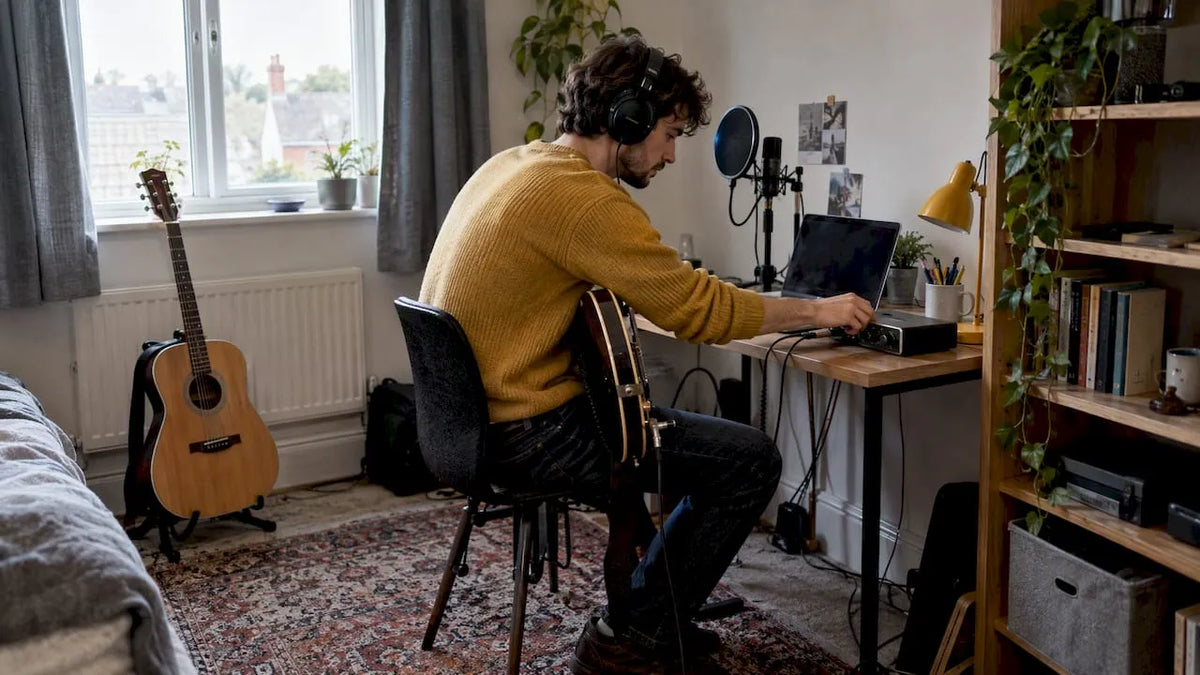
Once you have settled on a room, simple mitigation goes a long way before you buy anything specialist. Rugs on hard floors cut early reflections underfoot, heavy curtains or temporary window panels calm glassy reflections, and bookshelves or soft furniture break up parallel surfaces. Keep an eye on ventilation too: a sealed-up room with no airflow becomes uncomfortable and, in summer, noisy once you add a fan to cool it down.
Essential equipment: computer, interface, microphones and monitors
A home studio rests on five pieces of kit, and each one has a specific job.
- Computer and DAW: most modern laptops with at least 8GB of RAM and a recent processor will run a digital audio workstation such as Ableton Live, Logic Pro or Reaper comfortably; the DAW itself matters less than learning one properly.
- Audio interface: this converts your microphone or instrument signal into something your computer understands, and for a one to four mic setup you want clean preamps and low-latency drivers rather than a long input list you will never use.
- Microphone: a condenser microphone suits vocals and acoustic instruments where detail matters, while a dynamic microphone handles louder sources such as electric guitar cabinets or live drums without distorting, as AITone explains.
- Monitoring: closed-back headphones such as the Audio-Technica ATH-M40X are a sensible starting point, with calibrated studio monitors added once the room is treated.
- Starter interface bundles: the Studio 26c and Studio 24c both pair an interface with a microphone and headphones in one box, and the MXL USB Studio One offers a straightforward USB condenser route for anyone who wants to skip the interface step entirely for voice or acoustic guitar recording.
For vocal work, a dedicated condenser such as the Shure PGA181 gives more headroom for detail than a USB mic, while a dynamic option like the Shure PGA58 handles guitar amps and rougher sources. Anyone recording a full kit should look at a multi-mic bundle such as the Shure PGA drum kit rather than buying individual capsules piecemeal.
Monitoring: correct placement and quick calibration
Even good monitors sound wrong if they are placed badly. Set them up in an equilateral triangle with your listening position, tweeters at ear height, angled slightly inward so the sound crosses just in front of your face, a layout AITone confirms as the standard reference setup.
- Decouple monitors from the desk with isolation pads or dedicated stands to stop the desk itself resonating.
- Keep monitors away from corners and at least 20 centimetres from the wall behind them to avoid bass build-up.
- Mute one speaker at a time and check the room sounds roughly even on each side.
- Play a mono signal through both speakers together to check the centre image holds steady.
A simple calibration routine makes a real difference. Set your monitoring level to a comfortable, consistent volume, then play a few commercial tracks you know well on a good system, in the genre you intend to work in. Listen for how the bass, vocal and top end behave compared with what you remember, and use that as your reference point for new mixes.
Pro Tip: Check every mix on headphones and on a phone speaker before calling it finished. Mixing on headphones alone flatters stereo width and bass response that collapses the moment someone hears the track in mono.
Acoustic treatment: first reflections, bass control and panel placement
Acoustic treatment and soundproofing solve different problems, and conflating them wastes money. Treatment controls how sound behaves inside the room, improving what you hear and record. Soundproofing stops sound getting in or out, which needs mass, decoupling and sealed gaps rather than foam, as Neowall’s comparison of panels and soundproofing points out.
Start with first reflections. Sit in your mixing position, have someone slide a mirror along the side walls, and mark every point where you can see a monitor’s reflection in the glass. That is where a panel goes. The same logic applies to the ceiling above your head.
- Place absorbent panels at the marked first-reflection points on both side walls.
- Add a ceiling cloud directly above the mixing position to control overhead reflections.
- Fit bass traps in room corners, where low frequencies build up most.
- Mount panels with a small air gap behind them rather than flush against the wall.
Sound on Sound’s real-room case studies show that an air gap behind panels increases low-mid absorption, and that correctly placed corner traps and ceiling clouds improve monitoring accuracy more than scattering foam tiles symmetrically around the walls. Research into small control room acoustic design backs this up, finding that membrane absorbers and strategically placed bass traps measurably improve low-frequency response and stereo imaging.
A basic kit of DIY panels and a couple of corner traps often costs a fraction of a studio microphone upgrade, yet changes what you hear far more. If you need genuine soundproofing rather than treatment, that is structural work, and calling in a specialist for door seals, mass-loaded barriers or window glazing makes more sense than attempting it yourself.

Signal flow and a simple session workflow to start recording today
Every recording follows the same basic path: source into a microphone or DI box, through a preamp, into the interface, onto the DAW, and back out through monitors or headphones. Music Teacher’s guide to building a multitrack studio frames this as viewing the whole studio as one interconnected system rather than a pile of separate boxes, which makes troubleshooting far faster when something sounds wrong.
Gain staging keeps that chain clean. Set your interface’s input gain so the loudest part of the performance peaks comfortably below clipping, leaving headroom rather than running hot and hoping.
Keep a short checklist of cables and connectors on hand: XLR for microphones, a quarter-inch jack or DI box for instruments, and a USB or Thunderbolt cable for the interface itself. A quick line check, playing or singing at performance volume before you hit record, catches a loose cable or wrong input before it ruins a take.
- Set up the room, mic and headphones for the session.
- Run a soundcheck at performance level and adjust gain.
- Record a short test pass and listen back.
- Monitor levels throughout the take, watching for clipping.
- Save the session file with a clear name and date.
- Back up the recording to a second location immediately.
Budget guide and realistic cost ranges
Three rough tiers cover most home studios. A basic setup prioritises a budget interface, one microphone and headphones. An intermediate setup adds a second microphone, basic acoustic panels and entry-level monitors. A capable setup adds proper corner bass traps, a ceiling cloud and better monitors, with the microphone count staying modest.
Across all three, UK pricing for equipment and basic acoustic treatment typically runs from about £1,440 to £8,409, with treatment consistently the single biggest cost driver rather than the interface or microphone.
- Buy a well-reviewed used interface or monitor pair rather than a new budget model at the same price.
- Spend on treatment and monitoring before an expensive microphone; a modest mic in a treated room usually beats an expensive one in an untreated room.
- Build panels and bass traps yourself where time allows, saving the budget for monitors instead.
How MusicStreet can help you set up: services, starter kits and in-store support
We stock starter interface bundles, microphones and accessories suited to home recording, and every instrument or piece of gear we sell gets expert inspection before it reaches you. Our setup lets you test monitors, microphones and interfaces before buying, and our repair and warranty support covers you once you are recording.
For a UK-focused look at avoiding costly structural soundproofing while still getting clean recordings, our guide to setting up a home recording studio goes into more detail on practical, low-cost fixes.
Power supply and cable management to ensure clean signal and safety
A clean power supply protects both your gear and your recordings. Running an interface, computer and monitors from the same cheap extension lead as a fridge or boiler invites hum and ground loops that show up as a faint buzz on every take.
Use a dedicated surge-protected power strip for your studio equipment, separate from high-draw appliances on the same circuit. Where possible, plug audio gear into sockets on the same circuit as each other rather than spreading them across the house, which reduces the chance of ground loop noise.
Cable management is as much about safety as sound quality. Keep power cables and audio cables separated, or crossing at right angles rather than running parallel, since parallel runs induce hum into balanced and unbalanced lines alike. Label each cable at both ends, coil spares neatly, and tape down any lead crossing a walkway so a trailing cable does not become a trip hazard during a session. Replacing a frayed or kinked XLR or instrument cable before it fails mid-take saves a ruined recording later, and a basic set of cable ties or velcro wraps keeps a desk tidy enough to find the right lead quickly.
Choosing suitable instruments and amplifiers for home recording
The instrument and amplifier you record through matter as much as the microphone in front of them. An electric guitar run through a small valve or modelling combo gives you more usable tone options in a domestic room than a full-stack amplifier, which struggles to reach its best sound at a volume your neighbours can tolerate.
For acoustic work, a well-set-up acoustic or classical guitar with fresh strings records far more cleanly than an instrument with a sticking neck or dead strings, so a proper setup pays for itself the first time you sit down to track. Bass players benefit from a DI box alongside or instead of a microphone, capturing a clean signal directly into the interface without the amp’s room noise.
Browse our range of electric guitars, acoustic guitars, bass guitars and guitar amps and combos to find instruments suited to a home recording space rather than a stage. If you play classical or nylon-string material, our classical and Spanish guitars selection covers that ground too, and every instrument we sell has been checked and set up before it leaves us.
Ergonomic furniture and studio desk setup for comfort and efficiency
Long sessions expose bad furniture quickly. A desk that is too high or too low forces your shoulders up or your wrists down, and a few hours of mixing in that position leaves you stiff and less able to make good decisions about what you are hearing.
Choose a desk with a recessed section or low central shelf so your monitors sit at the correct height relative to your ears without you having to stack them on books. An adjustable chair with proper lumbar support matters more in a home studio than almost any other single furniture choice, since you will spend more hours sitting in it than standing at a microphone.
Keep your most-used controls, keyboard, audio interface and monitor controller, within easy reach so you are not twisting or reaching mid-take. A separate surface or rack for outboard gear and cables keeps the main desk clear, which also reduces unwanted reflective clutter near your monitoring position.
Software plugins and virtual instruments integration
Once the physical chain is sorted, plugins and virtual instruments extend what a modest setup can do. Most DAWs ship with a usable set of compressors, equalisers and reverbs built in, and these cover the majority of everyday mixing decisions without buying anything extra.
Virtual instruments let you sketch out drum, bass or orchestral parts without owning the physical instrument, which is useful for arranging a song before committing studio time to real performances. A software drum instrument triggered from a simple MIDI keyboard, for instance, can carry a full arrangement until you are ready to record a live kit.
Keep plugin use focused rather than collecting dozens you never open: a handful of equalisers, compressors and a couple of reverbs you understand well will outperform a bigger collection used badly. Check CPU load as you add virtual instruments and plugins, since an older computer can run out of processing power well before it runs out of storage.
Backup and data management strategies to prevent loss
Losing a session halfway through a project is one of the most avoidable disasters in home recording, and it happens constantly to people who never set up a backup routine. A single hard drive failure can take a finished album’s worth of recordings with it.
Follow a simple rule: keep one working copy on your main drive, one backup on a separate external drive, and ideally a third copy somewhere off-site or in cloud storage. Back up immediately after a significant recording session rather than waiting for a scheduled backup to catch it later.
Name session files and folders consistently, with the date and project name, so you can find the right version months later without guessing. Bounce or export finished mixes as standard WAV files in addition to keeping the full project file, since a plugin update or missing sample library can make an old project unopenable even though the original session data still exists.
Author perspective: priorities when building a studio
If you remember one thing from all of this, make it monitoring and treatment before gear. A room you can trust and speakers positioned correctly will improve every recording you make, long after a flashy microphone purchase has stopped feeling exciting. Test equipment in person where you can, and ask detailed questions before you buy.
— Music
Get started with MusicStreet: recommended kits and next actions
We keep three straightforward starter options in stock for anyone building a first setup: the Studio 26c and Studio 24c interface bundles, and the MXL USB Studio One for a simpler USB route.

- View full specifications and check current stock on each product page.
- Ask about delivery and warranty cover before ordering.
- Visit our Huntingdon store to try interfaces and microphones in person.
- Book a setup or repair appointment once your instruments arrive.
Head to our full range to compare options or get in touch about a bespoke recommendation.
FAQ
What do I need to create a home studio?
At minimum you need a quiet room, a computer running a DAW, an audio interface, one microphone suited to your main source, and a way to monitor your work through headphones or calibrated monitors. Acoustic treatment for first reflections and bass build-up should follow soon after, since it affects every recording you make in that room.
How much does it cost to start a home studio?
A basic UK home studio with equipment and simple acoustic treatment typically costs between £1,440 and £8,409, depending on how much treatment and how many microphones you add. Acoustic treatment is usually the biggest single cost within that range, more than the interface or microphone combined.
How do you make your own studio?
Choose the quietest, most regularly shaped room available, fit it with a core set of equipment (interface, microphone, monitors or headphones and a DAW), then treat the first-reflection points, corners and ceiling with absorption panels and bass traps. Build the signal chain from source through preamp, interface and DAW to monitors, and test it with a short recording before committing to a full session.
What are some good ideas for a home studio setup?
Prioritise monitoring accuracy and room treatment over buying multiple microphones, since a treated room with modest gear outperforms an untreated room with expensive equipment. Starting with a combined interface and microphone bundle, then adding targeted acoustic panels at your first-reflection points, covers most of the groundwork efficiently.
What is the best microphone for a home studio?
A condenser microphone suits vocals and acoustic instruments where detail matters, while a dynamic microphone handles louder sources such as amplifiers or drums without distorting. Most home studios benefit from having one of each rather than relying on a single all-purpose microphone.
Sources
- Setting up a simple home recording studio | AITone
- Tech guide: building a multitrack recording studio | Music Teacher
- Home recording studio cost: 2026 UK price guide | Checkatrade
- Studio SOS: making a small room sound good | Sound on Sound



Share:
Clean a Maple Fretboard: Sealed or Raw, With UK Shop Help