


Many guitarists avoid amp biasing because it seems technical and risky, yet understanding this fundamental aspect of tube amplifiers can transform your tone and extend your tubes’ lifespan significantly. Amp biasing sets the idle current in power tubes to optimise tone, performance, and tube longevity. This guide demystifies biasing types, measurement methods, and tonal effects, giving you practical knowledge to enhance your sound and maintain your gear confidently. Whether you play through a vintage Marshall or a boutique combo, mastering bias concepts empowers you to unlock your amplifier’s full potential whilst protecting your investment.
Table of Contents
- Key takeaways
- Understanding amp biasing and why it matters
- Types of amp biasing: fixed bias versus cathode bias
- How to measure and adjust amp bias safely and effectively
- Tone and tube life: balancing hot and cold bias settings
- Enhance your guitar tone with MusicStreet gear
- What is amp biasing FAQ
Key Takeaways
| Point | Details |
|---|---|
| Biasing purpose | Biasing sets the idle current in power tubes to optimise tone, performance and longevity. |
| Bias types | There are fixed bias and cathode bias, with fixed bias using an adjustable negative grid voltage and cathode bias using a cathode resistor, delivering different tones and maintenance needs. |
| Overbiasing risk | Overbiasing can cause tubes to glow cherry red and be destroyed within hours. |
| Practical benefits | Understanding biasing helps optimise tone, extend tube life, prevent damage and support informed maintenance and gear upgrades. |
Understanding amp biasing and why it matters
Amp biasing determines how much idle current flows through your power tubes when you’re not playing. Think of it like setting the engine idle on a car. Too high and you waste fuel whilst risking damage; too low and the engine runs rough. In tube amplifiers, biasing sets the quiescent current relative to plate voltage, directly affecting your tone quality and how long your valves last.
When bias is correctly set, your amplifier operates in its sweet spot. The tubes produce balanced harmonics, respond dynamically to your playing, and deliver the rich, complex tones that make valve amps legendary. Incorrect biasing creates problems ranging from harsh, brittle tone to premature tube failure. Some amps run tubes so hot they glow cherry red, a clear sign of dangerous overbiasing that will destroy valves within hours.
The benefits of understanding bias extend beyond tone. You’ll recognise when tubes need replacing, communicate effectively with amp technicians, and make informed decisions about modifications. Proper biasing also relates to the science of tone that makes tube amplifiers uniquely responsive and musical.
Key reasons to understand amp biasing:
- Optimise your amplifier’s tonal characteristics for your playing style
- Extend tube life significantly through proper current settings
- Prevent costly damage from overbiased or underbiased operation
- Gain confidence in maintaining and troubleshooting your gear
- Make informed choices when purchasing or modifying amplifiers
“Proper bias adjustment is the single most important factor in tube amplifier maintenance. It directly affects both the sound you hear and the money you spend on replacement valves.”
Many guitarists never adjust bias because they fear the high voltages inside amplifiers or lack confidence in their technical abilities. Whilst caution is absolutely warranted, understanding the principles empowers you to work safely with qualified technicians or tackle adjustments yourself when appropriate.
Types of amp biasing: fixed bias versus cathode bias
Tube amplifiers use two primary biasing methods, each with distinct operational characteristics and tonal implications. Understanding these differences helps you know what to expect from various amp designs and what adjustments are possible.
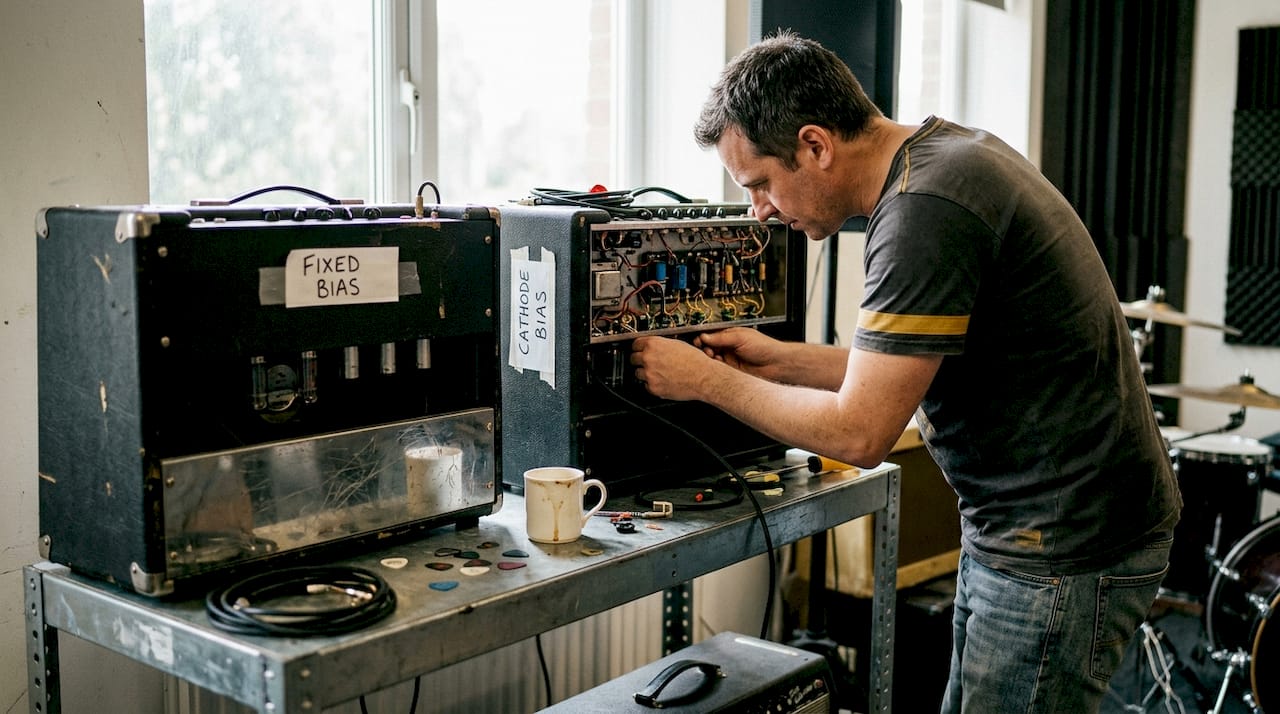
Fixed bias (also called grid bias) uses an adjustable negative voltage applied to the control grid of power tubes. This design appears in high-wattage amps like the Marshall JCM800, Fender Twin Reverb, and Mesa Boogie Dual Rectifier. Fixed bias circuits include a variable resistor (trim pot) that lets you adjust bias current precisely. This adjustability gives you control over tone and operating point, but requires periodic checking and adjustment, especially when installing new tubes.
Cathode bias (also called self-bias or automatic bias) uses a resistor in the cathode circuit to create bias voltage automatically. This simpler design regulates itself and appears in lower-wattage amplifiers like the Vox AC15, Fender Champ, and many boutique combos. The cathode resistor develops voltage as current flows through it, creating the necessary negative bias on the grid. This self-regulating characteristic means cathode-biased amps rarely need adjustment.
| Feature | Fixed bias | Cathode bias |
|---|---|---|
| Adjustment | Manual trim pot adjustment required | Self-regulating, no adjustment needed |
| Typical wattage | High-powered amps (50W+) | Low to medium power (5-30W) |
| Tone character | Punchy, tight, aggressive | Warm, compressed, forgiving |
| Efficiency | More efficient power conversion | Less efficient, generates more heat |
| Maintenance | Regular checking when tubes change | Minimal maintenance required |
| Tube matching | Requires matched pairs/quads | More tolerant of mismatched tubes |
The tonal differences stem from how each method handles tube characteristics. Fixed bias offers precise control and typically produces tighter bass response with more headroom before distortion. Cathode bias creates warmer tone with earlier compression and a more forgiving, musical breakup character.
Common fixed bias amplifiers:
- Marshall JCM800 and Plexi series
- Fender Twin Reverb and Bassman
- Mesa Boogie Dual and Triple Rectifier
- Orange Rockerverb series
Common cathode bias amplifiers:
- Vox AC15 and AC4
- Fender Champ and Princeton
- Matchless DC30 and Clubman
- Many boutique low-wattage designs
Some amplifiers use hybrid approaches or switchable biasing schemes. The Fender Deluxe Reverb, for instance, uses fixed bias but with relatively conservative settings that prioritise reliability. Understanding which type your amplifier uses helps you locate relevant information and set appropriate expectations for maintenance.
Pro tip: If you’re new to tube amps, cathode-biased designs offer a simpler ownership experience with less technical maintenance whilst still delivering authentic valve tone and feel.
You can explore various examples of guitar amps to see how different manufacturers implement these biasing approaches across their product ranges.
How to measure and adjust amp bias safely and effectively
Measuring and adjusting bias requires careful attention to safety procedures because tube amplifiers contain lethal voltages that remain present even after switching off. Never attempt bias adjustment unless you understand electrical safety or work with a qualified technician.
The standard approach uses the 70% plate dissipation rule, which balances tone quality against tube longevity. This calculation determines target idle current based on your power tubes’ maximum ratings. For example, a 6L6 tube rated at 30 watts maximum plate dissipation running at 450 volts plate voltage would target 70% of maximum: (30W × 0.70) ÷ 450V = 47mA per tube.
Bias adjustment steps for fixed bias amplifiers:
- Gather required tools: digital multimeter, insulated screwdriver, bias probe (optional), and tube data sheets
- Power down the amplifier completely and discharge filter capacitors safely
- Access the bias adjustment pot (usually on the rear panel or inside chassis)
- Install bias probe or prepare to measure voltage across cathode resistor
- Power up amplifier without input signal and allow 2-3 minutes warm-up
- Measure current draw using your chosen method
- Adjust bias pot slowly whilst monitoring readings
- Verify measurements stabilise at target current
- Replace chassis cover and verify amp functions normally
The cathode resistor method offers the safest measurement approach. Most fixed-bias amps include a small resistor (typically 1 ohm) in series with each power tube cathode. Measuring voltage across this resistor with your multimeter and applying Ohm’s law (current = voltage ÷ resistance) gives you the tube current without exposing yourself to high voltages.
| Measurement method | Safety level | Accuracy | Equipment needed | Difficulty |
|---|---|---|---|---|
| Cathode resistor | High | Excellent | Digital multimeter | Moderate |
| Bias probe | High | Excellent | Commercial bias probe | Easy |
| Plate voltage | Low | Good | High-voltage probe | Advanced |
| Cathode current | Medium | Excellent | Multimeter in series | Advanced |
Commercial bias probes simplify the process significantly. These devices insert between power tubes and sockets, providing safe measurement points without exposing you to high voltages. Popular models include the Eurotubes bias probe and TAD bias tool, which display current readings directly.
Pro tip: Always measure bias with the amplifier at operating temperature after a few minutes of warm-up, as tube characteristics change significantly between cold and hot states.
Critical safety considerations:
- Never touch internal components whilst the amplifier is powered
- Discharge filter capacitors before working inside the chassis
- Use only one hand when taking measurements to avoid current paths through your body
- Work on a non-conductive surface with adequate lighting
- Keep a qualified technician’s contact information readily available
Some amplifiers include built-in bias monitoring or adjustment systems. Modern designs from manufacturers like Mesa Boogie feature external bias test points and adjustment pots, making the process much safer. Always consult your amplifier’s service manual for specific procedures and specifications.
Maintaining proper bias also connects to your broader gear care routine. Quality guitar accessories support your amplifier’s performance and longevity alongside proper bias settings.
Tone and tube life: balancing hot and cold bias settings
Bias settings create a fundamental trade-off between tonal characteristics and tube longevity. Understanding this relationship helps you make informed choices about where to set your amplifier’s operating point.
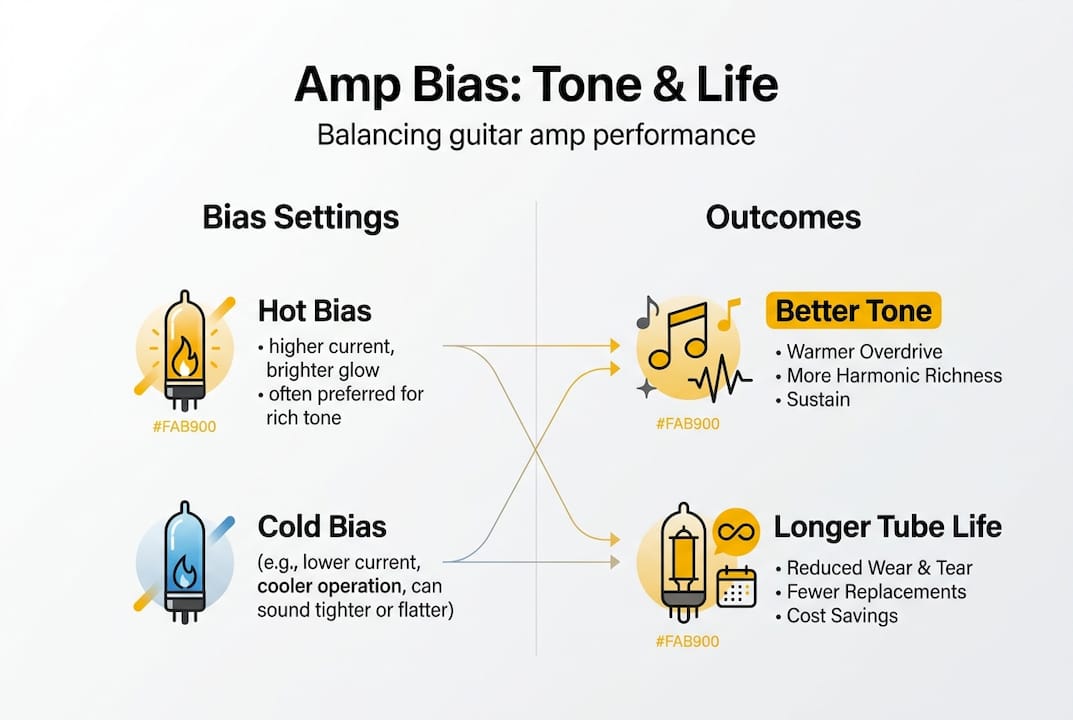
Hot bias (overbiasing) pushes tubes harder by increasing idle current above the standard 70% guideline. This approach produces warmer tone with earlier power tube saturation, more compression, and singing sustain. Blues and classic rock players often prefer slightly hot bias for its rich harmonic content and responsive feel. However, running tubes hot dramatically shortens their lifespan, potentially reducing a typical 2-3 year service life to just months.
Cold bias (underbiasing) reduces idle current below optimal levels, creating cleaner headroom and tighter bass response. This setting extends tube life significantly, sometimes doubling or tripling the service interval. The trade-off comes in tonal character. Cold-biased amplifiers can sound sterile or harsh, with reduced harmonic complexity and less dynamic response to playing nuances.
Tonal characteristics of bias settings:
- Hot bias: Warm, compressed, early breakup, rich harmonics, singing sustain
- Optimal bias: Balanced response, full frequency range, moderate tube life
- Cold bias: Clean, tight, extended headroom, crisp attack, longer tube life
The subjective nature of bias preference means no single setting suits everyone. Jazz guitarists seeking pristine cleans might prefer cooler bias, whilst hard rock players chasing saturated lead tones gravitate towards hotter settings. Your amplifier’s design also influences appropriate bias range. Class A cathode-biased amps naturally run hotter and more compressed than Class AB fixed-bias designs.
Safe bias operating ranges typically span 60-80% of maximum plate dissipation. Running below 60% risks crossover distortion and uneven tube wear. Exceeding 80% courts tube damage and potential transformer stress. Within this range, you can experiment to find your preferred balance between tone and longevity.
Special considerations affect certain amplifier types. Cathode-biased Class A designs like the Vox AC30 run tubes quite hot by nature, with plates often glowing dull orange during operation. This is normal for these circuits. Conversely, amplifiers operating on high mains voltage (above 240V) may need slightly cooler bias to compensate for increased plate voltage.
“Bias adjustment is ultimately about finding your personal sweet spot. Whilst technical guidelines provide starting points, your ears and playing style should guide final settings. Just remember that chasing tone at the expense of tube life becomes expensive quickly.”
Monitoring tube condition helps you understand how your bias settings affect longevity. Watch for these signs of tube wear:
- Reduced output volume or weak bass response
- Increased noise, hum, or crackling sounds
- Uneven glow between matched tube pairs
- Sudden changes in tone character or touch sensitivity
Balancing these factors requires honesty about your priorities and playing context. Professional musicians who depend on consistent tone might bias conservatively and budget for regular tube changes. Weekend players might run slightly hotter bias to maximise tonal satisfaction during limited playing time.
The relationship between bias and tone science extends throughout your signal chain, making amplifier maintenance part of your broader tonal strategy.
Enhance your guitar tone with MusicStreet gear
Understanding amp biasing opens doors to better tone and more reliable performance from your tube amplifier. Whether you’re ready to explore new amp options or need accessories to support proper maintenance, MusicStreet provides trusted gear and expertise for guitarists at every level.

Our carefully curated selection includes amplifiers across all biasing types and power levels, from cathode-biased boutique combos to high-powered fixed-bias heads. Each instrument receives professional setup and inspection before reaching you, ensuring optimal performance from day one. Beyond amplifiers, we stock essential maintenance tools and accessories that help you care for your gear properly.
Pro tip: Regular amplifier maintenance, including periodic bias checks and tube inspection, prevents costly repairs whilst keeping your tone consistent and inspiring.
Visit MusicStreet to explore our full range of guitar amplifiers, or review our guitar accessories guide for maintenance essentials. Our guitar amps guide provides detailed information about different amplifier types and their tonal characteristics. Whether you need advice on bias settings or help selecting your next amp, our team brings decades of combined experience to support your musical journey.
What is amp biasing FAQ
How often should I check amp bias?
Check bias whenever you install new power tubes, as different valves draw varying amounts of current even within matched sets. For established tube sets, inspect bias every 6-12 months or if you notice tonal changes. Amplifiers used professionally or at high volumes benefit from more frequent monitoring.
Can I bias my amp myself or should a tech do it?
This depends on your technical confidence and amplifier design. Simple cathode-biased amps rarely need adjustment. Fixed-bias amplifiers require working near lethal voltages, so consider professional service unless you have proper training and safety equipment. Many guitarists learn basic bias measurement whilst leaving adjustments to qualified technicians.
What are signs my tubes are biased wrong?
Watch for reduced output volume, weak or flabby bass response, excessive heat from power tubes, or plates glowing bright orange or red. Harsh, brittle tone suggests cold bias, whilst premature tube failure or transformer buzzing indicates hot bias. Uneven glow between matched tubes also signals bias problems.
Does amp biasing apply to solid-state amps?
No, solid-state amplifiers use transistors rather than valves and don’t require bias adjustment in the same way. Some high-end solid-state designs include bias circuits for their output stages, but these are factory-set and rarely need user adjustment. Biasing is specifically a tube amplifier consideration.
What tools do I need for biasing?
Essential tools include a quality digital multimeter, insulated screwdriver, tube specification sheets, and ideally a commercial bias probe for safety. You’ll also need your amplifier’s service manual for specific bias adjustment procedures and target values. Never attempt bias work without proper tools and safety knowledge.
Why do some amps sound better than others?
Beyond biasing, factors like circuit design, component quality, and transformer specifications contribute significantly to amplifier tone. Understanding why tube amps sound better helps you appreciate how biasing fits into the larger picture of valve amplifier performance and character.







Share:
Guitar effects pedals list: choose the best for your tone
What is a tube amplifier: a guide for musicians