


Lower your string action by measuring current heights, checking neck relief, then lowering the saddle or bridge saddles a little at a time. Never use the truss rod to lower nut action: it only changes relief. If the job needs nut filing, fret levelling or a large truss rod move, a professional setup is the safer route.
Table of Contents
- How to measure string action correctly
- Check the neck and truss rod before touching the saddle
- Lowering action on acoustic and classical guitars
- Lowering action on electric guitars
- When the nut, not the saddle, is the problem
- Testing for buzz and finding your sweet spot
- String gauge impact on action height and playability
- Humidity and temperature effects on string action and neck behaviour
- Fret wear and when to consider a fret dress
- Risks of lowering action and how to avoid damage
- Comparing action settings across playing styles
- Balancing playability with tone: when DIY is enough
- How we can help with your next setup
- FAQ
- Sources
How to measure string action correctly
Measure the gap between the bottom of the string and the top of the fret at the 12th fret on acoustic and classical guitars, or the 12th or 17th fret on electric guitars depending on where you want to check. Record both the low E and high E heights separately, since they’re rarely the same.
You’ll need a steel ruler marked in millimetres, feeler gauges or a dedicated string action gauge. Typical reference heights for acoustic guitars sit around 2.0 to 2.4 millimetres at the 12th fret, and a change as small as 0.25 millimetres can noticeably alter how a guitar feels to play. Electric guitars usually play comfortably lower, often closer to 1.5 millimetres, but this varies by bridge design and personal preference.
- Measure at the correct fret for your guitar type and note both E strings separately.
- Retune to pitch after every adjustment before remeasuring, since tension affects the reading.
- Treat 0.25 millimetre changes as meaningful, not negligible.
Check the neck and truss rod before touching the saddle
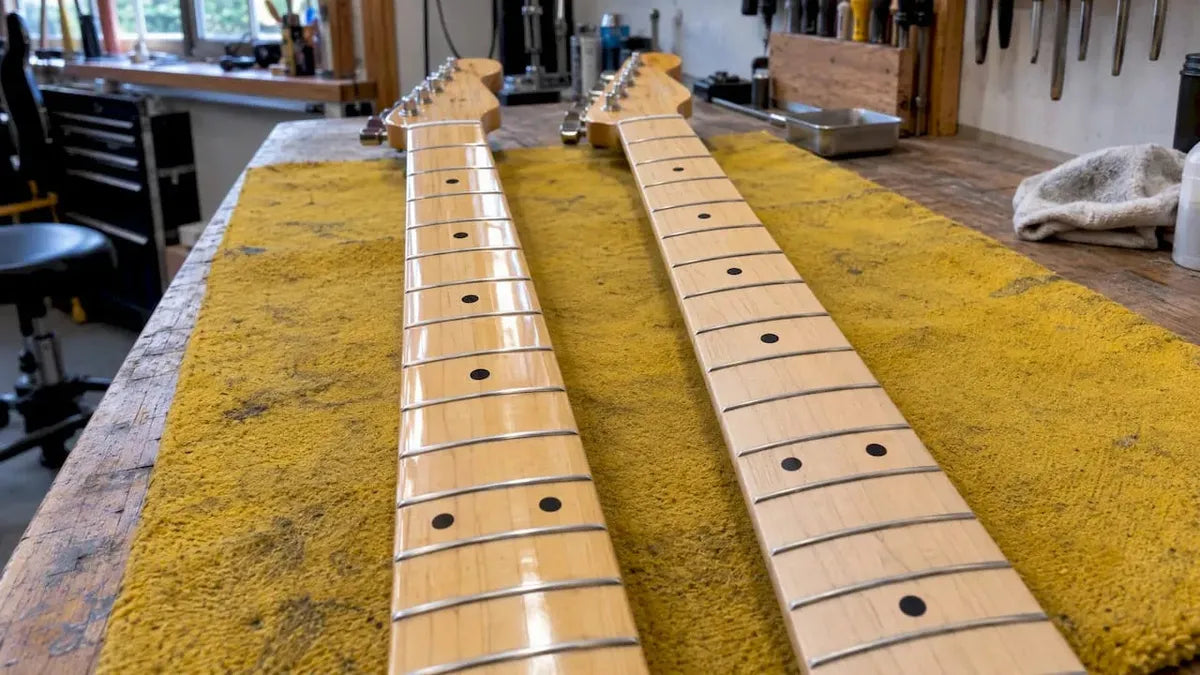
Neck relief is the slight forward bow in the neck that keeps strings from buzzing against the frets as they vibrate. Too much relief raises perceived action in the middle of the neck, while too little can cause buzzing even with a high saddle. To check it simply, hold down the string at the first fret and at the fret where the neck joins the body, then look at the small gap above the 7th or 8th fret.
- Fret the string at both ends as described and judge whether there’s a visible gap, a slight card’s-width is normal.
- If adjustment is needed, turn the truss rod nut clockwise to tighten the rod and reduce forward relief, or counter-clockwise to loosen it and allow more relief, confirming direction against your guitar’s own manual.
- Make quarter-turn adjustments at most, then retune and recheck before turning further.
Loosen the strings somewhat before making a larger truss rod move, and never force the rod if it resists.
Pro Tip: Dual-action truss rods can push the neck in either direction, which means some corrections possible on a dual rod simply aren’t available on a single-action rod, so it pays to know which type you have before planning anything.
Lowering action on acoustic and classical guitars
On acoustic and classical guitars, the saddle sits in a slot in the bridge and can usually be lifted out once string tension is released. Loosen the strings enough to remove the saddle freely, and lay a strip of masking tape across the bridge to protect the wood from stray sanding marks.
- Mark a pencil line on the saddle showing how much to remove, then sand the underside evenly on a flat surface using mid-grit paper such as P120.
- Refit the saddle, restring, retune, then remeasure at the 12th fret before deciding whether to take off more.
- Expect to remove roughly 2 millimetres from the saddle to lower the string height by 1 millimetre at the midpoint, a rough guide rather than a fixed ratio.
If the saddle is already close to its minimum height, a shim under it can raise action again, but there’s no equivalent fix for over-sanding since you can remove material but never put it back.
Pro Tip: Sand in short, even strokes and check your progress every few passes rather than guessing at the final depth in one go.
Lowering action on electric guitars
Electric bridges vary widely, so identify yours first, a Tune-o-matic, hardtail or tremolo system each uses different saddle hardware and tools, typically a small Allen key or Philips screwdriver. Each saddle height screw usually sits at either end of its saddle and adjusts independently.
- Turn each saddle height screw a small amount, then retune and remeasure before adjusting further.
- Check intonation after any meaningful saddle move, since changing height can shift the saddle’s effective string length slightly.
- On tremolo-equipped guitars, make sure spring tension in the back cavity is stable before adjusting saddles, since the whole bridge can shift and throw off your measurements.
Work string by string rather than moving all six at once, since uneven bass and treble heights are one of the most common beginner mistakes.
When the nut, not the saddle, is the problem
If open strings or notes at the first two frets feel unusually stiff or choke out, the nut slots are likely too high rather than the saddle or neck relief being at fault. This shows up as a guitar that plays fine higher up the neck but fights you near the headstock.
- A lighter string gauge can ease the feel temporarily without altering the nut itself.
- A small shim under the saddle raises overall height and can mask a nut that’s slightly low, though it won’t fix one that’s too high.
- Permanent nut work, filing slots or fitting a new nut, is precise work best left to a professional, and if you do attempt it, remove material conservatively and test after every pass.
Testing for buzz and finding your sweet spot
Test the guitar both unplugged and, for electrics, amplified, since buzz that’s audible acoustically often disappears once you’re playing through an amp. Play with your normal dynamics, including harder rest strokes, since buzz that only appears when you dig in hard may not be worth chasing.
- Run a straightedge across several frets; if it rocks on three or more, a fret may be unseated and needs attention rather than a further saddle drop.
- Check whether buzz appears only on specific frets or strings, which usually points to an uneven fret rather than overall action.
- If buzz persists evenly across the neck after relief and saddle checks, the action is probably too low for that particular setup.
A completely buzz-free setup is rarely realistic, and technicians often prioritise comfort and playability over chasing the last trace of it, since a small amount is frequently masked once amplified.
String gauge impact on action height and playability
String gauge and action are closely linked, and changing one without considering the other often undoes your work. Heavier strings vibrate with a wider arc, so a guitar set up for a light 9-42 set can start to buzz if you move to a heavier 11-50 set at the same saddle height. They also pull harder on the neck, which can increase relief slightly and raise the action you feel at the middle frets.
Lighter strings are easier to press down and bend, which is why many beginners find them easier to work with while a setup settles in. They also tend to feel looser and can buzz more easily if the action is already on the low side, since there’s less string mass resisting the fret.
Changing gauge is one of the few adjustments that affects the whole guitar at once, neck relief, saddle height and nut feel all shift slightly. If you change string gauge, treat it as a reason to remeasure action and recheck relief rather than assuming your previous setup still applies. A balanced set such as 10-48 gauge is a common middle ground for players who want comfortable bending without the looseness of extra-light sets.

Matching gauge to playing style matters too. Heavier gauges suit players who favour a fuller tone and don’t mind firmer resistance under the fingers, while lighter gauges suit faster playing and bigger bends. Neither is objectively correct, but switching between them without adjusting the guitar is the fastest way to end up with buzz or stiffness you didn’t expect.
Humidity and temperature effects on string action and neck behaviour
Wood moves with its environment, and a guitar’s neck is no exception. In damp conditions, wood can absorb moisture and swell slightly, which often increases neck relief and raises the action you feel. In dry conditions, particularly during winter when heating is running, wood can lose moisture and shrink, which tends to flatten relief and can bring the action down low enough to cause buzzing or even fret sprout, where fret ends protrude slightly past the edge of the fingerboard.
This is why a guitar that played perfectly in summer can develop buzz in winter, or feel stiffer in summer than it did a few months earlier, without anyone touching the truss rod or saddle. It’s a seasonal shift in the wood itself rather than a fault with your setup.
Keeping a guitar in a stable environment, away from direct heat sources, radiators or damp outside walls, reduces how often you need to readjust. A guitar case or gig bag offers some buffering against rapid changes when travelling between environments, and a basic room humidifier or dehumidifier can help in rooms with extreme swings.
If you notice action creeping up or down with the seasons, check relief before assuming the saddle needs work. A truss rod tweak to correct seasonal relief changes is often all that’s needed, and it’s worth rechecking action at the start of each season rather than waiting for buzz or stiffness to become obvious.
Fret wear and when to consider a fret dress
Frets wear unevenly over years of play, developing small grooves under the strings you use most, typically around the first five frets where open chords and lower positions see the most contact. As grooves deepen, the string sits lower at that specific point than the surrounding frets, which can cause buzzing even when overall action and relief are correctly set.
This is different from a general action problem because it’s localised. If buzz only appears on certain frets, or if notes fretted near a worn area sound dull or choke out, fret wear rather than saddle height is the likely cause. Running a straightedge across several frets and feeling for a gap or rock at the worn point will usually confirm it.
Light wear is often harmless and doesn’t affect playability enough to need attention. More significant grooving, where you can feel or see a dip under the string, usually means the frets need levelling and recrowning, a precise process that reshapes all the frets to a consistent height. In more severe cases, particularly on older or heavily played instruments, full fret replacement may be the only lasting fix.
Attempting to compensate for worn frets by raising the saddle or adding relief only masks the problem elsewhere on the neck and usually makes the action worse where it’s already comfortable. A fret dress is specialist work that affects every fret’s height relative to the others, so it’s one of the clearest cases where a professional setup is the right call rather than a DIY adjustment.
Risks of lowering action and how to avoid damage
Lowering action carries a few real risks, but nearly all of them come down to moving too fast or skipping the retune-and-recheck cycle. Sanding too much off a saddle is the most common irreversible mistake, since material removed can’t be replaced, only compensated for with a shim that changes how the saddle contacts the bridge.
Forcing a truss rod that resists turning can damage the rod or crack the neck, which is why quarter-turns and gentle pressure matter more than speed. If a truss rod feels stuck or won’t move smoothly, stop and treat that as a sign to seek professional help rather than applying more force.
Working on bridge saddles without loosening strings enough, or without supporting a tremolo system’s spring tension, can let the bridge shift unexpectedly and scratch the body or damage the hardware. Always loosen strings fully before removing a saddle, and take note of how a tremolo bridge sits before you start, so you can tell if something has moved.
The safest practice across every adjustment in this guide is the same: change one thing, retune, remeasure, then decide on the next step. Small increments mean any mistake is small too, and nothing here is harder to recover from than a saddle sanded too far or a truss rod turned too forcefully.
Comparing action settings across playing styles
There’s no single correct action height, because what works depends heavily on what and how you play. Players favouring fingerstyle or classical repertoire often prefer slightly higher action, since it gives notes room to ring without buzzing when plucked with more force, and classical guitarists in particular tend to run saddle heights toward the upper end of typical ranges to suit nylon strings and freer right-hand technique.
Rock and blues players who bend strings frequently usually prefer lower action on electrics, since high action makes bends harder to control and can throw intonation off mid-bend. Fast lead playing and tapping styles benefit from the lowest comfortable action, often right at the edge of audible buzz when unplugged, since that buzz frequently disappears once amplified.
Rhythm-focused acoustic players, particularly those using a pick and strumming hard, often need action closer to factory reference heights or slightly above, since lower settings increase the risk of buzz when strings are driven harder. Slide guitar is the clear outlier: it needs noticeably higher action than almost any other style, since the slide needs clearance above the frets to avoid rattling against them.
None of these are fixed rules, and the right setting ultimately comes from testing against your own playing dynamics rather than copying a number from someone else’s guitar.
Balancing playability with tone: when DIY is enough
Technicians often accept a touch of buzz in exchange for action that’s genuinely comfortable to play, since comfort tends to mean more practice and faster progress. DIY adjustments to saddle height, relief and string gauge cover most of what players need. Once frets, the nut or large truss rod moves are involved, a shop setup is usually quicker and safer, and our in-store inspection is a sensible next step when you’re unsure.
— Music
How we can help with your next setup
Once you’ve worked through measuring, relief and small saddle adjustments, the next sensible step depends on what you’ve found. If everything checks out and you just need fresh strings or a steady hand to fit them, we carry the Stringjoy Balanced Light Guitar Strings 10-48 alongside the D’ADDARIO Tour-Grade String Change Kit and a Fender String Winder to make the job quick and tidy at home.

If your check turned up fret wear, a nut that needs filing, or a truss rod that won’t move cleanly, that’s exactly the point where our guitar setups, servicing and repairs take over, backed by professional inspection and insurance-supported warranty cover. We also run an in-store restring service if you’d rather leave the whole job to us. Book a setup or order your tools online and get back to playing sooner.
FAQ
How do you lower string action without causing fret buzz?
Lower the saddle or bridge saddles in small steps, retuning and remeasuring after each change, and check neck relief first since too little relief causes buzz on its own. If buzz appears only on certain frets after lowering, fret height issues rather than the saddle are the likely cause.
How do you lower your guitar strings step by step?
Measure your current action at the 12th fret, check and correct neck relief if needed, then lower the saddle on acoustic and classical guitars or the individual bridge saddles on electrics in small increments. Retune and remeasure after every adjustment before deciding whether to go further.
Can you lower the action on an acoustic guitar yourself?
Yes, acoustic action is lowered by removing the saddle and sanding its underside gradually on a flat surface, refitting and remeasuring between passes. As a planning guide, removing around 2 millimetres from the saddle lowers string height by roughly 1 millimetre at the string’s midpoint, though this varies by instrument.
Which way do you turn the truss rod to lower action?
Turning the truss rod nut clockwise tightens the rod and reduces forward relief, which can lower perceived action in the middle of the neck, while counter-clockwise allows more relief. Always confirm the correct direction against your guitar’s own manual before adjusting, since this doesn’t affect nut height.
When should I book a professional setup instead of adjusting action myself?
A professional setup is the better choice when fret wear, an unseated fret, or a nut that needs filing is involved, since these require precision tools and experience to get right.
Sources
- Truss rod explained: features, types and tips
- Can I have my action as low as possible without buzzing?
- Classical guitar action explained
- How to lower the action on acoustic guitar explained easy






Share:
Open Tuning: One Finger Chords, Safe Retuning, and When to Book a Pro