

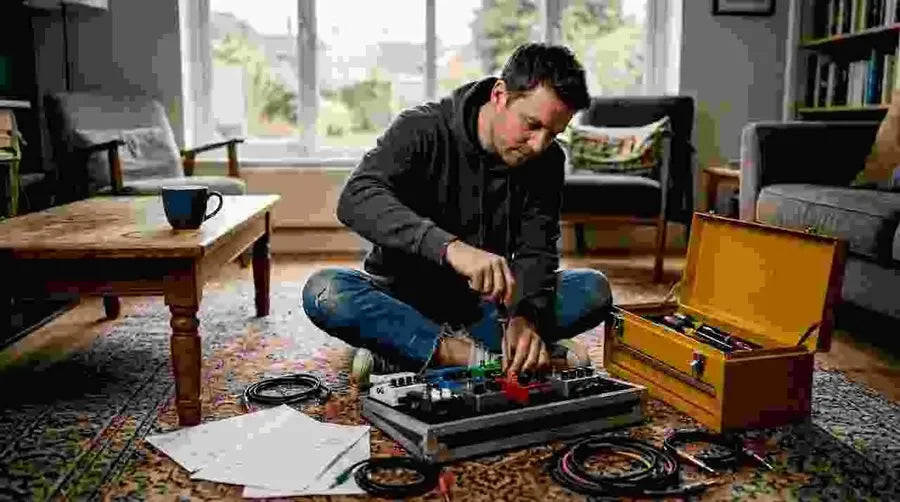
- A well-organized pedalboard enhances sound quality, reliability, and creative focus during performances. Proper setup, including selecting compatible gear and optimal signal chain order, prevents noise and signal issues. Regular maintenance and thoughtful cable management ensure consistent, professional results.
There is nothing more frustrating than stomping on your favourite pedal mid-song and hearing a wall of noise, a signal dropout, or a tone so muddy it sounds like the guitar is underwater. Poor pedalboard setup is one of the most common reasons guitarists struggle to translate their vision into actual sound. Whether you are playing your first open mic or preparing for a headline slot, a well-organised board gives you clarity, consistency, and the creative freedom to focus on playing rather than troubleshooting. This guide walks you through every step, from gathering the right tools to testing your final setup.
Table of Contents
- Gather your essentials: what you need for a pedalboard setup
- Choose your pedals: selecting the right effects for your board
- Mapping the signal chain: order matters for sound
- Assembly and troubleshooting: step-by-step guide to setup
- Testing and maintenance: getting consistent results
- Why a well-organised pedalboard is more than just gear
- Enhance your sound with premium gear from MusicStreet
- Frequently asked questions
Key Takeaways
| Point | Details |
|---|---|
| Essentials checklist | Gathering quality accessories and a dedicated pedalboard is crucial for setup success. |
| Pedal selection | Choose pedals based on style, tone goals, and genre to create your ideal board. |
| Signal chain order | Arranging pedals in the right sequence maximises clarity and expressive sound. |
| Assembly methods | Careful cable management and power setup prevent common issues and noise. |
| Routine maintenance | Regular testing and upkeep keeps your pedalboard reliable for every performance. |
Gather your essentials: what you need for a pedalboard setup
With the importance of setup established, let us look at the tools and accessories you will need before a single pedal hits the board.
Getting this stage right saves enormous time later. Many guitarists rush straight to pedal placement without considering whether their cables are compatible or their power supply can handle the current draw. The accessory essentials you choose at this stage directly affect the reliability of everything that follows, because cables, power supply, and pedalboard platform are all crucial for a dependable setup.
Here is a breakdown of everything you need:
| Item | Purpose | Recommended type |
|---|---|---|
| Pedalboard platform | Houses and organises your pedals | Aluminium rail or hard case |
| Effects pedals | Shape your tone | See section below |
| Patch cables | Connect pedals in the chain | Solderless or low-profile angled |
| Power supply | Powers all pedals | Isolated multi-output unit |
| Velcro or fixings | Secure pedals to the board | Heavy-duty industrial Velcro |
| Instrument cable | Guitar to board, board to amp | Shielded, low-capacitance |
| Gaffer tape / ties | Cable management | Reusable Velcro ties |
Beyond the items in the table, consider picking up a few extra patch cables and a spare instrument lead. You will thank yourself when one fails five minutes before a soundcheck.
Key essentials at a glance:
- A sturdy pedalboard with enough surface area for your current pedals plus two or three extras
- A power supply with isolated outputs (more on this in the assembly section)
- Short, right-angled patch cables to keep your board tidy and reduce interference
- Industrial-strength Velcro, applied to both the pedal base and the board
- A reliable tuner pedal, because your tuner is mission-critical at every gig
Exploring the best guitar accessories 2025 list is a great way to identify which brands consistently deliver quality at each price point.
Pro Tip: Use colour-coded patch cables to instantly identify each section of your signal chain. Red for gain pedals, blue for modulation, and green for time-based effects, for example. This makes troubleshooting under stage lighting far less stressful.
Choose your pedals: selecting the right effects for your board
Once you have your accessories ready, it is time to select the pedals most suited to your sound.
Choosing pedals is deeply personal, but there is a logical framework that prevents you from buying duplicates or missing entire sonic categories. Pedal selection depends on desired tone and genre, which means a blues player and a metal guitarist will build very different boards even at the beginner stage.
The table below compares the most common pedal types and their practical applications:
| Pedal type | Primary function | Best suited for |
|---|---|---|
| Tuner | Silent tuning, signal muting | Every genre, every level |
| Overdrive | Adds warmth and mild grit | Blues, rock, country |
| Distortion | Heavy clipping and sustain | Rock, metal, punk |
| Compressor | Levels dynamics, adds sustain | Country, funk, clean tones |
| Modulation (chorus, flanger, phaser) | Adds movement and texture | Pop, shoegaze, classic rock |
| Delay | Repeating echo effect | Rock, ambient, country |
| Reverb | Adds space and depth | Every genre |
Understanding the distinction between overdrive and distortion alone can save you from buying the wrong pedal. Overdrive gently pushes your amp into its natural saturation range. Distortion clips the signal more aggressively, creating that heavier, compressed sound associated with metal and hard rock. You can read more about this in the effect chain guide and get a broader sense of how each effect type interacts within a chain.
Pedal selection checklist:
- Does this pedal serve a gap in my current sound?
- Is it compatible with my existing power supply (voltage and current draw)?
- Does it have true bypass or buffered bypass? Both have advantages depending on chain length.
- Have I tried it through my actual amp, not just headphones at the shop?
The pedalboard basics article is particularly useful for beginners trying to understand how many pedals are genuinely practical at the start, and the examples of guitar pedals guide shows how real-world players have configured their boards across different genres.
Pro Tip: Start with five pedals maximum: a tuner, an overdrive, a compressor, a delay, and a reverb. That core covers most musical situations. Add distortion, modulation, and specialist effects only once you know precisely what sound you are chasing.
Mapping the signal chain: order matters for sound
With pedals chosen, finding the optimal order is the next step for clarity and expression.
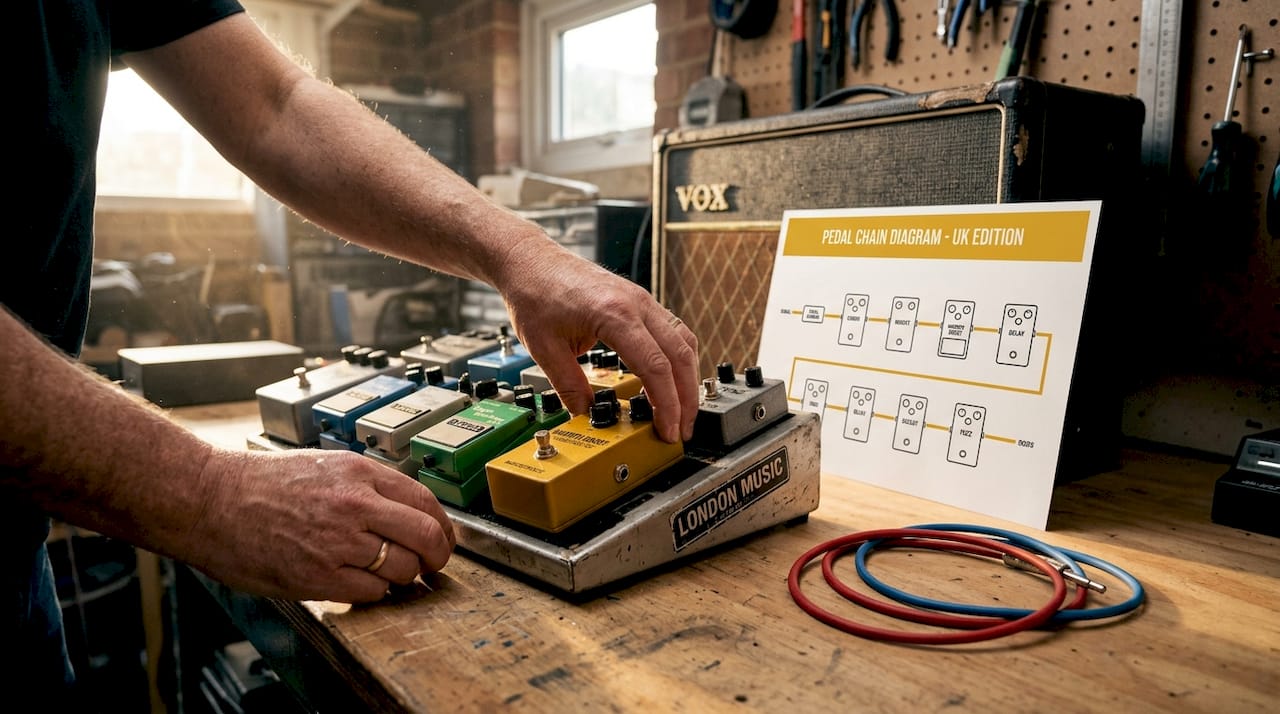
Most guitarists are surprised to discover that rearranging the same four pedals can produce drastically different results. A distortion pedal placed after a delay will distort the delay repeats, creating a dense, saturated wash. Placed before the delay, the repeats stay clean and defined. These are not subtle differences. Proper effects chain setup optimises tone and clarity, and even experienced players benefit from revisiting their signal order periodically.
The standard recommended order is:
- Tuner — always first, so it receives the cleanest possible signal
- Compressor — tightens your dynamics before any gain is added
- Overdrive or distortion — shapes your core gain tone
- Wah or filter pedals — after gain pedals for a more vocal, expressive sweep
- Modulation pedals (chorus, flanger, phaser) — add movement to the shaped tone
- Delay — sits late in the chain so repeats sound natural and clear
- Reverb — last in the chain, creates the ambient “room” around everything else
“The signal chain is the skeleton of your tone. Every decision you make about pedal order either supports or undermines the music you are trying to create.” This principle is why many seasoned players spend as much time on chain order as they do on pedal selection itself.
That said, rules exist to be broken deliberately. Many shoegaze and ambient players put reverb before distortion for a washed-out, blurred effect. Some country guitarists place a compressor after their overdrive for a different kind of sustain. The key word is deliberately. Once you understand the standard order, you can make intentional decisions that serve your style. The guitar pedal tips article covers several creative chain configurations that experienced players use to push beyond convention.
The effects chain best practices guide goes deeper into the logic behind each placement decision, which is well worth reading once your board is up and running.
Assembly and troubleshooting: step-by-step guide to setup
Now you know your signal chain, let us assemble your pedalboard and address common pitfalls.
Physical assembly is where many setups go wrong, not through lack of knowledge, but through rushing. Taking an extra twenty minutes at this stage prevents hours of frustrating troubleshooting later. Careful cable management and a solid power supply are the two factors most responsible for noise and unexpected failures during live performance.
Step-by-step assembly:
- Lay out your pedals unattached first. Place them on the board in signal order and check that your patch cables reach comfortably without strain.
- Attach Velcro to each pedal. Clean the pedal base with isopropyl alcohol first to ensure the adhesive bonds properly. Press firmly and leave for a few minutes before attaching to the board.
- Press pedals onto the board in order. Work from the input (first pedal) to the output (last pedal) so your cable routing makes logical sense.
- Connect patch cables between pedals. Use right-angled plugs where possible to keep everything flat and reduce the risk of accidental disconnection.
- Connect the power supply. Use individual outputs for each pedal rather than daisy chaining, particularly with digital pedals that are sensitive to power-sharing noise.
- Route cables neatly under the board or along the rails. Use Velcro ties or gaffer tape to fix cables so they cannot be snagged during performance.
- Connect your instrument cable from guitar to tuner input and a second cable from the last pedal to your amp.
The pedalboard assembly basics article offers additional guidance on board sizing, cable routing, and choosing the right platform for different gigging scenarios. For a broader toolkit, the essential guitar tools guide lists the maintenance items every gigging player should carry.
Common troubleshooting issues and fixes:
- No signal: Check each patch cable by swapping one at a time. A single faulty cable kills the entire chain.
- Loud hum or buzz: Usually a power supply issue. Switch to isolated outputs or check for a ground loop between pedals.
- Intermittent dropout: Wiggle cables at each connection point to find the loose plug, then replace or re-solder.
- Weak or thin tone: A pedal may be set to true bypass but has a faulty buffer. Try removing pedals one at a time to identify the culprit.
Pro Tip: Label both ends of every cable with a small piece of gaffer tape and a marker. Keep two spare patch cables and one spare instrument lead in your gigbag at all times. Cables fail at the worst possible moments.
Testing and maintenance: getting consistent results
With your board assembled, regular testing and maintenance will keep your tone sharp and reliable.
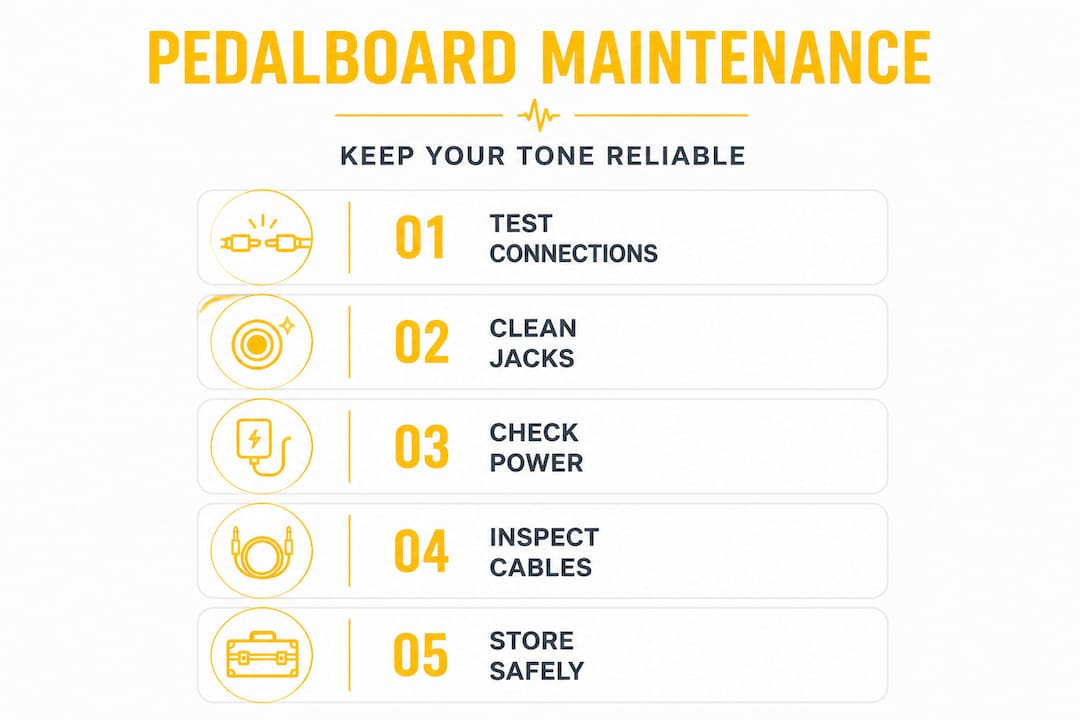
Assembly is not a one-time job. Connectors oxidise, Velcro loses grip, and cables develop internal breaks over time. Routine maintenance reduces pedal failures and is the single most underrated habit among gigging guitarists. Professionals treat their board like a piece of live sound equipment because that is exactly what it is.
Testing and maintenance checklist:
- Plug in and test every pedal individually before every rehearsal or gig
- Check that all Velcro patches are firmly holding each pedal, particularly after transport
- Inspect each patch cable for signs of wear at the plug ends, which is where breaks most commonly occur
- Clean jack sockets with contact cleaner spray every one to two months
- Wipe pedal enclosures with a dry cloth to prevent dust building up around footswitches
- Test your power supply voltage output periodically with a multimeter if you own one
The pedalboard maintenance essentials article provides a deeper look at the specific products and techniques used by touring musicians to keep boards running flawlessly through extended runs of shows.
Pro Tip: Keep a small can of contact cleaner in your gigbag alongside a flat-head screwdriver. Scratchy or intermittent pots and jacks almost always respond immediately to a quick spray. It costs very little and solves problems that would otherwise require a full pedal service.
Why a well-organised pedalboard is more than just gear
Most guides stop at the practical steps, and there is a useful reason to go further.
Here is something we genuinely believe after working with hundreds of guitarists: the physical state of your pedalboard reflects your creative state when you play. A tangled, uncertain board creates micro-hesitations. You are not quite sure which pedal does what, or whether that hum will appear again tonight. Those doubts bleed into your playing in ways that are hard to quantify but very easy to hear.
When your board is organised, labelled, and tested, something shifts. You stop thinking about gear and start thinking about music. The chain becomes invisible, which is precisely what it should be. Many guitarists spend years chasing new pedals for inspiration, when what they actually need is to understand and trust the pedals they already own.
There is also a flexibility argument here that is often overlooked. A well-documented, modular setup means you can swap one pedal in or out for a specific gig without rebuilding everything from scratch. You know exactly which cable goes where, which power output is free, and how the chain will behave with the new addition. That is a genuine creative advantage.
The pedalboard setup philosophy behind a tidy board is not about aesthetics. It is about removing the obstacles between you and the music. Invest the time once, and every session and every performance becomes more fluid as a result.
Enhance your sound with premium gear from MusicStreet
Building a reliable pedalboard starts with having access to quality gear that you can trust, whether you are setting up your first board or upgrading an existing rig.

At MusicStreet, we stock everything from top-quality effects pedals and accessories to premium electric and acoustic guitars, all backed by expert advice and real post-sale support. Our team in Huntingdon, Cambridgeshire understands exactly what gigging and recording guitarists need, and our online store makes it straightforward to find the right gear at competitive prices. Whether you are shopping for a new guitar, a reliable power supply, or the best cables for your chain, visit our premium guitar shop and explore a carefully curated selection with free UK delivery available on qualifying orders.
Frequently asked questions
What is the best order for guitar pedals?
A typical sequence places tuner first, then gain pedals, followed by modulation, delay, and reverb. This order preserves clarity and impact, as outlined in the effects chain guide.
How can I avoid noise in my pedalboard?
Use high-quality cables, organise your power supply with isolated outputs, and check for loose connections regularly. As noted in the guide to guitar accessories, cable management and power supply quality are the primary causes of hum and signal loss.
Do I need a dedicated power supply for my pedalboard?
Yes. A dedicated, isolated power supply prevents interference between pedals and delivers stable, consistent power, particularly important for digital effects which are sensitive to shared power sources.
How often should I maintain my pedalboard?
Test and clean your pedalboard before every gig, and carry out a full check monthly for home setups. Routine maintenance significantly reduces the risk of failures at critical moments.
Recommended
- Essential Effects Pedals for Function Bands: Upgrade Sound – MusicStreet
- The Ultimate Guide to Guitar Pedals & Effects Chain – MusicStreet
- The Basics of Pedalboards and How to Build Your Own System - MusicStreet
- 7 Essential Tips for Using Electric Guitar Pedals Effectively – MusicStreet
- Mastering the music collaboration process for seamless production – Audome

Share:
Your essential guitar maintenance checklist for peak performance
Best Ibanez Guitars for Metal in 2026 — MusicStreet's Definitive Guide