

Table of Contents
- What You'll Need Before You Start
- How to Inspect a Used Acoustic Guitar: The Three Main Checks
- How to Check Guitar Neck Relief
- Acoustic Guitar Action Height Guide
- Common Acoustic Guitar Repairs to Watch For
- How to Inspect a Used Acoustic Guitar Without Strings
- Frequently Asked Questions
Last Updated: September 12, 2026
What You'll Need Before You Start
A used acoustic guitar is a second-hand instrument whose true condition is revealed through systematic physical inspection, not through how it looks in photographs. Learning how to inspect a used acoustic guitar properly takes about twenty minutes and a handful of cheap tools, and it is the difference between a bargain and a money pit.
Gather these before you travel to view anything:
- A steel ruler or action gauge
- A capo
- A small torch
- A set of feeler gauges, or a spare low E string
- A clean cloth
At MusicStreet, our workshop sees instruments every week that looked fine online and arrived with problems a five-minute check would have caught. The checklist below is a sequence our own technicians work through.
How to Inspect a Used Acoustic Guitar: The Three Main Checks
Experienced buyers prioritise structural integrity over cosmetic condition. Scratches and faded lacquer affect appearance; bridge stability, fret wear, and neck geometry affect whether the instrument is playable at all. According to discussions on the Acoustic Guitar Forum, bridge stability, neck relief, and seam separation are the three indicators that matter most for long-term playability.
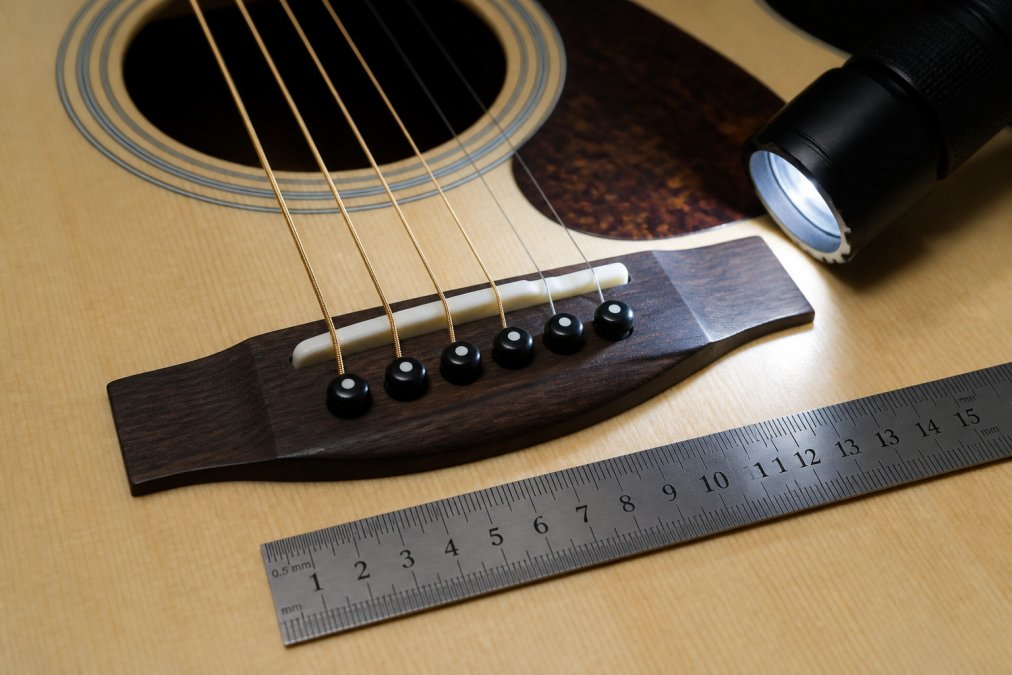
Close-up of a person's hands holding a used acoustic guitar, examining the bridge and saddle area with a small torch and ruler on a wooden workbench under warm workshop lighting
Here is how the three checks break down.
Check |
What to Look For |
Warning Sign |
Likely Impact |
|---|---|---|---|
Bridge |
Lifting, glue gaps, tilted saddle |
Feeler gauge slides under bridge edge |
Costly re-glue or bridge replacement |
Frets |
Flat spots, grooves, sharp ends |
Deep divots under wound strings |
Refret needed, playability suffers |
Neck |
Straightness, relief, twist |
Visible bow or hump at the body joint |
Setup cannot fix it; reset required |
The Bridge: Your First Stop
The bridge is where string tension meets wood, so it fails first. Run a feeler gauge or a thin piece of paper under the rear edge of the bridge. If it slides in easily, the bridge is lifting and will need re-gluing.
Check the saddle too. A saddle that leans forward towards the soundhole suggests the bridge has rotated under tension. That is a structural repair, not a setup adjustment.
Frets and Fretboard Wear
Fret wear tells you how hard the guitar has been played. Look along the fretboard from the headstock at a low angle under good light. Deep grooves under the wound strings on the first five frets mean a partial refret is coming.
Press each string down at the third fret and check the gap over the first fret. If the string touches the fret, the nut is cut too low. Sharp fret ends, common on older instruments that have dried out, point to humidity damage.
The Neck: Straightness and Relief
Sight down the neck from the headstock with the guitar held at eye level against a plain background. The fretboard should have a slight, even forward curve. A visible hump where the neck meets the body is the worst outcome, because no truss rod adjustment can correct it.
Twists are harder to spot. Rest the guitar on a flat surface and check that both edges of the fretboard sit at the same height along the neck.
How to Check Guitar Neck Relief
Guitar neck relief is the small forward curve built into the neck to give strings room to vibrate. Checking it takes two minutes and tells you whether the truss rod has room to move.
Capo the first fret, then hold the low E string down at the fourteenth fret. Look at the gap between the string and the seventh fret. A typical target is roughly the thickness of a business card, though personal preference varies.
If the string sits flat against the fret, the neck is back-bowed and needs relief added. If the gap is wide enough to fit a coin, the neck is over-bowed. Most guitars correct this with a truss rod turn, but only if the rod still has travel. Ask the seller whether the truss rod has ever been adjusted, and if possible, test that it turns.
Acoustic Guitar Action Height Guide
Action height is the distance between the strings and the frets, measured at the twelfth fret. It is the number that decides how hard the guitar is to play, and it is the first thing a proper setup addresses.
Measure from the top of the twelfth fret to the bottom of the low E string. Most players find a comfortable range between roughly 2.0mm and 2.5mm on the bass side, with the treble strings sitting a little lower (acousticguitarforum.com). Bluegrass players often prefer it higher; electric players moving across usually want it lower.
Common Acoustic Guitar Repairs to Watch For
Knowing which repairs are cosmetic and which are structural saves you from overpaying. A scratch on the lower bout costs nothing to live with; a loose brace inside the soundbox can buzz, dampen tone, and worsen over time.
Work through this list at every viewing:
- Belly bulge behind the bridge, checked by laying a straight edge across the top
- Loose braces, checked by tapping the top and listening for rattles
- Cracked or separated top and back seams, checked with a torch inside the soundhole
- Lifting binding around the waist
- A worn or cracked nut
- Loose tuning machines or stripped gears
Practitioners increasingly recommend treating the bridge, frets, and neck as the three main checks, because they catch the repairs that cost the most to put right, as outlined by Coleman's Music buying guidance.
How to Inspect a Used Acoustic Guitar Without Strings
A guitar with no strings is the hardest to assess and the easiest to hide problems in. Some sellers remove strings deliberately to conceal high action or a back-bowed neck, since neither is visible without tension. Treat a de-strung instrument as unverified rather than inspected.
You can still check several things:
- Sight the neck for twist and humps, which show regardless of string tension
- Inspect the bridge for lifting and the saddle for lean
- Look inside with a torch for loose braces and seam separation
- Check the fretboard for divots and the frets for sharp ends
- Test that the truss rod turns freely
What you cannot judge is action height, relief under tension, or whether the neck holds its shape once strung up. If the seller will not restring it for you, price that uncertainty into your offer.
Buying second-hand does not have to mean buying blind. If you would rather skip the guesswork entirely, MusicStreet hand-selects every pre-owned acoustic that comes through the door and puts it through our in-house workshop before it reaches the floor, so the bridge, frets, and neck have already been checked by players. Browse our pre-owned acoustics and new acoustic guitars, or book your instrument in for a setup and repair if you have already found one you like. Get started with MusicStreet and play an instrument that is ready the moment it arrives.
Frequently Asked Questions
What are the most common structural problems in old acoustic guitars?
The three most common structural issues are bridge lift, loose braces and neck angle problems. A lifting bridge shows a gap between the bridge and the soundboard, often enough to slide a piece of paper under. Loose braces cause a dull thud when you tap the top. Neck angle issues make the strings sit too high near the body. Checking these first saves you from buying a used acoustic guitar that needs expensive repair work.
How do I check for a warped neck on an acoustic guitar?
Hold the guitar at eye level and sight down the edge of the fretboard from the headstock. The neck should have a slight forward curve, not a back bow or a twist. You can also press the low E string at the first and fourteenth frets and look at the gap at the seventh fret. A gap of around 0.2 to 0.3 millimetres is normal. Anything more suggests too much relief, and a back bow means the truss rod needs attention or the neck is warped.
Is a bridge lift a dealbreaker when buying a used guitar?
A small bridge lift is common on older guitars and can often be reglued by a repair shop. A significant lift, where you can see a clear gap or the bridge is starting to separate from the soundboard, is a bigger concern. It usually points to humidity damage or string tension over many years. Factor in the cost of a professional repair before deciding. If the bridge has already been reglued poorly, walk away.
How can I tell if an acoustic guitar has had a neck reset?
Look for finish cracks around the neck joint where it meets the body. A neck reset involves removing the neck and re-fitting it, which often leaves slight marks or touch-ups at that seam. Check the heel of the neck for unusual gaps or fresh glue lines. If the action is low and the saddle is tall, a reset may have been done well. If the saddle is very low and the action is still high, the guitar may need a reset now.



Share:
Alternatives to Big Box Guitar Stores: 2026 Guide
Best Electric Guitar Setup Guide: 2026 Step-by-Step