


You can string an acoustic guitar yourself in about 20 to 45 minutes by following four ordered steps: loosen and remove the old strings, seat the new ball ends against the bridge pins, wind each string at the tuning peg with the correct number of wraps, then stretch and tune until the pitch holds steady. Watch for sharp cut ends and pins that pop free under tension. Before you touch a peg, you’ll want to:
- Gather your tools (winder, pin puller, cutters, tuner)
- Clear a flat, well-lit surface to work on
- Have the new string set open and sorted by gauge
Key Takeaways
Stringing an acoustic guitar correctly comes down to seating the ball end properly, winding with the right number of wraps, and stretching new strings before trusting the tuning.
| Point | Details |
|---|---|
| Seat the ball end first | Bend the string to roughly 45 degrees before inserting the pin so the ball catches under the top. |
| Wind with control | Use around two to three wraps on bass strings and three to six on treble strings, keeping tension steady to avoid kinks. |
| Stretch before trusting pitch | Repeat the tune, stretch, retune cycle two to three times to settle new strings quickly. |
| Watch replacement intervals | Weekend players with uncoated strings frequently change them every few months; coated strings last roughly 2.5 to 3 times longer. |
| Use the right tools | A combined kit like Musicstreet’s Groovetech tech kit speeds up pin removal, cutting and winding for beginners. |
Table of Contents
- What you need to restring an acoustic guitar
- Step-by-step: how to string an acoustic guitar
- Common restringing mistakes and how to fix them
- Settling new strings and knowing when to change them
- What Musicstreet offers for restringing and guitar care
- What actually matters when you restring a guitar
- Where to buy strings, tools, and book a setup
- Sources
- FAQ
What you need to restring an acoustic guitar
You need six things before you start, and skipping any of them is how a ten-minute job turns into an hour of swearing at a stuck bridge pin. Buy a fresh set of acoustic strings first. Most players use light gauge (.012 to .053) for a balance of tone and playability, though extra light suits smaller hands or fingerstyle players who want less tension, and medium gauge suits heavier strummers who want more volume. If you’re unsure which gauge or coating suits your playing style, Musicstreet’s string differences guide breaks down the trade offs between coated and uncoated sets.
You’ll also need:
- A string winder with a built-in bridge pin puller (or a separate pin puller)
- Wire cutters for trimming excess string
- A tuner, clip-on or app-based, doesn’t matter which
- A microfiber cloth for wiping down the neck and body
- A neck support or rolled towel to stop the guitar rocking on your lap
A couple of extras earn their place in a case pocket. The CruzTools Groovetech Guitar Player Tech Kit bundles a winder, pin puller, cutters and a set of hex keys into one tool, which matters more than it sounds because fumbling between four loose tools is where guitars get scratched. The Groovetech Mini Multi-Tool is small enough to live permanently in your gig bag for emergency string breaks mid-set.
Set up your workspace before you pull a single string. Lay a cloth or towel across the top to catch dropped picks and stop your winder scratching the finish. Keep the old bridge pins in a small dish in the order you removed them, since pins do wear into their own holes over years of use. Work under decent light so you can actually see the saddle slots, and keep your face clear when a string finally snaps free of tension.
Step-by-step: how to string an acoustic guitar
This is the sequence luthiers actually follow, in the order that avoids the two most common beginner disasters: a bridge pin that shoots across the room, and a string that kinks before it’s even on the guitar.
Step 1: Loosen the old strings
Turn each tuning peg to release tension gradually rather than yanking pins out under full tension. You don’t need to remove all six strings at once. Many experienced techs change the three wound strings first, then the three plain strings, which avoids a sudden shift in the tension the neck is used to holding. If you’re planning a full clean of the fretboard, though, taking all six off together gives you clear access and is perfectly fine for a solid-top guitar in normal condition.
Step 2: Remove bridge pins and old strings
Once a string is slack, the pin holding its ball end usually lifts out with light pressure from a winder’s pin-puller slot. Rock the pin gently rather than prising it straight up. If a pin refuses to budge, push up from underneath through the soundhole with a finger or a pencil while pulling gently from the top. Drop each pin into your dish in order, then pull the old string free and set it aside.
Step 3: Clean and inspect while you have the chance
With the top exposed, wipe down the fretboard with a dry cloth and check for a few things you can’t normally see under six strings: a saddle that’s shifted position, grime built up around the frets, or hairline cracks near the bridge. This is also your moment to check nut slots for debris, since a dirty slot can bind a string and throw tuning off later. Musicstreet’s fret cleaning guide covers what to use and what to avoid on different fretboard woods.
Step 4: Seat the ball end properly
Feed the new string’s ball end into the bridge hole, then bend the string to roughly a 45 degree angle before dropping the pin back in. This bend is what actually catches the ball against the underside of the guitar’s top rather than letting it float loose against the pin. D’Addario’s own restringing guide confirms this angle as the standard technique across most acoustic bridges. Press the pin in gently, then pull the string upward with light tension. If the pin lifts straight back out, the ball end isn’t caught, so reseat it before moving on.
Step 5: Wind the string at the tuning peg
Pull the string toward the peg it belongs to, then pull it about two finger-widths past the post to leave enough slack for winding. Feed it through the hole, bend the tail sharply back on itself, then start winding.

The winding direction matters. Wind so the string wraps down and away from the headstock’s centre, which keeps tension pulling the string straight down the neck rather than at an angle. Aim for roughly two to three wraps on the wound bass strings and three to six on the thinner treble strings. Taylor Guitars recommends starting with one wrap on the inside of the post, with the remaining wraps stacking below it, so the coils pull downward rather than sliding up and slipping at the post.
Pro Tip: Keep light tension on the string with one hand while you wind with the other. A slack string kinks as it wraps, and a kinked string never sits properly against the nut, which shows up later as a mysterious buzzing note that no amount of tuning fixes.
Step 6: Trim, stretch, and tune
Cut the excess tail close to the post, leaving a short stub rather than a wire that pokes into your palm mid-song. Repeat winding for all six strings, then bring each one up to rough pitch with your tuner.
Now stretch them. Hook a finger under each string a few inches above the soundhole and pull it away from the body gently, two or three times per string. You’ll hear the pitch drop as the string settles. Retune, stretch again, retune again. Two to three cycles of this settles most of the tuning drift new strings show in their first hour of use, which saves you from a guitar that goes flat every few minutes during a session.
Variations worth knowing
Twelve-string guitars double the string count and the winding, but the sequence is identical. Slotted headstocks, common on classical-style and some parlour acoustics, need the string threaded through the post hole from the opposite side, so check orientation before you start winding. Some older or vintage bridges use a tighter pin fit that needs firmer pressure to seat. Go slowly rather than forcing it.
Common restringing mistakes and how to fix them
Most restringing problems trace back to one of five habits, and every one of them is fixable in under a minute once you know what’s causing it.
-
Bridge pin pops back out: The ball end almost certainly isn’t caught against the top. Remove the pin, check the 45 degree bend is still there, and reseat.
-
Tuning won’t hold: Usually too few winding wraps or a string that hasn’t been stretched enough. Add another stretch and retune cycle before assuming something’s broken.
-
Overlapping or messy winds: Wraps crossing over each other on the post create uneven tension and slow slippage over days. Unwind and redo with steady, even tension rather than trying to fix it wrap by wrap.
-
Kinked or bent string tail: This happens when you feed a string through the post hole without keeping it straight. A kinked string rarely sits flat and can produce a dead, thuddy note. Cut it and start that string again rather than fighting a bad bend.
-
String snaps mid-change: Not your fault, it happens. Just start that string fresh from Step 4.
If tuning still drifts after two or three stretch-and-retune cycles, check whether a nut slot is binding the string (a pencil rubbed lightly in the slot can help) or whether the saddle itself has shifted position in its slot. A loose bridge pin that won’t seat no matter what you try, a saddle that rocks, or any movement around an under-saddle pickup sensor on an electro-acoustic are all signs to stop and get the guitar looked at by a tech rather than persisting. Coated strings, worth noting, last roughly 2.5 to 3 times longer than uncoated ones before losing their high-frequency shimmer, so if you’re restringing more often than every couple of months, that alone might be worth solving before anything else.
Settling new strings and knowing when to change them
New strings need a settling period before they’re fully stable, and skipping it is the single biggest reason players think they’ve done something wrong. Run the tune, stretch, retune cycle two to three times right after installation. Manual stretching immediately after fitting removes most of the initial pitch drift, cutting down how many retune passes you need over the following days.
A few habits stretch string life considerably. Wipe strings down with a dry cloth after every session, since sweat and skin oils are one of the biggest drivers of corrosion and dulled tone. Wash your hands before picking up the guitar if you can. Store the instrument somewhere with stable humidity rather than a damp case in a cold garage.
How often you need a full change depends on how much you play and what strings you use:
- Weekend players with uncoated strings: frequently every few months
- Weekend players with coated strings: typically several times longer than uncoated strings
- Gigging musicians: expect to change strings much more often regardless of coating
Signs it’s time, regardless of the calendar: a dull or flat tone that doesn’t brighten after cleaning, visible corrosion or discolouration along the wound strings, or a noticeable drop in sustain. Change the full set rather than swapping a single broken string. Mismatched old and new strings sound uneven, since fresh strings ring brighter than ones that have lost their top end. Keep a spare set in your case for exactly this reason, and Musicstreet’s guide to cleaning guitar strings covers day-to-day upkeep between full changes.
What Musicstreet offers for restringing and guitar care
Musicstreet specialises in electric, acoustic and bass guitars, alongside the accessories that keep them playable, from replacement strings through to full setup and repair work. The shop’s product listings and buying guides are built to help musicians of every level make an informed choice rather than guessing.
For restringing specifically, a few items in the range are worth having on hand:
- The CruzTools Groovetech Acoustic Guitar Player Tech Kit is built specifically for acoustic setups, combining a winder, pin puller and cutters in one tool.
- The Groovetech Mini Multi-Tool is compact enough for a gig bag, useful when a string breaks away from home.
- Musicstreet’s restringing guide covers tuning and stretching technique in more depth for readers who want a second walkthrough.
Beyond the tools, Musicstreet’s setup and repair service is there for anyone who wants a tech to check nut and saddle height after a gauge change, since swapping to a heavier or lighter string set does shift how the guitar plays.
What actually matters when you restring a guitar
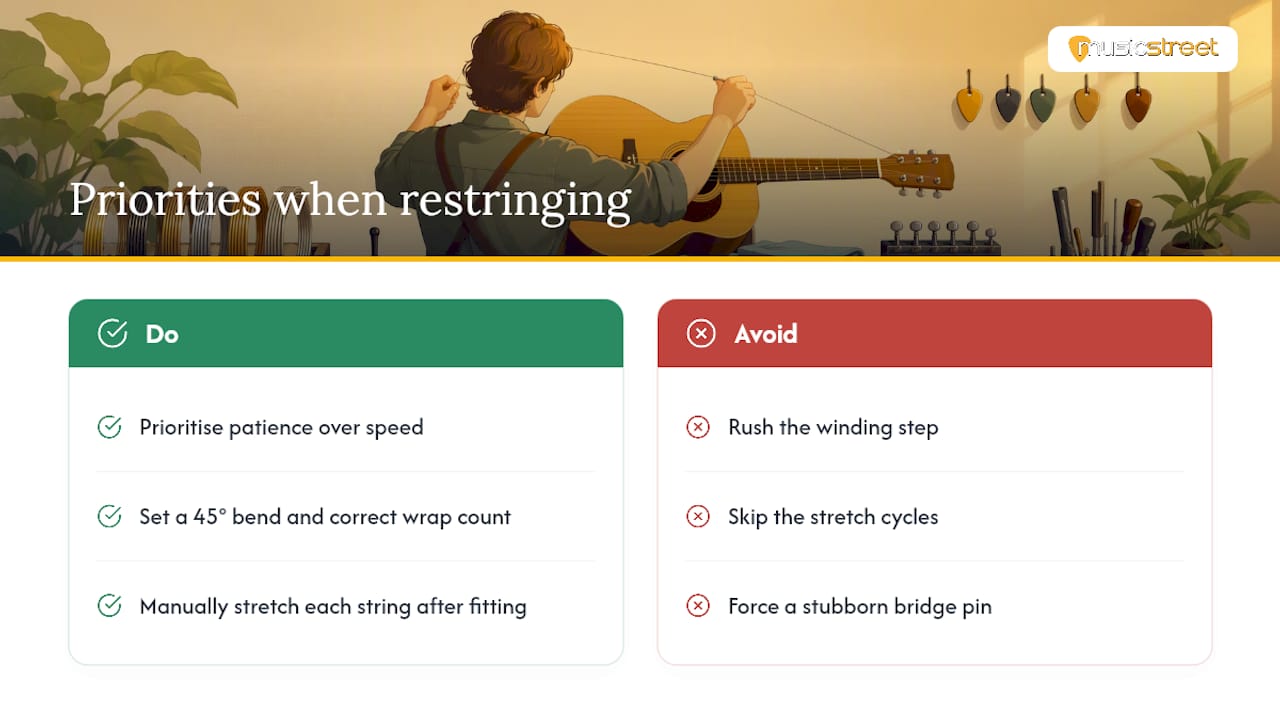
Most tutorials treat every step as equally important, and that’s where they go wrong. Winding technique and ball end seating are where nearly every problem starts, yet they get a single sentence in most guides while the article spends three paragraphs on tuner apps. Get the 45 degree bend and the wrap count right, and half the “why won’t my guitar stay in tune” complaints disappear before they start.
The stretching step is the other one people skip, usually because it feels unnecessary when the tuner already reads correctly. It isn’t unnecessary. A string that hasn’t been manually stretched will drop pitch repeatedly over its first few hours of playing, and mistaking that for a broken tuning peg or a faulty guitar is a common beginner panic that has nothing to do with either.
If you take one thing from this walkthrough, prioritise patience over speed on your first attempt. Rushing the wind, skipping the stretch cycles, or forcing a stubborn pin are the three habits that turn a straightforward job into a repeat visit to a guitar shop.
Where to buy strings, tools, and book a setup
Once you’ve got the technique down, having the right kit on hand makes every future restring faster. Musicstreet stocks the CruzTools Groovetech Guitar Player Tech Kit for players who want one tool that handles winding, pin removal and cutting, and the Groovetech Mini Multi-Tool for a case-friendly backup.

If you’ve just fitted a heavier or lighter gauge than your guitar is used to, it’s worth having the nut and saddle checked. A gauge change shifts the tension your neck and bridge are carrying, and Musicstreet’s in-store setup service catches anything that needs adjusting before it becomes a buzz or a tuning problem you can’t trace. Musicstreet’s acoustic range, including the Yamaha FGX5 and the Yamaha FGC-TA TransAcoustic, comes with expert setup already done, which is a useful reference point if you’re comparing how your own guitar should feel once restrung. Browse the full Musicstreet range online, or bring your guitar into the Huntingdon store to have a tech check your work in person.
Sources
- MusicRadar: acoustic guitar restring tips
- D’Addario: How to restring an acoustic guitar
- How often should you change acoustic guitar strings? | Strum Avenue
- Taylor Guitars: changing steel strings
FAQ
What is the proper way to restring an acoustic guitar?
Loosen and remove the old strings, seat each new ball end at roughly a 45 degree angle in the bridge, wind at the tuning peg with two to three wraps for bass strings and three to six for treble strings, then stretch and tune in repeated cycles until the pitch holds.
What are common restringing mistakes?
The most frequent errors are an unseated ball end that pops the bridge pin back out, overlapping or uneven winds that cause tuning instability, and kinked string tails from feeding the string through the post without keeping it straight.
Is stringing an acoustic guitar hard?
It isn’t technically difficult, but it does reward patience. Most beginners manage a full set in 20 to 45 minutes once they’ve done it once or twice, and the CruzTools Groovetech kits from Musicstreet make the pin removal and winding steps noticeably easier.
Can I restring my own acoustic guitar?
Yes, restringing is a routine task any player can learn with basic tools: a winder, cutters, and a tuner. If you’ve just changed string gauge, though, it’s worth having Musicstreet check the nut and saddle afterwards to make sure the setup still suits the new tension.








Share:
Which type of Fender Stratocaster should you actually buy?
How to tune my guitar: a step-by-step method that works