You’ve invested in quality pedals and cables, yet your tone feels dull and lifeless. The culprit might surprise you: those true bypass pedals you trusted to keep your signal pristine could be causing tone suck. Buffer pedals convert high impedance signals to low impedance, preventing signal degradation across your entire rig. Understanding how they work transforms your sound from muddy to crystal clear.
Table of Contents
Key takeaways
| Point | Details |
| Buffer pedals prevent tone loss | They convert high impedance signals to low impedance, maintaining signal strength through cables and pedals. |
| Long cables cause tone suck | Cable runs over 6 metres and multiple pedals degrade high frequencies without buffering. |
| True bypass isn’t always better | In complex setups, true bypass pedals can worsen tone degradation compared to buffered designs. |
| Strategic placement matters | Position buffers at chain start or after vintage fuzz pedals for optimal tone preservation. |
| Quality buffers are tone neutral | Premium buffer pedals maintain signal integrity without colouring your guitar’s natural character. |
How buffer pedals work: the technical explanation
A buffer pedal acts as a unity gain amplifier that converts your guitar’s naturally high impedance signal into a robust low impedance one. Your guitar pickups typically output around 1 megaohm (MΩ) impedance, which becomes vulnerable to signal loss over distance. Buffer pedals receive this delicate signal through their high input impedance of approximately 1 MΩ, then output it at a much lower impedance of around 100 ohms (Ω).
This impedance transformation proves crucial for signal preservation. High impedance signals interact with cable capacitance, creating a low pass filter effect that strips away high frequencies. The longer your cable run or the more pedals in your chain, the more pronounced this treble loss becomes. Buffers eliminate this problem by strengthening the signal before it travels through your pedalboard.
The technical principle behind buffering revolves around impedance matching. When your guitar’s high impedance output meets long cables or multiple pedal inputs, resistance builds up. A properly designed buffer pedal addresses this by:
-
Accepting the weak high impedance signal without loading it down
-
Amplifying the signal to unity gain (same volume, just stronger)
-
Outputting a low impedance signal that drives cables and pedals effectively
-
Maintaining frequency response across the entire audio spectrum
Modern buffer designs like those in the Strymon Brigadier delay pedal use premium op amp circuits or discrete transistor designs. These components ensure the buffered signal remains transparent and faithful to your original tone. The circuit’s output stage can easily drive the capacitance of long cable runs without losing clarity or definition, preserving every nuance of your playing.
Why buffer pedals are needed: the problem of tone suck
Tone suck manifests as a gradual dulling of your guitar’s voice, robbing you of sparkle and presence. High frequency loss occurs when cables and pedals create capacitance that filters out treble content. This effect compounds with each metre of cable and every pedal input, even when pedals are bypassed.
Long cable runs present the primary challenge. A standard guitar cable has capacitance of roughly 30 to 50 picofarads per foot. When you run a 6 metre cable from your guitar to your pedalboard, then another 6 metres from your board to your amplifier, you’ve accumulated substantial capacitance. Your guitar’s high impedance output interacts with this capacitance, creating a natural low pass filter.
The sonic result resembles turning down your guitar’s tone knob halfway. Your sound loses its cutting edge, making lead lines disappear in a band mix. Clean tones become muddy and undefined. Overdriven sounds lose articulation and note separation. The following issues arise without proper buffering:
-
High frequency roll off above 5 kHz becomes audible
-
Attack transients lose definition and snap
-
Harmonic overtones that give your guitar character diminish
-
Overall volume drops slightly due to signal loss
-
Dynamic response feels sluggish and compressed
“The difference between a buffered and unbuffered signal in a large pedalboard can be compared to the clarity difference between a fresh set of strings and old, dead ones.”
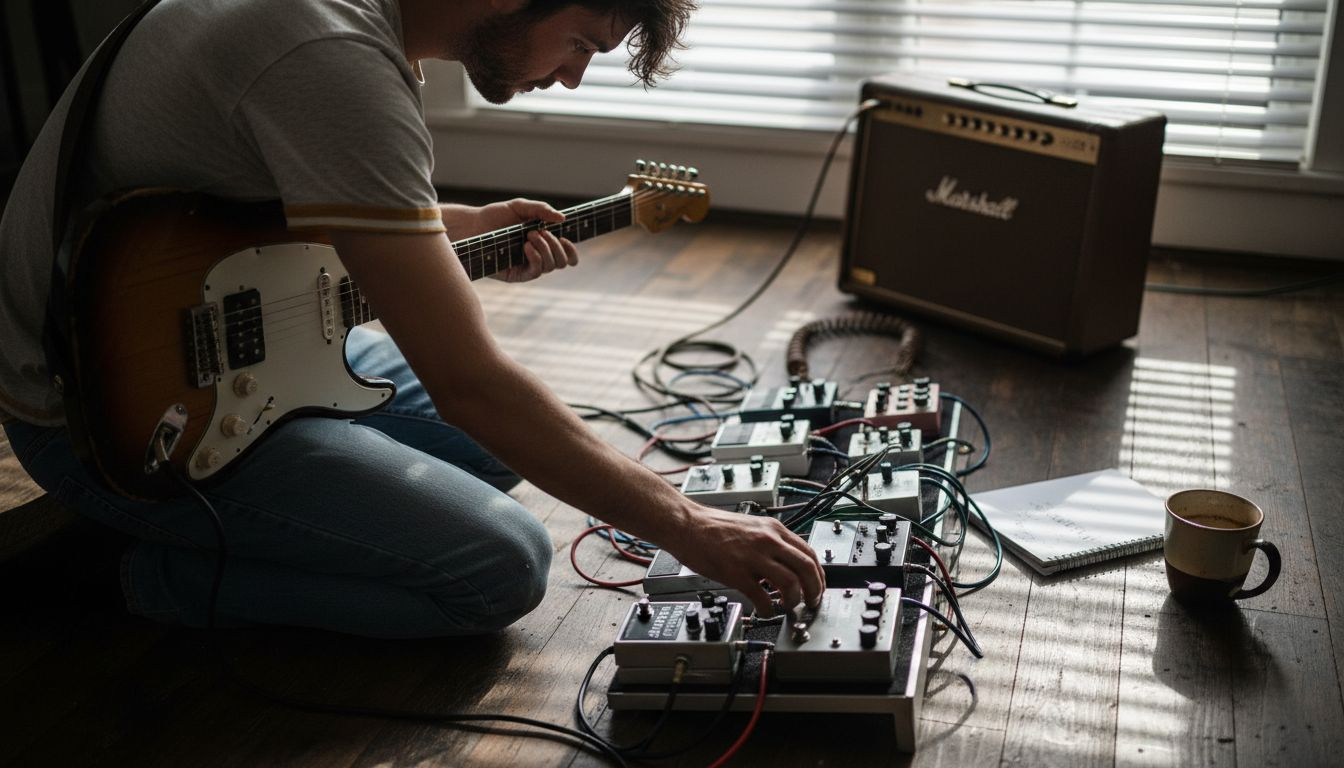
Multiple true bypass pedals exacerbate the problem. Each pedal input and output adds connection points where signal degradation occurs. A pedalboard with eight true bypass pedals creates sixteen additional solder joints and switch contacts in your signal path. While each pedal bypasses cleanly when off, the cumulative cable length and connection resistance still affect your tone. Buffer pedals counteract these issues by maintaining signal strength throughout your entire rig, ensuring your guitar’s natural voice reaches your amplifier intact.
Optimal placement and use of buffer pedals
Strategic positioning of your buffer pedal maximises tone preservation throughout your signal chain. Most guitarists achieve best results by following these placement guidelines tailored to different rig configurations.
-
Place your first buffer immediately after your guitar input for standard setups. This location catches your signal at its strongest point, before any degradation occurs. Your buffer then drives the rest of your pedal chain effectively.
-
Position buffers after vintage fuzz pedals like Fuzz Faces or Tone Benders. These circuits use germanium or silicon transistors that react sensitively to input impedance. They need to see your guitar’s high impedance directly to maintain their characteristic sound and cleanup response when you roll back your volume knob.
-
Add a second buffer at the end of long pedal chains containing ten or more pedals. This final buffer ensures your signal stays strong for the cable run to your amplifier, especially if you play large stages with 15 metre cable runs.
-
Insert buffers before and after long cable runs when using pedals in your amplifier’s effects loop. Many amplifiers place their effects loop after the preamp stage, requiring separate cable runs that benefit from independent buffering.
-
Experiment with buffer placement when using multiple gain stages. Some overdrive and distortion pedals respond differently to buffered versus high impedance signals, so testing various configurations reveals your optimal tone.
Pro Tip: Keep a short patch cable handy to test your signal with the buffer engaged versus bypassed completely. A/B comparison reveals exactly how much tone loss your specific rig experiences, helping you decide if additional buffers would help. For comprehensive guidance on signal chain architecture, explore our guitar effects chain tips and ultimate guitar pedal guide.
Remember that buffer placement affects interaction between pedals. Wah pedals, for instance, often sound better before a buffer since they rely on impedance interaction for their vocal sweep. Vintage style effects often prefer seeing your guitar’s natural impedance. Modern digital pedals typically include built in buffering and work well anywhere in your chain.
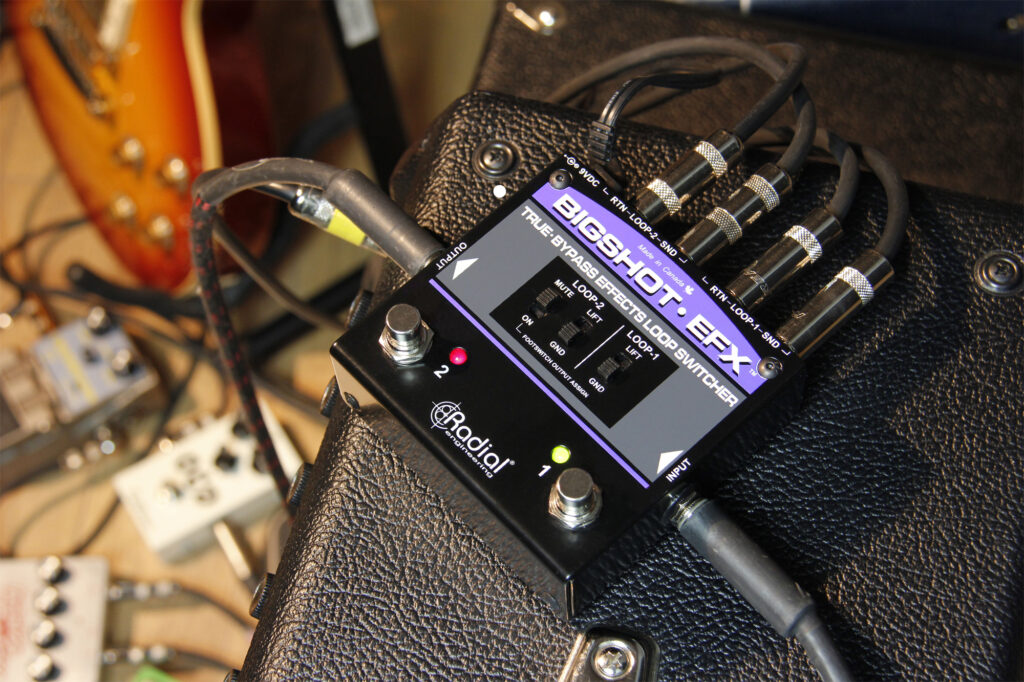
Comparison: buffer pedals vs true bypass pedals
The debate between buffered and true bypass designs has divided guitarists for decades. Understanding their fundamental differences helps you make informed choices for your specific rig requirements.
True bypass pedals send signal straight through when disengaged, using mechanical switches that physically connect input to output. Buffered pedals maintain active circuitry even when bypassed, continuously conditioning your signal. Neither approach is universally superior; context determines which serves you better.
| Feature | True bypass pedals | Buffered pedals |
| Signal path when off | Direct mechanical connection | Active electronic circuit |
| Tone preservation | Excellent in small rigs | Superior in complex setups |
| Cable length tolerance | Limited to 6 metres total | Handles 15+ metres easily |
| Pedal chain size | Best for 1 to 5 pedals | Ideal for 6+ pedals |
| High frequency response | Degrades with cable length | Maintains full bandwidth |
| Power requirements | None when bypassed | Requires constant power |
| Vintage pedal compatibility | Works with impedance sensitive fuzzes | May alter fuzz character |
| Switching noise | Mechanical pop possible | Usually silent switching |
True bypass excels in minimal setups where you use three or four pedals with short cables. Your signal passes through unaltered, preserving your guitar’s natural impedance. This approach suits players who value absolute signal purity and run compact pedalboards.
Buffered bypass becomes essential as rig complexity increases. Professional touring guitarists typically use multiple buffers to maintain signal integrity across elaborate pedalboards with twenty or more pedals. The constant signal conditioning prevents cumulative tone loss that would otherwise make your sound thin and lifeless.
Modern hybrid approaches combine both technologies. Some pedals offer switchable true bypass or buffered modes, letting you adapt to different situations. Others use relay based true bypass with optional buffer circuits, providing maximum flexibility. Consider your specific needs: cable lengths, pedal count, and whether you use impedance sensitive vintage effects. These factors determine which bypass topology serves your tone best.
Common misconceptions about buffer pedals
Several persistent myths about buffer pedals confuse guitarists and prevent them from optimising their tone. Separating fact from fiction helps you make better gear decisions.
True bypass pedals don’t always preserve tone better than buffered designs. In rigs with long cables or many pedals, true bypass actually causes more tone suck than quality buffering. The mechanical bypass connection still subjects your signal to cable capacitance and connection resistance throughout your chain.
Key misconceptions that limit tone optimisation include:
-
Myth: All buffers colour your tone negatively. Reality: Premium buffers use carefully selected components that maintain absolute transparency. Cheap buffers with poor designs may add colouration, but quality units from reputable manufacturers preserve your natural guitar voice perfectly. The circuit design and component quality determine sonic impact, not the buffering concept itself.
-
Myth: You should never use buffers with vintage fuzz pedals. Reality: Buffer placement matters more than their presence. Placing a buffer before a vintage fuzz changes its character, but positioning it after preserves the fuzz while protecting the rest of your chain. Many professional guitarists successfully combine classic fuzzes with strategic buffering.
-
Myth: More buffers always improve your tone. Reality: Excessive buffering can cause issues just like insufficient buffering. Each buffer stage introduces minimal noise, and multiple buffers may create slight impedance mismatches. One or two well placed buffers typically suffice for most rigs, even complex professional setups.
-
Myth: Digital pedals eliminate the need for dedicated buffers. Reality: While many digital pedals include built in buffers, their placement in your chain may not optimally protect your entire signal path. A dedicated buffer at your chain’s start still provides benefits by catching your guitar’s signal at full strength.
-
Myth: Buffers reduce dynamic range and responsiveness. Reality: Properly designed buffers maintain your guitar’s full dynamic range and touch sensitivity. Any perceived reduction typically results from poor buffer design or inappropriate gain staging, not from buffering itself.
Understanding these realities empowers you to use buffers strategically rather than avoiding them based on outdated assumptions. Quality buffering represents a professional approach to signal management, not a compromise or tonal sacrifice.
Advanced buffer pedal features and model comparisons
Modern buffer pedals offer specialised features beyond basic impedance conversion, addressing specific needs for professional and advanced amateur setups. Understanding these capabilities helps you select the right tool for your rig.
Dual output buffers like the EarthQuaker Devices Buffer/Splitter provide separate buffered outputs for running multiple amplifiers simultaneously. Each output maintains proper impedance matching, letting you drive two different amp rigs without tone loss or ground loop hum. This feature proves invaluable for stereo rigs or players who blend different amp characters.
Premium buffer designs incorporate superior components that reduce noise and maintain pristine signal quality. The Suhr Buffer uses carefully selected op amps and film capacitors that preserve every detail of your guitar’s voice. Its circuit design ensures flat frequency response from 20 Hz to 20 kHz, maintaining perfect tonal neutrality.
| Buffer model | Key features | Typical price range | Best application |
| Suhr Buffer | Premium op amp design, ultra low noise | £75 to £95 | Professional touring rigs |
| TC Electronic Bonafide | Compact size, true buffer circuitry | £40 to £55 | Everyday pedalboards |
| EarthQuaker Devices Buffer/Splitter | Dual outputs, 1 MΩ input impedance | £65 to £85 | Stereo or dual amp setups |
| Boss TU 3 Tuner | Built in buffer, tuning function | £75 to £100 | Space conscious boards |
| JHS Little Black Buffer | Discrete transistor design, vintage voiced | £60 to £80 | Players seeking subtle warmth |
Some buffers offer adjustable input impedance, letting you fine tune how your guitar interacts with the buffer stage. This adjustment affects how your volume and tone controls respond, with lower input impedance creating slightly darker tones and reduced volume control range. Higher input impedance preserves your guitar’s natural response curve.
Pro Tip: Consider buffers with multiple outputs if you plan to expand into stereo rigs or need to feed both your pedalboard and a tuner simultaneously. This feature eliminates the need for separate splitter boxes and maintains signal integrity to both destinations. Discover more options in our best guitar pedals 2025 guide and delay pedal types overview.
Noise filtering represents another advanced feature. Some buffers incorporate RF filtering to eliminate radio frequency interference that can plague high gain rigs. This protection prevents your amplifier from picking up mobile phone signals or radio broadcasts through your guitar cable.
Practical tips for integrating buffer pedals into your rig
Successfully implementing buffer pedals requires systematic evaluation and testing to achieve optimal results for your specific setup. These practical strategies help you integrate buffering effectively.
Begin by assessing your current rig’s vulnerability to tone suck. Measure your total cable length from guitar to amplifier, including all patch cables between pedals. If this exceeds 6 metres, you definitely need buffering. Count your pedals: more than five true bypass units typically benefit from at least one buffer.
-
Test your baseline tone. Plug your guitar directly into your amplifier with a short cable. Note the clarity, high end sparkle, and overall presence. This reference point reveals how much tone loss your pedalboard causes.
-
Evaluate buffer placement with sensitive pedals. If you use vintage style fuzzes, wah pedals, or germanium boosters, test buffer positions carefully. These effects often interact with source impedance as part of their character. Place buffers after these pedals rather than before them.
-
Select buffers from reputable manufacturers. Cheap buffers may introduce noise, colouration, or inadequate drive capability. Investing in quality units from established pedal companies ensures transparent performance. Read specifications carefully: look for input impedance above 500 kΩ and output impedance below 200 Ω.
-
Compare bypassed versus engaged operation. Once installed, use your buffer’s bypass switch (if available) to compare tones directly. You should hear restored high frequencies, improved clarity, and better definition. If you don’t notice improvement, your rig may not need buffering, or the buffer quality may be insufficient.
-
Monitor for noise issues. While quality buffers run silently, poor implementations or ground loop problems can introduce hum. If you experience new noise after adding a buffer, check your power supply connections and ensure proper grounding throughout your pedal chain.
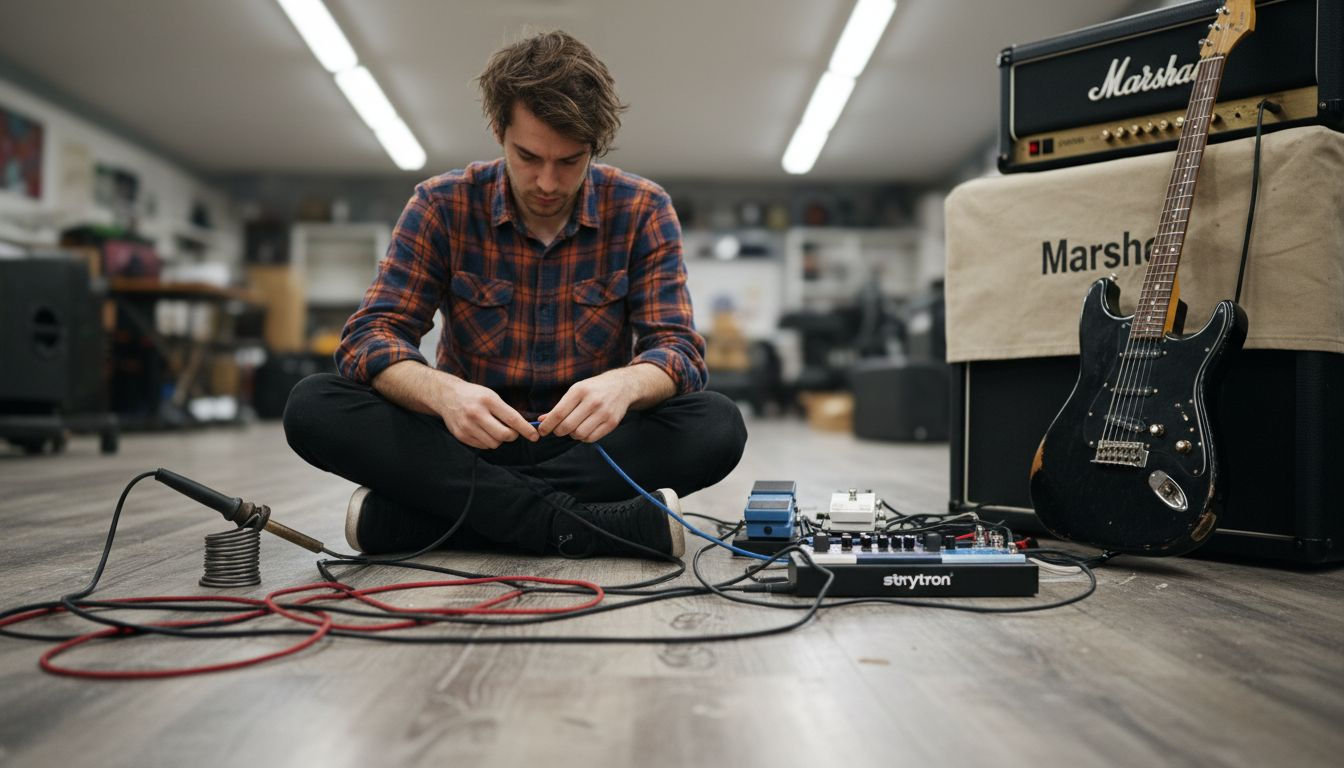
Pro Tip: Document your signal chain configuration with photos and diagrams. When you achieve great tone, recording your exact buffer placement and pedal order helps you recreate the setup after making changes. This documentation proves invaluable during sound checks or when troubleshooting issues. Learn more about optimal configurations in our guide to pedalboards basics and setup.
Regular maintenance ensures continued performance. Check buffer power connections periodically, as intermittent power can cause signal dropouts. Clean input and output jacks with contact cleaner to prevent oxidation that degrades signal transfer. Replace patch cables showing wear, since damaged cables undermine even the best buffering.
Enhance your tone with premium guitar gear from MusicStreet
Preserving your guitar’s natural voice requires more than just understanding buffer pedals. It demands access to quality gear that respects your tone at every connection point.

At MusicStreet, we curate premium guitars and accessories that maintain signal integrity throughout your entire rig. Our selection includes carefully chosen buffer pedals, cables, and effects that work together to deliver the clarity and presence your playing deserves. Every product undergoes professional inspection to ensure it meets exacting standards for tone preservation.
Whether you’re building your first pedalboard or refining a professional touring rig, our team provides expert guidance on selecting components that complement each other. We understand how buffer placement, cable quality, and pedal selection interact to shape your final sound. Visit our Huntingdon showroom or explore our online catalogue to discover gear that elevates your tone rather than compromising it.
Frequently asked questions
What is a buffer pedal on a guitar?
A buffer pedal preserves your guitar’s tone by converting high impedance signals to low impedance, maintaining signal strength through cables and pedals. It prevents loss of high frequencies and reduces tone degradation that makes your sound dull and lifeless.
How do I know if my pedalboard needs a buffer pedal?
If you use long cables over 6 metres or multiple pedals, especially true bypass ones, you likely need a buffer to prevent tone suck. Testing your signal with and without buffering confirms whether your rig experiences audible high frequency loss.
Where should I place a buffer pedal in my effects chain?
Generally, place the buffer at the start of your pedal chain to catch your guitar’s signal at full strength. Place it immediately after vintage fuzz pedals to preserve their character. Experiment with placement for best tone in your specific setup.
Do buffer pedals affect my guitar’s tone quality?
Quality buffer pedals maintain tonal neutrality and transparency, preserving your guitar’s natural voice without colouration. Cheap or poorly designed buffers may add unwanted characteristics, making component quality crucial for optimal results.
Can I use multiple buffer pedals in one signal chain?
Yes, but strategic placement matters more than quantity. One or two well positioned buffers typically suffice for most rigs. Excessive buffering can introduce minimal noise accumulation, so use only what your specific cable lengths and pedal count require.


Share:
What is amp modeling? A guide for UK musicians 2026
Discover the advantages of custom guitars in 2026