

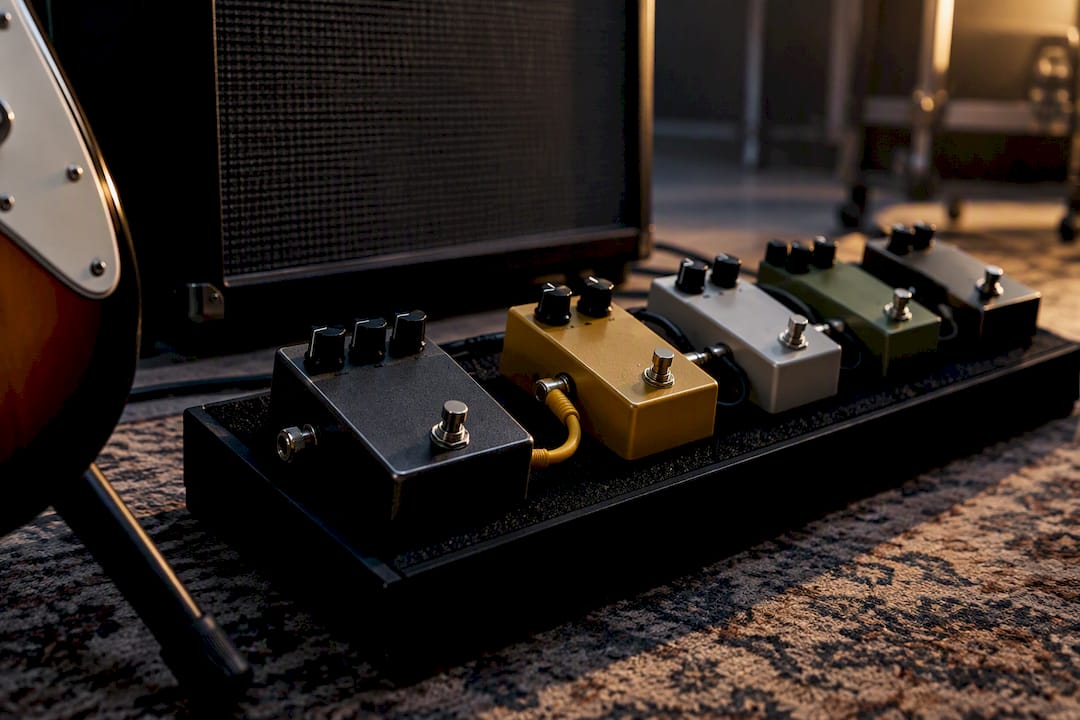
The order that works for most players is tuner and volume first, then compressor or wah, then drive pedals, then modulation, then delay and reverb last. This sequence keeps your signal clean and predictable, because each stage receives a signal it is designed to process rather than one already shaped by the pedal before it. Exceptions exist for fuzz, buffers and amp effects loops, but this is the order to start from.
Table of Contents
- Recommended baseline pedal order, explained step by step
- Why that order works: signal flow, impedance and tone interactions
- Placement nuances and common exceptions (fuzz, boost, volume pedal)
- Routing options: FX loop, parallel paths and the 4-cable method
- Power, buffers and wiring: practical setup tips to avoid hum and tone loss
- Step-by-step setup and testing checklist
- Troubleshooting common problems and quick fixes
- Why trust MusicStreet: expert setup services and what we do for players
- How MusicStreet can help: pedals, controllers and accessories we stock
- Practical perspective: start with rules but end with your ears
- Sources
- FAQ
Recommended baseline pedal order, explained step by step
Every pedal in your chain reacts to what comes before it, so the order you choose changes how each effect behaves, not just what it sounds like on its own. The sequence below reflects a widely accepted starting order that industry sources recommend as a baseline for troubleshooting and clear signal integrity.
Your tuner sits first in the chain, right after the guitar. It needs a clean, unaffected signal to track pitch accurately, and most tuner pedals include a hard mute function that silences the rest of the board while you tune, which is handy between songs. A volume pedal usually sits alongside it at the front, giving you control over your entire signal before it hits any gain or effect stage. Placed here, a volume pedal works like a second guitar volume knob, letting you swell in or fade out without touching your drive tone.
Next come dynamics and filters: compressors and wah pedals. A compressor placed early evens out your picking dynamics before that signal reaches a drive pedal, which matters because an overdrive or distortion pedal responds directly to input level. Feed it a more consistent signal and you get more consistent breakup, whether you are digging in for accents or playing softly. Wah pedals also tend to work best early, shaping the raw guitar tone before distortion adds harmonics that can make the wah sweep sound muddled or harsh.
Drive pedals come next: boost, overdrive, distortion and fuzz, usually in that order of increasing gain. Stacking gain pedals this way lets a lower-gain boost or overdrive push a higher-gain distortion harder, adding sustain and thickness without turning the tone to mush. Reverse the order and a fuzz feeding into an overdrive often sounds thin or gated, because the overdrive struggles to shape an already-saturated signal cleanly.
Modulation effects, chorus, phaser and flanger, generally sit after your drive stage. Placing modulation before distortion produces a more integrated, occasionally chaotic texture, while putting it after distortion gives a clearer, more distinct modulation sound that is less coloured by the dirt in your signal, according to guidance on effects pedal order. Neither placement is wrong, but the difference is audible and worth testing deliberately rather than by accident.
Time-based effects, delay and reverb, close out the chain. Feeding delay and reverb a signal that has already been shaped by drive and modulation keeps the repeats and ambience clean rather than smeared, which matters most when you want articulate, rhythmic delay trails rather than a wash of noise.
A quick recap of the stage order:
- Tuner and volume pedal at the very front for clean tracking and overall level control.
- Compressor and wah next, shaping dynamics before gain is added.
- Drive pedals (boost, overdrive, distortion, fuzz) in ascending order of gain.
- Modulation (chorus, phaser, flanger) after drive for clarity, or before for a more blended texture.
- Delay and reverb last, so ambience and repeats stay defined.
This is a starting point, not a rulebook. Manufacturer guidance from Strymon’s signal chain notes supports the same broad sequence: dynamics and filters early, gain next, modulation after that, and time-based effects last or inside an amp’s effects loop. Once you understand why the order works, breaking it becomes a creative choice rather than a guess.
Why that order works: signal flow, impedance and tone interactions
The baseline order is not a convention picked at random. It follows how electric signals actually behave as they pass through multiple stages of processing, and understanding the mechanics helps you know when it is safe to deviate.
Every pedal has an input impedance and an output impedance, and the relationship between them affects how much of your tone survives the trip. A common rule of thumb in audio design is that a following stage’s input impedance should be roughly ten times higher than the output impedance of the stage feeding it, which keeps the signal from being loaded down and losing high-frequency detail. This is one reason a buffer, or a buffered pedal such as many Boss units, is often placed early in a chain: it presents a consistently high input impedance to your guitar’s pickups and a low, stable output impedance to everything downstream.
Long, low-quality cables can measurably dull your tone. Guitar pickups are high-impedance sources, and cable capacitance acts like a filter that rolls off treble as cable length increases, an effect that becomes audible over the sort of distances found on a large pedalboard or a long cable run to the amp. Guidance from Pete Cornish’s interview on getting the best from your pedals points to buffering and shorter, higher-quality cable runs as the practical fix, since a line-driver stage isolates your guitar’s pickups from the loading effect of a long cable and keeps the top end intact.
Gain staging follows a similar logic. Placing a compressor or other dynamics control before your drive pedals means the drive stage receives a signal with dynamics already tamed, which produces more even, controllable breakup. Do the reverse, compressing after distortion, and you mostly just raise the noise floor, because there is little dynamic range left to compress once the signal has been heavily saturated.
Modulation placement changes more than texture. Chorus or phaser placed before distortion gets folded into the harmonic content the distortion generates, producing a denser, sometimes disorienting result. Placed after distortion, or routed through a stereo output into two amps or a stereo interface, the same modulation pedal can create a wider, more defined stereo image, because the pitch or phase shifting is acting on a signal that is not being continuously reshaped by a gain stage downstream.
None of this means you must follow the order slavishly. It means that when you break it, you are making an informed trade, not just guessing.

Placement nuances and common exceptions (fuzz, boost, volume pedal)
Some of the most interesting tones come from deliberately ignoring the baseline order, and a handful of exceptions come up often enough to be worth naming directly.
Fuzz pedals are the classic exception. Many vintage-style fuzz circuits, particularly those built around germanium transistors, interact directly with your guitar’s volume knob and with whatever is plugged in before them. Put a buffer or another pedal ahead of a fuzz and it can lose its cleaning-up behaviour, where rolling back the guitar volume cleans the tone rather than just turning it down. For that reason, fuzz often goes first in the chain, straight after the guitar, even though it is technically a drive pedal.
A Tube Screamer-style overdrive is genuinely flexible depending on what you want from it. Placed before a high-gain amp or distortion pedal, it tightens the low end and pushes the mids, a classic method for shaping an already-saturated amp tone without adding much obvious “overdrive” character of its own. Placed after a distortion pedal instead, the same pedal behaves more like a coloured boost, adding grit and mid-emphasis to a tone that is already distorted rather than shaping what feeds into it.
Volume pedal placement also changes its job entirely. At the front of the chain, before any gain pedals, it works as a straightforward volume control, turning the whole signal up or down without affecting the character of your drive tones. Moved to the end of the chain, after distortion and modulation, the same pedal becomes a swell tool, letting you fade in a sustained, already-distorted note for ambient or pad-like textures, since the drive pedals are reacting to a full-strength signal that is then faded independently.
Boost placement depends on what problem you are solving. A boost placed before your drive pedals pushes them harder, useful for a solo that needs more sustain and saturation. A boost placed after your drive pedals, closer to the amp, instead raises the overall volume for a lead break without changing the character of the distortion, which is often the more reliable choice for players who need a clean volume jump on stage without retuning their gain structure mid-song.
A few practical placement notes worth remembering:
- Fuzz usually goes first, right after the guitar, to preserve its interaction with your volume knob.
- A Tube Screamer-style pedal shapes tone differently depending on whether it sits before or after your main distortion.
- Volume pedals control level at the front and create swells at the back.
Pro Tip: Try your boost in both positions during a single rehearsal and note which one solves the actual problem, more gain or more volume, rather than assuming one is always correct.
Routing options: FX loop, parallel paths and the 4-cable method
Standalone pedal chains are not the only option once you introduce an amp with an effects loop or a switching system, and these routing methods solve problems that ordering alone cannot.
An amp’s effects loop sits between the preamp and power amp stages, which means anything placed there reacts to your amp’s own gain and distortion rather than to a clean signal. Delay and reverb are the effects most commonly placed in an FX loop, because doing so keeps their repeats and ambience clear even when you are using the amp’s own high-gain channel, rather than having them blur together with an already-distorted signal.
The 4-cable method extends this idea to let you use both your pedalboard’s drive pedals and your amp’s own preamp distortion in the same rig without compromise:
- Run a cable from your guitar into the input of your first pedals (tuner, drive, and so on), then out to the input of your amp.
- Run a second cable from the amp’s effects send into the input side of your time-based pedals (modulation, delay, reverb).
- Run a third cable from the output of those pedals into the amp’s effects return.
- Set the amp’s loop to match your needs, series for most rigs, and confirm levels are not clipping at the return.
This method matters most for players who want their amp’s own distortion channel but still want delay and reverb to sit after that distortion for clarity, a workflow detailed in Strymon’s guidance on effects loop configurations.
Parallel routing solves a different problem, common among bassists and players using heavily downturned guitars: cascading multiple gain or pitch-affected pedals can turn low frequencies into an undefined rumble. Splitting the signal, running one path through your effects and blending it back with a clean, unaffected path, keeps the low end solid while still layering in distortion or octave effects on top.
Multi-effects units and loop switchers increasingly offer “pre” and “post” routing on individual blocks, letting you shift an effect’s position in the signal path electronically rather than by physically moving pedals and cables. This is the same reordering logic covered above, just implemented in software, and it is one reason loop switchers have become popular on boards that need to change configuration between songs without a scramble.
Power, buffers and wiring: practical setup tips to avoid hum and tone loss
A pedalboard that sounds thin, noisy or inconsistent is often suffering from a power or wiring problem rather than an ordering one, and most of these issues are straightforward to fix once you know what to check.
Isolated power supplies are worth the investment over daisy-chaining pedals from a single output. An un-isolated daisy chain shares ground and current paths across every pedal on it, which is a common source of hum, especially once digital pedals are mixed in with analogue ones. An isolated supply gives each pedal its own electrically separate output, removing that shared-ground noise path entirely.
Buffers deserve a clear placement rule. A buffer works best either right at the start of your chain, protecting your guitar’s high-impedance signal from cable capacitance and long runs, or immediately before a long cable run to the amp, where it prevents the same capacitance loss on the way out. You may not need a dedicated buffer pedal at all if your board already includes buffered pedals such as certain Boss or Ibanez units, since their input stages perform the same job.
Cable quality and length matter more than many players expect. Short, well-shielded cables with solid connectors preserve high-frequency detail that longer or cheaper cables lose to capacitance, an effect Pete Cornish’s interview specifically calls out as a source of tone loss on boards with excessive cable runs.
A quick checklist for a quieter, cleaner-sounding board:
- Use an isolated power supply rather than a single un-isolated daisy chain, particularly once digital pedals are involved.
- Place a buffer at the start of the chain, or before any long cable run to the amp.
- Keep cables as short as the board layout allows, and use good-quality connectors.
- If you suspect a ground loop, swap one pedal at a time onto battery power to see whether the hum disappears.
That last step, a battery test, is a fast way to isolate whether noise is coming from your power supply or from somewhere else in the signal path, and it costs nothing but a spare battery and a few minutes.
Step-by-step setup and testing checklist
Building a pedalboard from scratch, or troubleshooting one that already exists, goes faster with a fixed sequence rather than plugging everything in at once and hoping for the best.
- Plug the guitar straight into the amp first, with no pedals at all, and confirm the base tone is clean and free of hum.
- Add your tuner and volume pedal and test again, checking that muting and volume control both work as expected.
- Add one pedal at a time from there, in the baseline order, testing tone and noise after each addition before moving to the next.
- If hum appears after adding a specific pedal, swap that pedal to battery power to check whether the issue is the pedal itself or the shared power supply.
- Once every pedal is on the board, check tap-tempo delays sync correctly and that modulation rates feel right at your typical playing tempo.
- Confirm true-bypass and buffered pedals are not fighting each other by listening for tone changes when pedals are switched in and out with nothing else engaged.
- If you use a cab simulator or DI output for recording or front-of-house, check that output separately from your amp signal, since level and tone can differ significantly between the two.
This process takes longer than plugging everything in at once, but it means any problem you find has only one likely cause, the pedal you just added, rather than a whole board of possibilities.
Pro Tip: Keep a simple note on your phone of which pedal caused which problem during setup. It saves you repeating the same diagnosis next time you add a new pedal.
Troubleshooting common problems and quick fixes
Most pedalboard problems fall into a small number of categories, and the add-one testing method described above is the fastest way to find the cause rather than guessing at a fix.
If you hear hum or buzz, isolate it by removing pedals one at a time, starting with anything digital or powered from a shared daisy chain, since un-isolated power is the most common cause. If the hum disappears, that pedal or its power connection is the issue, and moving it to an isolated output or a battery usually resolves it.
Muddy or undefined low end, particularly on bass or downtuned guitar rigs, is usually the result of stacking multiple gain or pitch-shifting effects in series. Splitting the signal with a parallel path, so a clean low end blends with an affected high end, is the fix covered earlier, and it is worth trying before assuming a pedal itself is at fault.
If modulation sounds washed out or indistinct when stacked with distortion, moving it into your amp’s effects loop, or simply after the drive pedals instead of before them, usually restores clarity. Some modulation pedals also include a mix or blend control that reduces the wet signal relative to dry, which can solve the same problem without any repacking at all.
A few fast diagnostic steps to try before assuming a pedal is faulty:
- Bypass every pedal in turn to find exactly which one introduces noise or tone loss.
- Swap a suspect pedal to battery power to rule out the shared power supply as the cause.
- Move modulation after drive, or into an FX loop, if it sounds smeared when stacked with distortion.
- For a temporary live fix, drop the problem pedal from the chain entirely and address it properly afterwards.
If you do need a technician’s help, tell them exactly what you have already tried, which pedal seemed to cause the issue and whether it happens with a battery instead of the shared supply. That single detail often cuts a diagnosis down from an hour to a few minutes.
Why trust MusicStreet: expert setup services and what we do for players
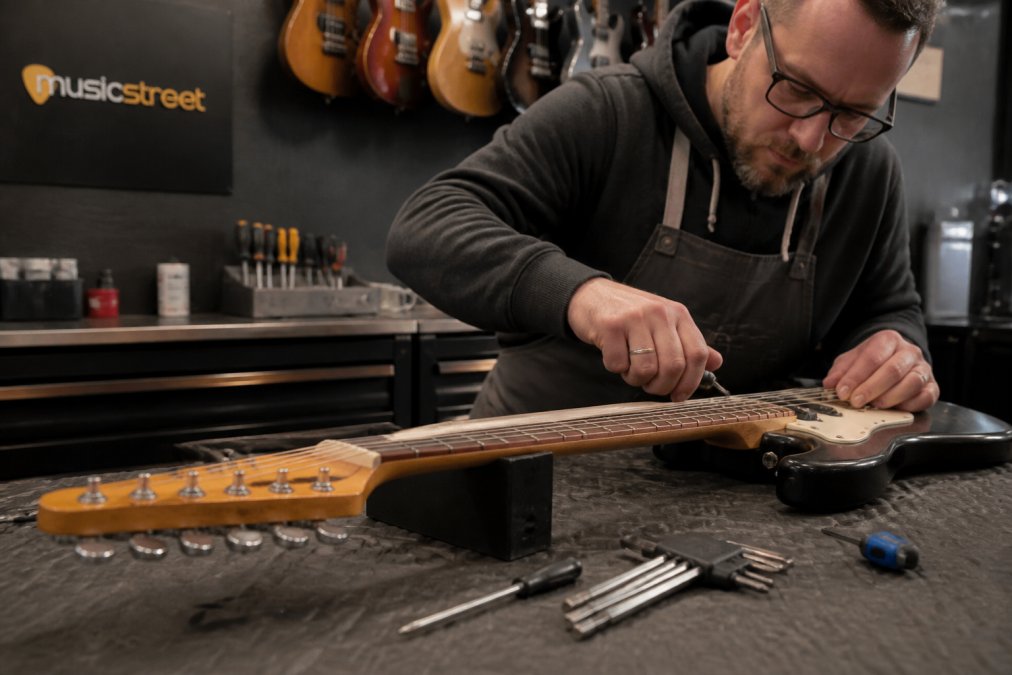
Working through pedal order, impedance and power issues on your own is entirely doable, but MusicStreet offers guitar setups, servicing and repairs for players who would rather have it handled properly the first time. Our setup service includes an inspection of your instrument, which matters just as much for effects performance as pedal order does, since worn pickups, poor intonation or a badly set-up guitar can undermine even a well-planned board.
When applying such a checklist for a customer, that means checking impedance-sensitive wiring, recommending isolated power where a board is showing hum, and advising on buffer placement based on the actual pedals involved rather than a generic rule. Personalised service is central to this approach: every recommendation is based on your instrument, your amp and the pedals you already own, backed by post-sale support if something needs adjusting once you are back home.
How MusicStreet can help: pedals, controllers and accessories we stock
Once your chain order is sorted, the right controller can make switching between complex setups far simpler. The Electro-Harmonix 8-Step Program Foot Controller suits players who want rhythmic, sequenced modulation control underfoot without reaching down mid-song, while the Electro-Harmonix 22500 Foot Controller gives looping and multi-effects players hands-free control over a more elaborate signal chain.

For expression-based control over modulation depth, delay time or wah sweep, the Electro-Harmonix Expression Pedal adds a physical, real-time layer to any pedal that accepts expression input. Browse our full range of effects online or in-store, and if you would rather have your board wired, powered and set up by hand, book a professional setup through the same page and we will take it from there.
Practical perspective: start with rules but end with your ears
The baseline order in this guide is a genuinely useful starting point, but it is not a law, and some of the best-sounding boards belong to players who broke it deliberately after understanding why it exists in the first place. Experiment with fuzz first, modulation before drive, or delay mid-chain instead of last, and trust what you hear over what a diagram says you should be hearing.
What matters more than the order itself is remembering what you changed and why, because a tone you stumble into by accident is much harder to recreate than one you built on purpose. Write it down, even roughly, the moment you find something you like.
— Music
Sources
For deeper technical detail, Strymon’s guide to setting up an effect signal chain covers amp-loop use and pre/post routing in more depth than fits here. Manufacturer manuals remain the best source for model-specific wiring, and industry write-ups such as the ultimate guide to pedalboard essentials offer further context on baseline ordering.
- The ultimate guide to pedal board essentials and what order to put them in
- Setting up your effect signal chain - Strymon
FAQ
In what order should pedals be placed in an effects chain?
The widely used baseline is tuner and volume first, then compressor or wah, then drive pedals, then modulation, then delay and reverb last, a sequence recommended by industry guidance on pedalboard essentials for clarity and predictable interaction between stages. Fuzz and boost are common exceptions worth testing in different positions.
What five pedals should every guitarist have?
There is no fixed list, since pedal choice depends heavily on style and genre, but a tuner, a drive or overdrive pedal, a compressor, a modulation effect such as chorus and a delay or reverb cover the core categories most guitarists build around. Starting with one pedal from each category gives you a functional signal chain before adding more specialised effects.
Where should a Tube Screamer-style pedal go in a pedal chain?
Placed before a high-gain amp channel or distortion pedal, a Tube Screamer-style overdrive tightens the low end and pushes the mids of whatever follows it. Placed after distortion instead, it acts more like a coloured boost, adding grit to a signal that is already saturated rather than shaping what feeds into the distortion stage.
What is an effect chain?
An effect chain is the order in which your guitar or bass signal passes through a series of pedals before reaching the amplifier. The order matters because each pedal reacts to whatever signal comes before it, so the same pedals can sound noticeably different depending on where they sit in the chain.




Share:
Guitar Tuning: A Step-by-Step Guide for Beginners
Best Bass Guitar Brands for Intermediate Players 2026