


You’re mid-rehearsal, the band is locked in, and suddenly your amp goes dead. No sound, a horrible hum, or a fizzing distortion that wasn’t there five minutes ago. It’s one of the most disruptive things that can happen to a guitarist, and the frustration is real. The good news is that the majority of common amp faults don’t require a trip to a repair shop. With a methodical approach and a bit of patience, you can diagnose and fix most problems yourself, saving both time and money.
Table of Contents
- Understanding common amp problems
- What you need before you start troubleshooting
- Step-by-step guitar amp troubleshooting process
- Diagnosing tube vs solid-state amp issues
- Preventative maintenance and when to seek help
- Find expert support and gear for your next step
- Frequently asked questions
Key Takeaways
| Point | Details |
|---|---|
| Isolate the issue | Systematically check power, cables, and controls to quickly locate the source of amp problems. |
| Safety first | Unplug amps for all checks and avoid internal repairs if not qualified, especially with valve models. |
| Match steps to amp type | Troubleshooting steps differ for tube and solid-state amps, so identify your type before starting. |
| Routine maintenance matters | Regularly clean, inspect, and replace components to extend amp life and prevent issues. |
Understanding common amp problems
Before you start poking around, it helps to know what you’re actually dealing with. Guitar amp faults tend to fall into a handful of recognisable categories, and spotting the symptom early points you straight toward the cause.
The most common issues you’ll encounter include:
- No sound at all — often a power, fuse, or cable issue
- Loud hum or buzz — hum and buzz noises frequently result from input, ground, or component problems
- Unwanted distortion or breakup — can point to failing tubes, a clipping preamp, or a damaged speaker
- Intermittent signal — usually a dirty or worn jack socket, or a loose internal connection
- Overheating or burning smell — a serious warning sign that needs immediate attention
The reassuring thing is that most of these symptoms are identifiable without specialist equipment. A divide-and-conquer approach to troubleshooting amp faults is the most efficient method: isolate each part of the signal chain one at a time until you find the culprit. Understanding the different guitar amp types also helps, since tube and solid-state designs fail in different ways.
Pro Tip: Keep a simple notebook log of when problems started and what changed before they appeared. This context is invaluable when speaking to a technician.
What you need before you start troubleshooting
Rushing into troubleshooting without the right tools or safety awareness is how small problems become bigger ones. Take five minutes to prepare properly and you’ll work far more efficiently.
Here’s what to have on hand:
- Spare instrument cables — to rule out cable faults quickly
- A multimeter — for checking voltages and continuity
- Screwdrivers (flathead and Phillips) — for accessing panels and chassis
- Contact cleaner spray — for dirty pots and jack sockets
- A torch — to inspect inside the cabinet clearly
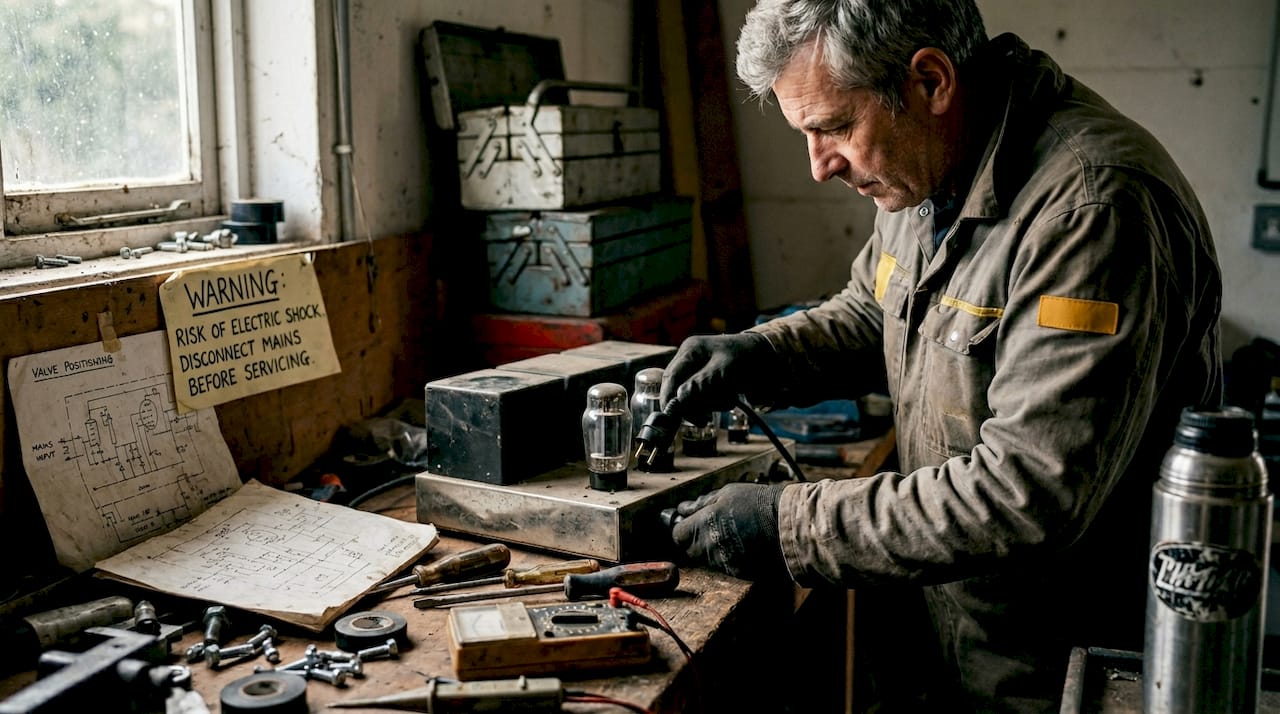
Safety is non-negotiable. Always unplug your amp before opening it, and be aware that tube amps store hazardous voltages in their capacitors even after being switched off. This isn’t a minor risk. Capacitors in a valve amp can hold lethal charge for hours. Unless you’re trained in electronics, keep your hands away from internal components.
You’ll also find it useful to stock up on essential amp accessories and review guitar maintenance essentials before you begin.
| Tool | Purpose | Priority |
|---|---|---|
| Spare cables | Eliminate cable as the fault source | High |
| Multimeter | Test voltages and continuity | Medium |
| Contact cleaner | Clean pots, jacks, and switches | High |
| Screwdriver set | Access panels and internal chassis | Medium |
| Torch | Visual inspection of tubes and components | Low |
Pro Tip: Work on a clean, well-lit surface and photograph the inside of your amp before touching anything. If you accidentally dislodge a wire, you’ll know exactly where it goes.
Step-by-step guitar amp troubleshooting process
With your tools ready and safety measures in place, you can work through the fault systematically. This process moves from the simplest possible causes to the more involved ones.
- Check the power supply. Confirm the amp is plugged in, the fuse is intact, and the power outlet is working. Try a different socket.
- Inspect your cables. Swap every cable in the chain with a known working spare. A divide-and-conquer method means checking power first, then isolating the signal path step by step.
- Test with a different guitar. This rules out the instrument as the source of the problem.
- Check input selection and channel settings. Make sure you’re plugged into the correct input and the channel isn’t muted.
- Inspect the tubes (valve amps only). Look for any that appear dark, cracked, or not glowing. Check cables first, then power, then tubes, testing preamp tubes one by one if needed.
- Listen carefully to isolate the fault. A hum that changes with the volume knob suggests a preamp issue. One that doesn’t change points toward the power amp stage or a grounding fault.
- Check the speaker connection. A loose speaker cable inside the cabinet is a surprisingly common cause of no sound.
| Symptom | First check | Second check | Likely cause |
|---|---|---|---|
| No sound | Cables and power | Input selection, fuse | Dead tube, blown fuse |
| Loud hum | Cable swap | Volume knob response | Ground loop, bad tube |
| Unwanted distortion | Guitar volume | Preamp gain settings | Failing tube, clipping |
| Intermittent signal | Jack socket | Cable connections | Dirty jack, loose wire |
| Overheating | Ventilation clearance | Bias setting | Failing output tube |
For ongoing reliability, the amp maintenance guide covers deeper care routines. If you’re unsure whether your current amp is worth repairing, the beginner amp selection guide can help you weigh up your options.
Pro Tip: Tap each preamp tube gently with a pencil eraser while the amp is on. A microphonic tube will produce a ringing or tapping sound through the speaker, making it easy to identify.
Diagnosing tube vs solid-state amp issues
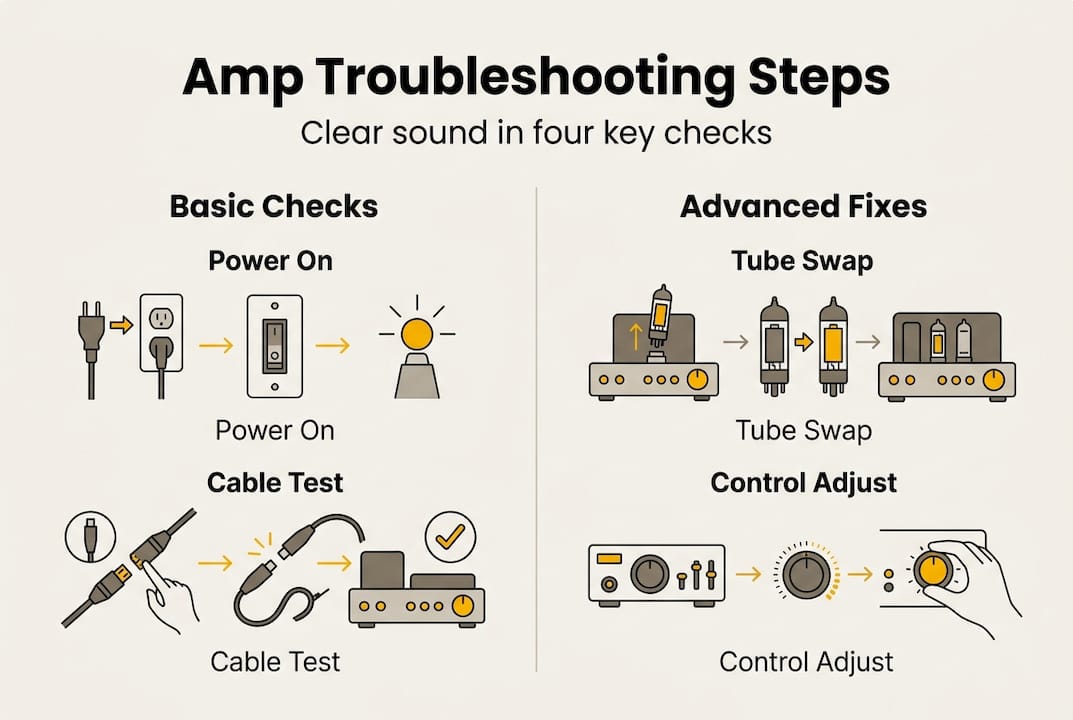
The type of amplifier you own shapes how you troubleshoot it. Tube amps and solid-state amps fail differently, and knowing which you have saves a lot of guesswork.
Tube amp specific issues:
- Tubes wear out gradually, causing loss of volume, warmth, or increased noise
- Tube microphonics can be identified with a tap test and must be handled carefully
- Bias drift in output tubes causes distortion, overheating, or blown fuses
- Rectifier tube failure results in complete loss of power
Solid-state amp specific issues:
- Solid-state amps are less prone to tube issues; focus on fuses, the power supply, and cleaning pots and jacks
- Dirty volume or tone pots cause crackling when turned
- Oxidised jack sockets create intermittent signal or no sound
- Internal solder joints can crack over time, especially after heavy use or transport
For a deeper look at how these designs differ in practice, the solid-state amp guide is worth reading. You’ll also find practical amp care tips that apply to both types.
Solid-state amps are often more forgiving for self-diagnosis. Their components are more stable and less sensitive to handling, making them a safer starting point for guitarists new to amp troubleshooting.
Preventative maintenance and when to seek help
Fixing a fault is satisfying, but preventing it in the first place is even better. A little routine care goes a long way toward keeping your amp reliable for years.
Regular maintenance tasks:
- Dust the exterior and ventilation slots monthly using a soft brush or compressed air
- Clean jack sockets and pots with contact cleaner every six months
- Check all external cable connections for wear or fraying
- Store your amp away from damp environments and extreme temperatures
- Have a qualified technician inspect the amp annually
Power tubes should be replaced every 1,000 to 3,000 hours of use, and capacitors should be recapped every 10 to 15 years. These aren’t arbitrary figures. Ageing tubes introduce noise and instability, while old capacitors can fail suddenly and cause serious damage to other components.
Knowing when to stop and call a professional is just as important as knowing how to start. Hand the amp over to a technician if you notice any of the following:
- Burning smells or visible scorch marks inside the chassis
- A fuse that blows repeatedly after replacement
- Complete silence despite all external checks passing
- Sparking or arcing from any component
- A hum or fault that persists after tube replacement
For more on keeping your gear in top shape, the importance of amp maintenance is covered in detail on the MusicStreet blog.
Find expert support and gear for your next step
If you’ve worked through these steps and still can’t pin down the fault, or if you’d simply rather have an expert take a look, MusicStreet is here to help. Whether you need a replacement amp, quality cables, or reliable care products, the team at MusicStreet brings genuine expertise to every enquiry.

From boutique valve combos to dependable solid-state practice amps, the range covers every style and budget. The guitar maintenance advice on the blog goes hand in hand with the products available in store and online. Visit the Huntingdon showroom to try gear in person, or shop online with free UK delivery on qualifying orders. Expert help is never far away.
Frequently asked questions
Why does my amp hum loudly even when not playing?
Hum is often caused by ground loops, faulty cables, or bad tubes, and you can usually tell the difference by whether the volume knob affects the noise level. If turning the volume down reduces the hum, the issue is likely in the preamp or input stage.
How do I know if a tube needs replacing?
Look for crackling, fading output, or visible damage such as dark deposits or burnt glass. A tap test with an eraser will reveal microphonic tubes by producing a ringing sound through the speaker.
Is it safe to open my amp to fix issues myself?
Simple exterior checks are fine, but internal repairs on tube amps carry serious risk due to high stored voltages that remain even after the amp is switched off and unplugged. Leave internal work to a qualified technician.
How often should I maintain or service my guitar amp?
Aim for an annual professional inspection, replace power tubes every 1,000 to 3,000 hours, and plan for a full recap every 10 to 15 years to keep your amp performing reliably.


Share:
Swamp ash for guitars: benefits, sound and expert advice
Tube amps vs digital: Find your perfect guitar sound