


A patch cord is a short instrument cable used to connect effects pedals to each other, and to route signal over short distances between a guitar, pedals, buffer and amp. Most players just call it a patch cable, and on a pedalboard it does one job repeatedly: carrying your signal a few inches from one jack to the next without adding bulk, tension, or unwanted noise to the chain. This guide covers guitar patch cords specifically, not the network patch leads used for Ethernet or fibre connections.
Common jobs a patch cord handles on a typical board:
- Linking the output of one pedal to the input of the next
- Connecting a tuner or buffer pedal into the front of the chain
- Running a short jump from an effects loop send to the first pedal
- Feeding signal from the last pedal into an amp input when the amp sits close to the board
Key Takeaways
Short, low-capacitance patch cords with reliable connectors preserve tone and reduce failure points on any pedalboard, and matching plug profile to layout prevents wasted space and strain on jacks.
| Point | Details |
|---|---|
| Keep length minimal | Cut cable to the shortest distance between jacks to limit capacitance and tone loss. |
| Choose connectors deliberately | Right-angle or flat plugs suit tight layouts; match plug direction to jack orientation. |
| Solder for gigging boards | Soldered terminations resist vibration better than solderless kits on the road. |
| Upgrade signs to watch for | Crackle, dulled treble, or persistent hum usually mean it’s time to replace a lead. |
| Get expert help when needed | MusicStreet offers in-store setup and inspection for pedalboard wiring and cable choice. |
Table of Contents
- Why patch cables matter for tone and pedalboard function
- How do patch cables differ from instrument cables?
- What to look for when buying patch cables
- Choosing the right length and plug style for your layout
- Installing and maintaining patch cords for reliability
- When a patch cord isn’t the right choice
- What to expect at different price points
- MusicStreet’s practical perspective on pedalboard cabling
- Get the right patch leads and expert setup at MusicStreet
- Sources
- FAQ
Why patch cables matter for tone and pedalboard function
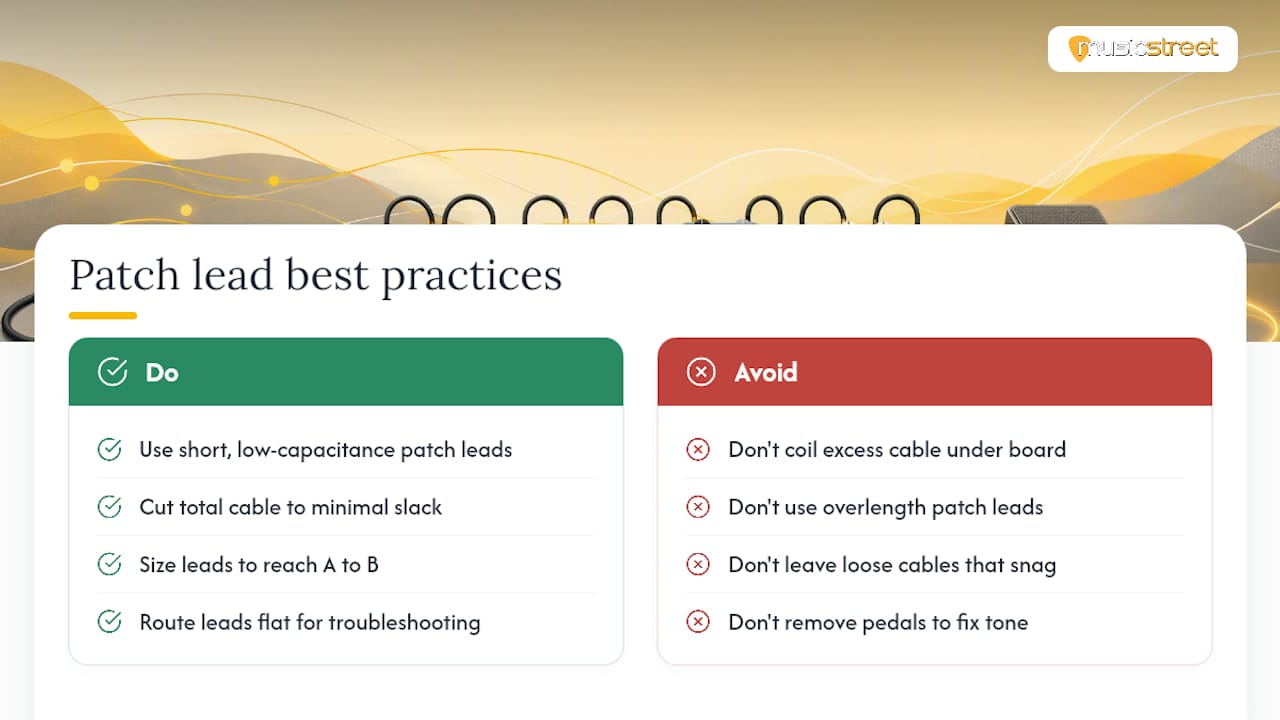
Short, low-capacitance patch leads keep your signal cleaner by reducing what guitarists call “tone suck”, the gradual loss of top-end sparkle that happens as cable length adds up. Every foot of cable introduces capacitance into the signal path, and in a passive pickup chain with no buffer, that capacitance rolls off high frequencies before the signal even reaches your amp.
It rarely shows up as one dramatic loss. It creeps in. A pedalboard with eight or ten patch leads, each slightly longer than it needs to be, can dull your tone in ways that are hard to trace back to any single cable. Guitar World has flagged this cumulative effect as one of the main reasons players chase down mystery tone problems on complex boards, and the fix is almost always the same: shorten the cable, not the pedal count.
There’s a second, less discussed benefit: organisation. A board wired with correctly sized patch leads sits flatter, routes more predictably, and is far easier to troubleshoot when something goes quiet mid soundcheck. Loose, overlength cables coiled under the board don’t just look untidy, they get snagged, pulled, and eventually damaged at the jack.
Pro Tip: Cut your total pedalboard cable length down to whatever gets you from A to B with minimal slack, and never coil excess cable into a loop under the board to “tidy” it. A coiled cable still adds its full length in capacitance, so you get all the tone loss and none of the tidiness.
How do patch cables differ from instrument cables?
Patch cables are shorter, lower profile and generally lower capacitance than instrument cables; instrument cables are built for longer runs and carry more bulk to survive it. A typical patch cable runs from around 2 to 12 inches, while a standard instrument lead from guitar to amp is usually 10 to 25 feet.
The practical differences worth knowing:
- Length: patch leads measure in inches, instrument cables in feet
- Connector profile: patch cables often use compact right-angle or flat plugs to save space; instrument cables usually have a standard straight jack at one or both ends
- Capacitance per unit length: broadly similar cable to cable, but total capacitance scales with length, so a long instrument cable adds far more than a short patch lead
- Bulk on a crowded board: instrument cables have thicker jackets and bigger plugs that simply don’t fit between pedals spaced two inches apart
Never substitute a full-length instrument cable for a patch lead between two adjacent pedals. Beyond the obvious space problem, the extra length adds capacitance you don’t need and creates loops that are prone to snagging during transport or a hasty gig teardown.
What to look for when buying patch cables
Prioritise low capacitance, dependable connectors, a plug profile that suits your layout, and a jacket flexible enough to route without stress on the jacks. Those four things determine most of what you’ll notice, both in tone and in how long the cable survives regular use.
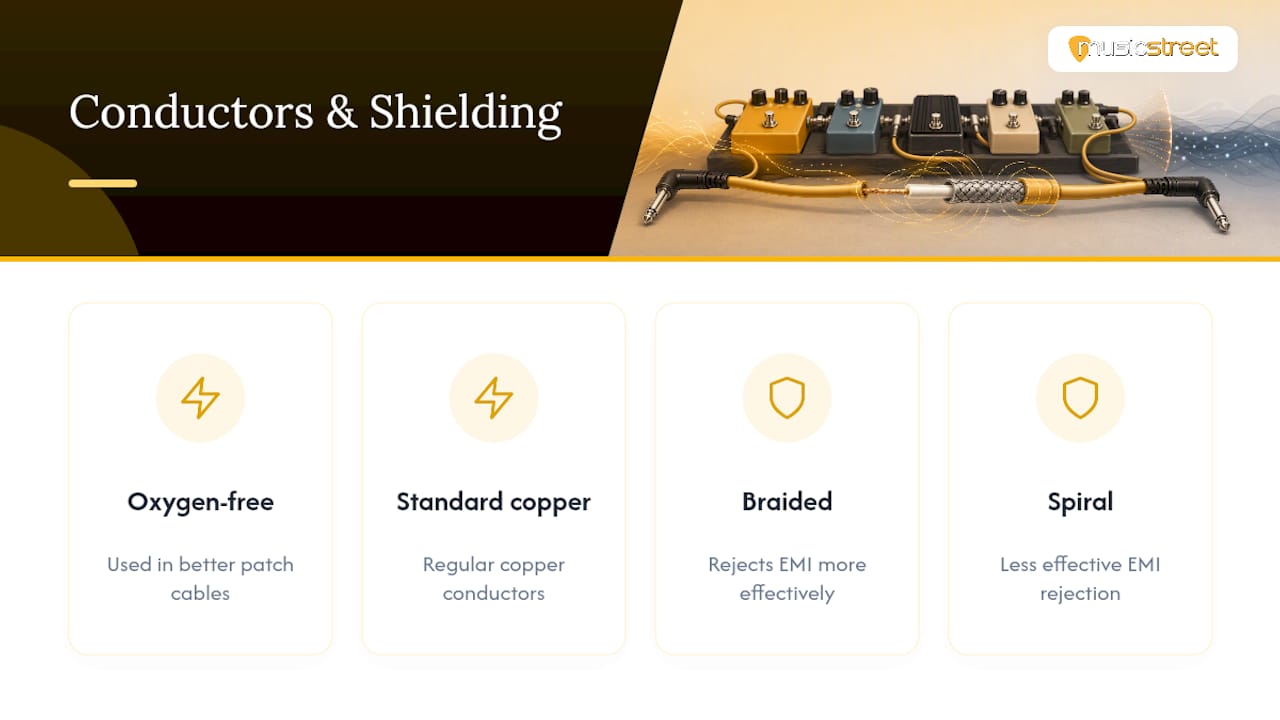
Conductors and shielding: better patch cables typically use oxygen-free copper conductors with braided rather than spiral shielding. Braided shielding rejects electromagnetic interference more effectively than spiral wrap, which matters if your board sits near a noisy power supply or you’re playing stages with heavy lighting rigs.
Connector choice: right-angle plugs are the most common choice for pedal-to-pedal links because they sit flush against the pedal casing rather than sticking out. Flat or pancake-style plugs go a step further, letting you push pedals closer together on a tightly packed board. Same-side facing plugs (both ends bent the same direction) suit pedals mounted side by side; opposite-facing plugs suit pedals mounted back to back or at odd angles.
Soldered vs solderless: soldered terminations generally outlast solderless kits under the vibration of regular gigging, where screw-clamp connectors can work loose over time and cause intermittent dropouts. Solderless kits are genuinely useful for a bedroom rig you rearrange often, since you can cut and reterminate cable to any length in minutes.
Pro Tip: If your budget is limited, spend it on the connectors and shielding rather than the jacket colour or branding. A cheap jacket with a solid Neutrik-style plug will outlast a flashy cable with a loose-fitting connector every time.
Choosing the right length and plug style for your layout
Use the shortest practical length that reaches cleanly between two jacks without pulling or bending the plug at an angle. Anything longer just adds slack, weight, and capacitance you don’t need.
A simple way to get this right:
- Lay your pedals out on the board in their final positions before ordering any cable
- Map the signal path from input to output, noting which jack faces which direction on each pedal
- Measure the actual gap between adjacent jacks, then add a small amount of slack, not a loop, just enough for the board to flex slightly without any joint being under tension
- Match plug type to jack position: right-angle for jacks on the side or top, straight for jacks recessed into a housing, flat or pancake where space between two pedals is under an inch
- Order or cut cables to that measured length rather than grabbing whatever’s in the drawer
For most home and gigging boards, 2 to 4 inches suits closely spaced pedals, while runs of 6 to 12 inches cover looser layouts or pedals separated by a power supply or looper. Anything beyond about a foot on a pedalboard usually signals the layout itself needs rethinking, not a longer cable.
Installing and maintaining patch cords for reliability
Route every cable flat against the board surface and avoid tight coils, which strain the plug at the point it enters the jack and are the single most common cause of a cable failing at the connector. Secure cables loosely with board-mounted clips or hook and loop strips so nothing tugs on a jack when you move the board.
A basic maintenance routine catches most problems before they cost you a gig:
- Check plugs periodically for looseness, corrosion, or a jack that no longer clicks in firmly
- Clean contacts with an appropriate contact cleaner if you notice crackle or intermittent signal
- Swap out any lead you suspect is faulty rather than trying to nurse it through one more show
- Inspect solder joints or crimps on solderless kits if a pedal starts cutting out under light pressure on the cable
Bedroom rigs can get away with lighter cable management since they rarely move. Gigging boards need proper strain relief and protection during transport, ideally in a hard case, since the repeated flexing of loading in and out is what actually kills patch leads over time.
Pro Tip: Bench-test your board the day before a gig, not the morning of. Wiggle every jack gently while the signal is live and listen for crackle. Keep one known-good spare patch cable in your gig bag; it’s the cheapest insurance you’ll ever buy.
When a patch cord isn’t the right choice
Don’t reach for a patch cord for long cable runs, stereo or TRS tasks, balanced connections, or anything involving mains power. Patch cables are built for short, unbalanced TS connections between pieces of gear sitting close together, and pushing them beyond that job invites noise and reliability problems.
Situations that call for something else entirely:
- Guitar to amp over several metres: use a proper instrument cable rated for that length
- Stereo effects returns: use a TRS cable matched to the pedal’s stereo output
- Long effects loop runs, especially to a rack unit across the stage: consider a balanced cable or a buffered send
- Powering multiple pedals from a distant outlet: that’s a job for a dedicated power supply, never an audio cable
If you’re routing signal across a stage rather than across a board, a DI box or a buffered pedal switcher will preserve your tone far better than stretching patch cables beyond their intended reach.
What to expect at different price points
Expect better materials, lower capacitance and sturdier connectors as price rises, though even a modest step up from the cheapest options buys a real improvement in reliability. You don’t need premium cable on every link to notice a difference.
At the budget end, expect basic PVC jackets, spiral shielding, and connectors that work fine for a while but are the first thing to fail under repeated flexing. Mid-range leads typically bring braided shielding and better strain relief at the plug, a sensible sweet spot for most gigging players. Premium leads add oxygen-free copper conductors, gold-plated contacts, and soldered joints built for years of reliable service, the kind of build quality that matters most on larger, professional boards where a single failed link takes down half your rig mid-set.
Watch for a few warning signs that it’s time to upgrade: intermittent crackle that comes and goes as you nudge the board, a noticeable dulling of top end that’s crept in as you’ve added pedals, persistent hum that worsens near lighting or power supplies, or a cable that’s failed more than once. Any one of those is a cheaper fix now than a dead signal chain at a gig.
MusicStreet’s practical perspective on pedalboard cabling
We recommend prioritising low-capacitance cable, right-angle or flat plugs, and soldered terminations for anyone building a board they intend to gig regularly. That advice comes from years of setting up and servicing pedalboards for customers who bring them in expecting a straightforward fix and instead find a patch lead quietly killing their tone.
The most common fault we see on trade-in and repair boards isn’t a broken pedal. It’s a cheap solderless patch cable that’s worked loose at the clamp, or a spiral-shielded lead picking up hum next to a switching power supply. These faults are intermittent by nature, which makes them maddening to diagnose on stage and straightforward to spot on a bench with a proper visual and continuity check.
If you’re assembling a board from scratch, buy slightly better cable than you think you need for the two or three links closest to your guitar input, since that’s where capacitance losses are most audible before any buffer in the chain has a chance to correct them. Ask for an expert setup if you’re unsure how your signal chain should be ordered. It’s a small cost against the time lost troubleshooting a board that’s wired wrong from the start.
Pro Tip: Before any gig, run through your board with the volume up and physically flex every connection point by hand. If a cable is going to fail, it will usually tell you at soundcheck rather than mid-song, but only if you actually test it.
Get the right patch leads and expert setup at MusicStreet
MusicStreet gives you something the big online cable warehouses don’t: a physical shop in Huntingdon where someone will actually look at your board and tell you what’s wrong with it, not just sell you another cable. If you’re weighing up patch leads, plug profiles, or whether your board needs a rewire rather than a repair, that conversation is worth more than another spec sheet.

Alongside patch cables and accessories, MusicStreet stocks maintenance essentials like the CruzTools Groovetech Guitar Player Tech Kit and the compact Groovetech Mini Multi-Tool, both useful for on-the-spot pedalboard adjustments and jack tightening. If you’re shopping for the guitar that feeds your board in the first place, our Yamaha TransAcoustic FGC-TA Electro Acoustic Cutaway and Ibanez GSR200B-WNF 4-string bass are both hands-on inspected before they go on sale, new or pre-owned. Every purchase comes with insurance-supported warranty cover and our post-sale support, so if a cable or connection ever gives you trouble, you’ve got somewhere to bring it back to. Drop into the Huntingdon store for a demo, or check our pedalboard setup guide online and get in touch to ask about custom cable lengths for your specific layout.
Sources
For deeper technical detail beyond this guide, a few sources cover specific angles well:
- Guitar cables: everything you need to know, from what they’re made of to how they work | Guitar World
- Best patch cables | Guitar Player
- Best Patch Cables for Your Pedalboard: Why Cable Quality Matters | The Rig Doctor
FAQ
What is a patch cord used for on a pedalboard?
A patch cord connects one pedal’s output to the next pedal’s input, or links a pedal to a buffer or nearby amp, carrying signal over the short distances typical of a pedalboard layout.
What’s the difference between a patch cable and an instrument cable?
Patch cables are shorter (typically 2 to 12 inches) with more compact connectors, while instrument cables run several feet and use bulkier jacks suited to longer distances.
Does patch cable length actually affect tone?
Yes. Longer cables add more capacitance to the signal path, which can dull high frequencies, particularly noticeable across a board with many pedal-to-pedal links.
Should I choose soldered or solderless patch cables?
Soldered terminations are more reliable for gigging boards that face regular vibration and transport; solderless kits suit home rigs you reconfigure often.
Can MusicStreet help me choose or fit patch cables?
Yes, MusicStreet offers in-store inspection, setup advice and custom cable options at its Huntingdon shop, alongside its full range of guitars and accessories.
When should I upgrade my patch cables?
Upgrade when you notice intermittent crackle, a gradual loss of top-end clarity, persistent hum near power supplies, or repeated connector failures.








Share:
7 string guitar scale length: which one should you buy?
Electric guitar body styles: a player's guide