


TL;DR:
- Proper guitar action impacts playability, comfort, and sound quality; it should be tailored to the player.
- Adjustments involve careful tuning, checking neck relief, nut height, saddle height, and intonation systematically.
- Regular seasonal maintenance and understanding personal playing needs are essential for optimal setup and performance.
If your guitar feels like a workout every time you play, the problem is almost certainly your action. Action refers to the height of your strings above the fretboard, and even a fraction of a millimetre in the wrong direction can make playing feel stiff, cause unwanted buzzing, or throw your tuning off completely. The good news is that adjusting your action is one of the most impactful things you can do for your instrument, and it does not require a degree in lutherie. This guide walks you through every stage, from understanding what action is to making safe, precise adjustments at home.
Table of Contents
- What is guitar action and why does it matter?
- Essential tools and preparation for action adjustments
- Step-by-step process to adjust your guitar action safely
- Troubleshooting: Common mistakes and how to fix them
- Our take: What really matters in guitar action adjustment
- Need further guitar setup help?
- Frequently asked questions
Key Takeaways
| Point | Details |
|---|---|
| Action affects playability | Lower or higher action can make your guitar easier or harder to play and directly impacts sound clarity. |
| Use proper tools | Having the right equipment and following safe methods prevents damage and ensures accurate results. |
| Follow the right steps | Adjust action in sequence—neck relief, nut height, bridge—tuning as you go for the best outcome. |
| Check regularly | UK humidity and climate changes mean guitar action should be reviewed every season for optimal playability. |
| When in doubt, consult a pro | If you’re ever unsure or major changes are needed, a professional can help avoid permanent damage to your guitar. |
What is guitar action and why does it matter?
Guitar action describes the distance between the bottom of each string and the top of the frets. It sounds simple, but what guitar action means in practice is the difference between an instrument that inspires you to play and one that sits in the corner gathering dust.
When action is too high, you need to press harder to fret notes cleanly. This causes finger fatigue, slows down your technique, and can pull notes sharp because you are stretching the string further than intended. When action is too low, the strings vibrate against the frets and produce an irritating buzz. Neither extreme is acceptable if you want to play well.
The signs you need an adjustment are usually obvious once you know what to look for. Common symptoms include:
- Fret buzz on open strings or specific positions
- Difficulty pressing chords cleanly, especially in the first few positions
- Intonation problems, where notes above the twelfth fret sound sharp or flat
- Uneven string response across the neck
- General discomfort during extended playing sessions
“Action adjustment is critical for playability and sound.” Ignoring poor action does not just affect comfort. It actively limits how fast you can progress as a player.
Several factors influence your action, and understanding them helps you diagnose problems accurately:
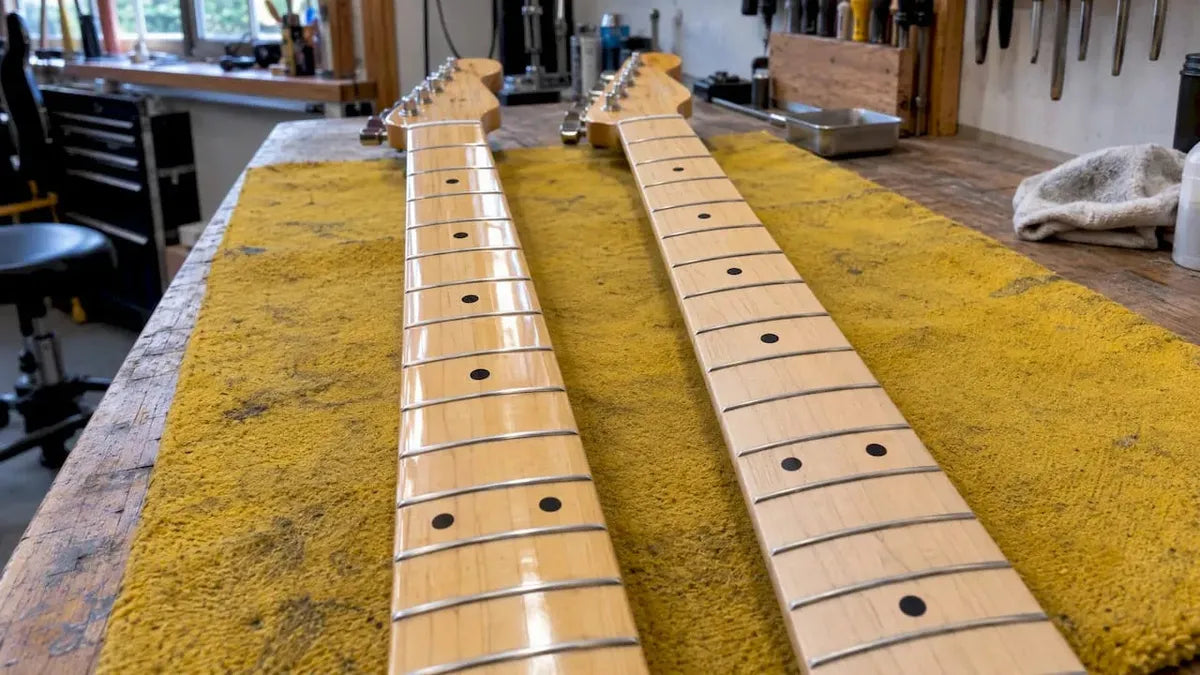
- Neck relief: The slight forward bow in the neck, controlled by the truss rod
- Nut height: The slots cut into the nut at the headstock end
- Saddle height: The bridge saddle, which sets string height at the body end
- Weather and humidity: Temperature and moisture cause wood to expand and contract, shifting your setup
All four of these elements interact. Changing one without considering the others can create new problems. That is why a systematic approach matters.
Essential tools and preparation for action adjustments
With the importance of action clear, the next step is arming yourself with the right tools and preparation. Rushing into adjustments without the correct equipment is a common mistake, and it can lead to stripped screws or worse.
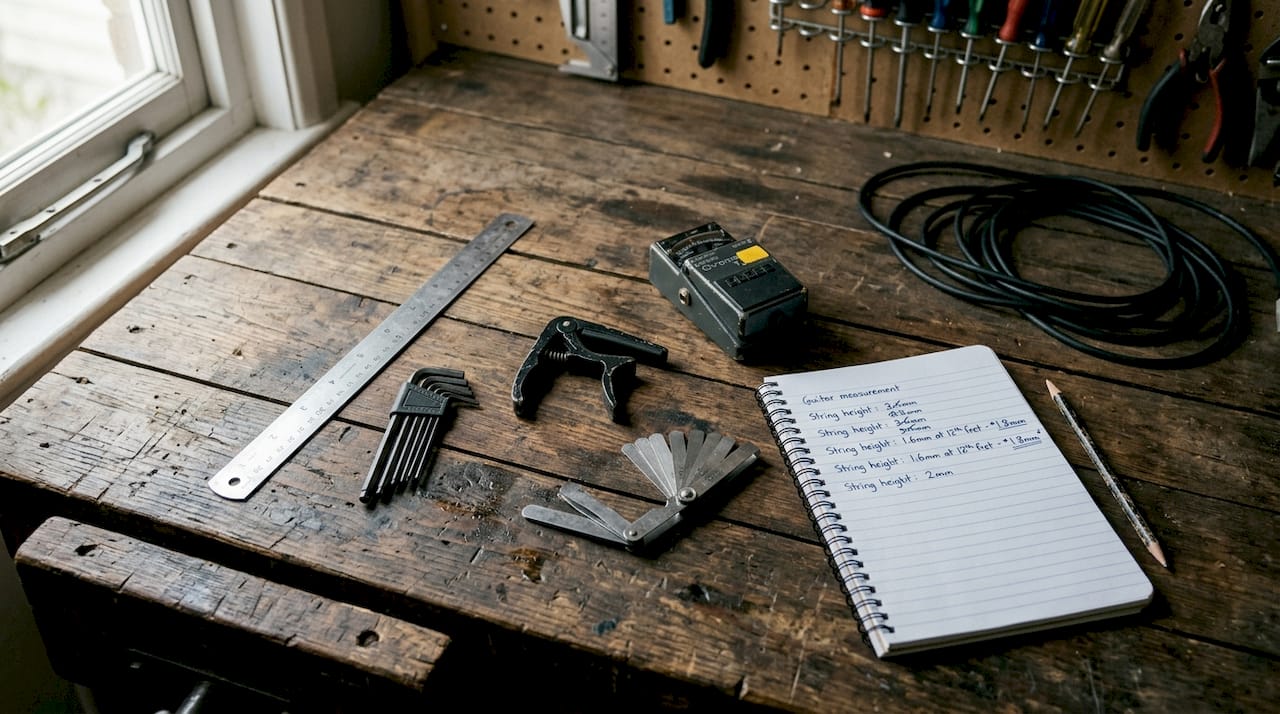
Here is a straightforward table of what you will need:
| Tool | Purpose | UK alternative |
|---|---|---|
| Capo | Holds strings at first fret for nut checks | Borrow from a friend or buy cheaply online |
| Electronic tuner | Keeps guitar in tune throughout | Free tuner apps work well |
| Hex keys (Allen keys) | Adjusts truss rod and bridge saddles | Standard metric set from any hardware shop |
| Steel ruler (with mm markings) | Measures string height at twelfth fret | Any precision ruler from a stationery shop |
| Feeler gauge | Checks neck relief and nut slot depth | Available from car parts shops like Halfords |
Before you touch anything on the guitar, run through this preparation checklist:
- Fit a fresh set of strings if the current ones are old or corroded
- Tune the guitar to standard pitch and let it settle for ten minutes
- Clean your workspace and lay the guitar on a soft surface to avoid scratches
- Write down your current string heights so you can revert if needed
- Check your guitar has been indoors for at least an hour to acclimatise
That last point matters more than most people realise. UK humidity requires seasonal setup checks, and a guitar brought in from a cold car boot will behave differently than one that has settled at room temperature. Reading up on maintenance tips for UK conditions will help you understand how the British climate affects your instrument throughout the year.
Pro Tip: Log your original measurements in a notebook before making any changes. If an adjustment does not feel right, you have a reliable baseline to return to. Working in small increments and keeping notes is the single best habit any DIY setup enthusiast can develop.
If you are new to this, aim for a medium action to start. It gives you room to go lower if you want easier playability, without immediately risking fret buzz.
Step-by-step process to adjust your guitar action safely
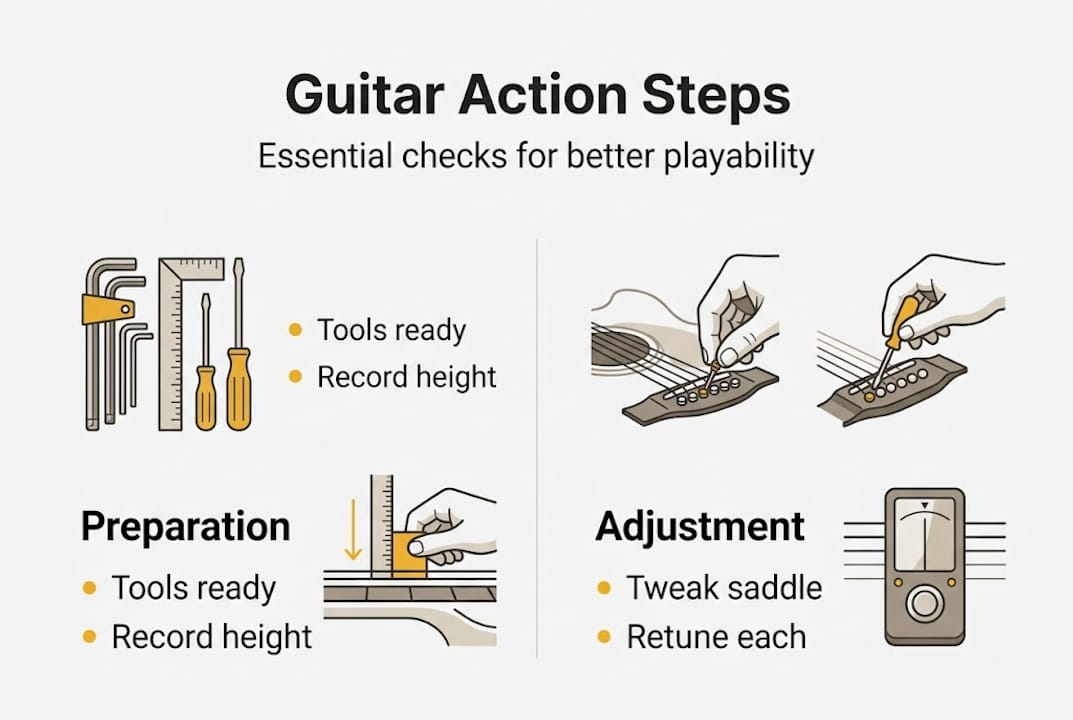
With everything ready, it is time to walk through each setup step and make precise adjustments. The standard setup sequence recommended by professional luthiers is: tune, set neck relief, check nut height, adjust bridge or saddle height, set intonation, then play-test. Follow this order every time.
- Tune the guitar to standard pitch. All measurements depend on correct tension.
- Check neck relief by pressing the low E string at the first and fourteenth frets simultaneously. The gap at the seventh fret should be roughly 0.3 mm to 0.5 mm for most guitars. Adjust the truss rod in small increments, no more than a quarter turn at a time, and wait several minutes between adjustments.
- Check nut height by placing a capo at the second fret and pressing each string at the third. If the string does not move at all when you tap it at the first fret, the nut slots may be too shallow. This is a job for a nut file and is best left to a professional if you are unsure.
- Adjust saddle or bridge height using your hex key. Measure string height at the twelfth fret with your steel ruler.
- Set intonation by comparing the open string pitch to the fretted note at the twelfth fret. Adjust the saddle forward or back until they match.
- Play-test across the full neck, checking for buzz, comfort, and tuning stability.
Here are typical action heights to aim for at the twelfth fret:
| Guitar type | Low E string | High E string |
|---|---|---|
| Acoustic | 2.0 mm to 2.5 mm | 1.5 mm to 2.0 mm |
| Electric | 1.5 mm to 2.0 mm | 1.0 mm to 1.5 mm |
| Bass | 2.5 mm to 3.0 mm | 2.0 mm to 2.5 mm |
These are starting points, not rules. Your full setup step-by-step may land slightly outside these ranges depending on your playing style, and that is perfectly fine. For more on optimising playability for different genres and techniques, it is worth reading further.
Pro Tip: Retune after every individual adjustment. String tension changes with each tweak, and your measurements will be inaccurate if the guitar drifts out of pitch during the process.
Troubleshooting: Common mistakes and how to fix them
Even following expert guidance, challenges can arise. Here is how to tackle the most common ones safely.
The problems players encounter most often when adjusting action include:
- Buzz after lowering action: The neck may need more relief, or the nut slots could be too deep
- Action remains high after saddle adjustment: Check whether the neck has too much back-bow, which raises the middle of the neck
- Stripped saddle screws: Use the correct hex key size and never force a stuck screw
- Seasonal changes undoing your setup: Wood moves with humidity, so expect to revisit your setup in autumn and spring
Warning: Never force a stiff truss rod. If it will not turn with gentle pressure, stop immediately. Forcing a truss rod can crack the neck or cause permanent damage that no amount of adjustment will fix.
If you have made recent changes and something feels wrong, reverse your steps one at a time. Return the saddle height first, then the truss rod, checking tuning and playability after each reversal. Patience here saves you from compounding one mistake into several.
Knowing when to call a professional is just as important as knowing how to adjust. If you notice a twisted neck, a cracked nut, or a saddle that will not seat properly, these are signs a guitar technician should take over. Beginners should start with conservative changes; experienced players can experiment more freely, but even seasoned players know their limits.
For UK players, a seasonal re-check checklist is worth keeping on hand:
- Check action heights at the twelfth fret every three months
- Inspect neck relief after any significant temperature change
- Wipe down and condition the fretboard at each check
- Store the guitar away from radiators and external walls
Our take: What really matters in guitar action adjustment
Here is something most setup guides will not tell you: there is no single perfect action height. The obsession with hitting a specific millimetre measurement misses the point entirely. Action is personal. A slide player needs high action to avoid buzz under heavy pressure. A shredder wants action as low as possible without sacrificing clarity. A fingerstyle acoustic player sits somewhere in between.
What we have seen time and again at MusicStreet is that players who learn to read and adjust their own action develop a far deeper relationship with their instrument than those who chase a spec sheet. You start to feel when something is off. You notice the subtle changes that come with a cold winter or a dry summer. You stop waiting for a setup appointment and start maintaining your guitar as a living, breathing tool.
The British climate makes this especially relevant. Guitar maintenance in the UK is not a once-a-year task. Regular minor tweaks beat rare perfection every time. A guitar that is consistently 90% dialled in will serve you better than one that is perfect twice a year and neglected the rest of the time.
Need further guitar setup help?
Feeling ready to tackle your setup, or would you prefer professional guidance? Either way, MusicStreet has you covered.

Whether you are after the right tools, want to browse our DIY guitar setups guide, or simply want to speak to someone who knows guitars inside out, visit MusicStreet online or come and see us in store in Huntingdon, Cambridgeshire. Our team offers professional setup services, expert advice, and a full range of accessories to keep your instrument playing at its best. Do not let a poor setup hold back your playing any longer.
Frequently asked questions
How do I know if my guitar action is too high or too low?
Action is too high if playing feels stiff or notes go sharp above the twelfth fret. It is too low if you hear buzzing on multiple frets across the neck.
How often should I check my guitar action in the UK?
Check your action every season. UK humidity changes affect the wood in your guitar’s neck and body, which can shift your setup between spring, summer, autumn, and winter.
Can I adjust guitar action myself, or should I see a professional?
Minor action adjustments are safe at home if you follow the correct sequence. Seek a guitar technician if major changes are needed or if you encounter a stiff truss rod or structural issues.
What tools do I need to adjust guitar action?
You will need a capo, an electronic tuner, a set of hex keys, a steel ruler with millimetre markings, and a feeler gauge for checking neck relief and nut slot depth.
Will changing string gauge affect my action?
Yes. Heavier strings exert more tension and can raise action, while lighter strings may lower it. Always recheck your setup after switching gauges.





Share:
Guitar Setup at MusicStreet: What to Expect, How Long It Takes, and Why It Matters
Electric Guitars — Shop the UK's Best Electric Guitar Range at Music Street