


Changing the strings on an acoustic guitar is the single most effective maintenance step you can take to restore tone, playability, and tuning reliability. Fresh strings produce a brighter, fuller sound that worn strings simply cannot match. Gibson’s master luthier Jim DeCola notes that tonal dullness and residue on fingers are the clearest signs that strings need replacing. For regular players, that moment arrives every 1–3 months. For heavy players, it can come as soon as every 2–8 weeks. This guide walks you through every stage of the process, from gathering tools to stretching new strings into stable tuning.
What tools do you need before changing acoustic guitar strings?
The right tools make the difference between a clean restring and a frustrating one. Arriving at the job unprepared wastes time and risks damaging your guitar.
The essentials:
- A fresh set of acoustic guitar strings in your preferred gauge
- A string winder with a built-in bridge pin puller
- Wire cutters or string snips
- A soft, lint-free cloth
Optional but recommended:
- Lemon oil or a dedicated fretboard conditioner for cleaning while strings are off
- A clip-on chromatic tuner for accurate pitch reference after restringing
The tools for string changes listed above cover every stage of the process without improvisation. Improvised tools, such as using pliers directly on bridge pins, cause wood damage that is expensive to repair.
Choosing the right string gauge
String gauge refers to the thickness of the strings, measured in thousandths of an inch. Light gauge strings (typically .012–.053) are the most common choice for acoustic guitars because they balance playability with projection. Medium gauge strings (.013–.056) produce more volume and sustain but require more finger pressure. If you are unsure which gauge suits your playing style and guitar, the acoustic guitar string guide at Musicstreet explains the trade-offs clearly.
Pro Tip: Always replace strings with the same gauge your guitar was set up for. Switching to a significantly heavier gauge without a professional setup can alter neck relief and action.
| String type | Gauge range | Best for |
|---|---|---|
| Extra light | .010–.047 | Beginners, fingerpickers |
| Light | .012–.053 | All-round acoustic playing |
| Medium | .013–.056 | Strummers, louder projection |
How do you remove old strings safely?
Safe removal protects your guitar’s neck, bridge, and finish. The key rule is to loosen and remove strings one at a time rather than cutting them all off at once.
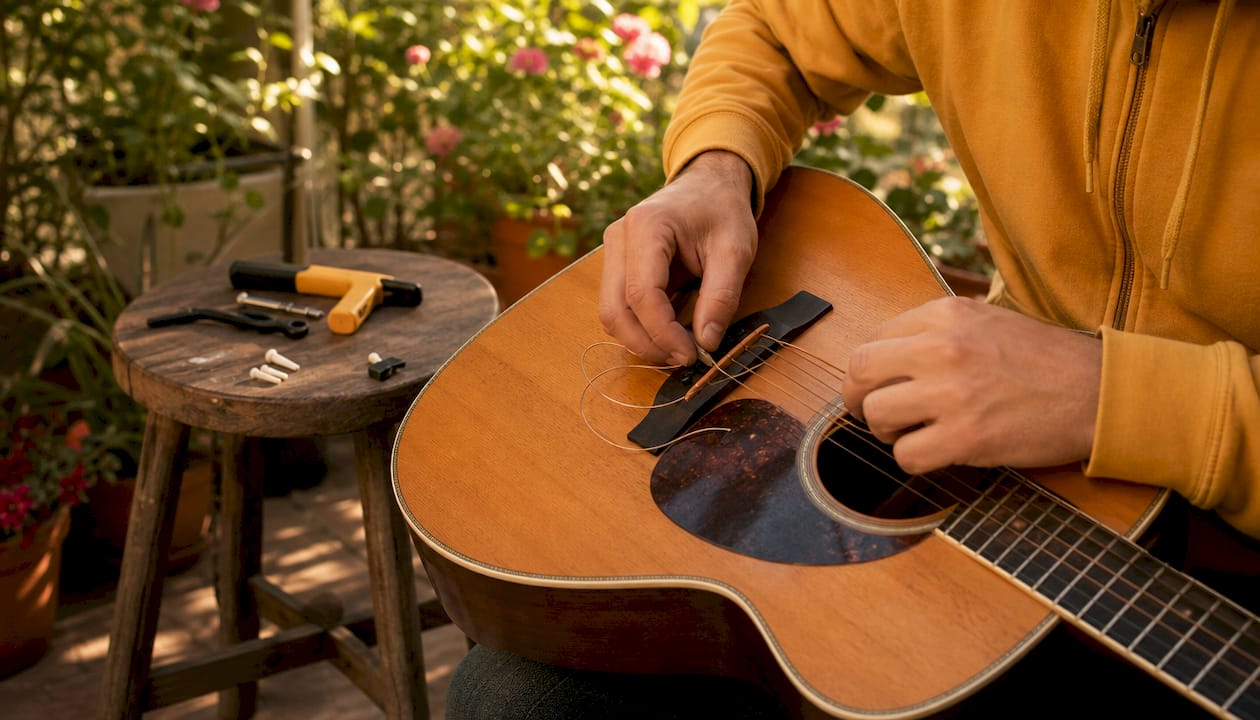
Changing strings one at a time prevents sudden tension loss across the neck and bridge. A rapid drop in tension can shift the neck or cause the bridge saddle to move, both of which affect intonation and may require a professional setup to correct.
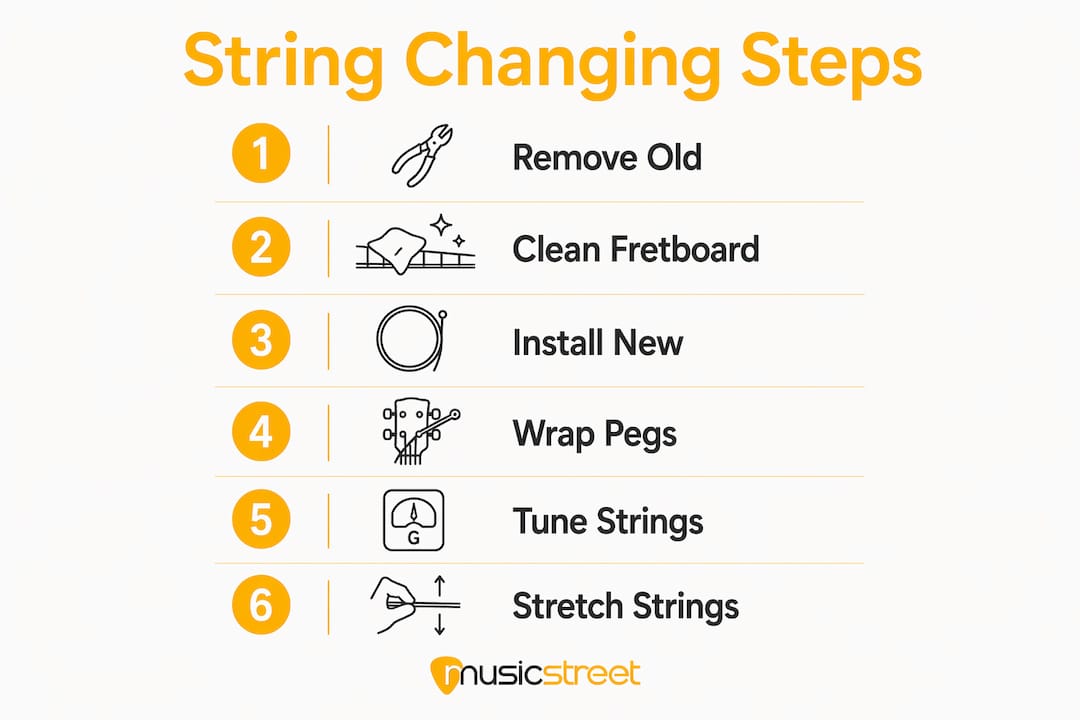
Step-by-step removal:
- Turn the tuning peg to loosen the first string until it is slack enough to unwind by hand.
- Unwind the string from the tuning peg and pull it free.
- Use your string winder’s bridge pin puller to lever the bridge pin straight up. Apply steady, even pressure rather than yanking.
- Pull the string out through the bridge hole and set it aside.
- Repeat for each string, working across the guitar one at a time.
Pro Tip: If a bridge pin feels stuck, push the string slightly further down into the bridge hole before pulling the pin upward. This releases the ball-end tension that is holding the pin in place.
Stubborn bridge pins are one of the most common causes of accidental damage during restringing. Proper pin removal technique uses the correct puller and gentle, controlled pressure. Never grip a pin with metal pliers directly on the wood surface.
Cleaning the fretboard while strings are off
With all strings removed, the fretboard is fully exposed. This is the best time to clean it. Apply a small amount of lemon oil or fretboard conditioner to a soft cloth and work it into the wood along each fret. Wipe away any excess before the oil sits too long. A clean fretboard improves feel and slows the build-up of grime that accelerates string wear.
How to install new strings on your acoustic guitar
Correct installation determines whether your strings stay in tune and seat properly at the bridge. Rushing this stage is the most common cause of slipping strings and unstable pitch.
Step-by-step installation:
- Take the lowest string (the thickest, low E) and insert the ball end into the corresponding bridge hole.
- Push the bridge pin back into the hole with the groove facing toward the neck. The groove guides the string up and out of the bridge correctly.
- Pull the string upward with gentle tension to seat the ball end firmly against the underside of the bridge plate.
- Run the string up the neck to the corresponding tuning peg.
- Thread the string through the hole in the tuning peg shaft.
- Pull the string taut, then allow approximately 2–3 cm of slack before you begin winding. This slack creates the wraps needed for grip.
- Wind the string downward on the peg, keeping each wrap below the previous one.
- Repeat the process for each remaining string, working from low to high.
How many wraps does each string need?
The number of wraps around the tuning peg affects tuning stability directly. Wound strings require 2–3 wraps around the peg, while plain strings need 3–5 wraps. Too few wraps and the string slips under tension. Too many and the excess coils can bind or create uneven pull on the peg.
Pro Tip: After threading through the peg, kink the string slightly at the hole before winding. This small bend locks the string in place and reduces the chance of it slipping during the first tuning session.
The wound strings are your low E, A, D, and G strings. The plain strings are your B and high e. Keeping this distinction in mind as you wind prevents the most common winding errors.
Quick winding reference:
- Low E, A, D, G (wound): 2–3 wraps
- B, high e (plain): 3–5 wraps
- Wraps should sit neatly below the string hole, not stacked randomly
Once all strings are installed, use wire cutters to trim the excess string ends close to the tuning pegs. Leave no more than 3–4 mm of tail to avoid sharp ends catching on your hand.
How do you tune new strings and keep them in tune?
New strings go out of tune rapidly because they are still stretching under tension. This is normal and not a sign of poor installation. The solution is manual stretching combined with repeated tuning cycles.
Tuning and stretching process:
- Bring all strings up to approximate pitch using a clip-on chromatic tuner. Standard tuning is E-A-D-G-B-e from the thickest to the thinnest string.
- Starting with the low E string, place two fingers under the string at the 12th fret and pull upward gently but firmly. Do not yank hard enough to snap the string.
- Retune the string to pitch. It will have dropped noticeably.
- Repeat the stretch-and-retune cycle 2–3 times per string.
- Work through all six strings in order, then go back and check tuning across the whole guitar.
Manual stretching after installation settles string tension faster than simply playing the guitar and waiting. Without stretching, new strings can take several hours of playing before they hold pitch reliably.
Pro Tip: After stretching, play a few open chords and check tuning again. If the guitar stays within a few cents of pitch across all strings, the strings have settled enough for a proper playing session.
Standard tuning (E-A-D-G-B-e) is the reference point for all chromatic tuners. If you use an alternative tuning, bring strings to standard pitch first to seat them, then retune to your preferred voicing.
Common mistakes to avoid when restringing an acoustic guitar
Even experienced players make errors during restringing. Knowing the most common pitfalls saves time and protects your instrument.
- Removing all strings at once. This releases all neck and bridge tension simultaneously. Sudden tension loss risks neck shifting and saddle movement. Always work one string at a time.
- Forcing bridge pins with the wrong tool. Using metal pliers directly on a bridge pin can split the wood around the pin hole. Use a dedicated bridge pin puller every time.
- Insufficient wraps on the tuning peg. Too few wraps cause the string to slip when brought to pitch. Follow the 2–3 wrap rule for wound strings and 3–5 for plain strings.
- Skipping the stretching stage. Strings that have not been stretched will detune constantly during the first playing session, which is frustrating and avoidable.
- Using the wrong string gauge without a setup. Heavier strings increase neck tension. Switching gauges without adjusting the truss rod can cause buzzing or high action.
“Recognising when strings need changing based on tonal dullness, residue, and texture can affect overall playability just as much as the restringing technique itself.” — Jim DeCola, master luthier, Gibson
Pro Tip: If a string slips at the bridge pin after installation, remove the pin and check that the ball end has seated properly against the bridge plate. A misaligned ball end is the most common cause of bridge pin popping during tuning.
Key takeaways
Changing acoustic guitar strings correctly requires the right tools, a methodical one-at-a-time approach, proper winding technique, and manual stretching to achieve stable tuning.
| Point | Details |
|---|---|
| Change strings regularly | Replace strings every 1–3 months for regular players, every 2–8 weeks for heavy players. |
| Use the correct tools | A string winder with pin puller and wire cutters prevent damage and speed up the process. |
| Work one string at a time | Removing and replacing strings individually protects neck and bridge tension. |
| Follow winding counts | Use 2–3 wraps for wound strings and 3–5 wraps for plain strings to prevent slipping. |
| Stretch new strings | Manual stretching after installation settles tension and dramatically improves tuning stability. |
What I have learned from years of restringing acoustic guitars
The most underrated part of changing strings is knowing when to do it. Most players wait too long. The moment your strings start to feel rough under your fingertips, or you notice a greenish residue on your fingers after playing, the strings are already past their best. Tone deteriorates gradually, which means players often adapt to a duller sound without realising how much they are missing.
One thing I have found consistently is that players obsess over string brand but neglect technique. A mid-range set of strings installed correctly, with proper winding and thorough stretching, will outperform a premium set installed carelessly. The installation process matters more than most players acknowledge.
The other point worth making is that string changes and professional setups are not the same thing. Annual or 18-month professional setups address structural issues like neck relief, nut slots, and bridge saddle height that string changes cannot fix. Changing strings keeps your tone fresh. A professional setup keeps your guitar structurally sound. Both are necessary, and neither replaces the other.
My practical advice: build a simple habit. Change your strings on the same day each month if you play regularly. Use the time to clean the fretboard and inspect the guitar for any wear. That 20-minute routine will keep your instrument sounding its best year-round.
— Music
Quality strings and maintenance kits at Musicstreet
Fresh strings make an immediate difference to how your guitar sounds and feels. Musicstreet stocks a full range of acoustic guitar strings across all gauges, alongside the maintenance tools you need for a clean, professional restring every time.

The CruzTools Groovetech Acoustic Guitar Player Tech Kit includes a bridge pin puller, string winder, wire cutter, and fretboard care products in a single kit. It covers everything covered in this guide. If you are looking to upgrade the guitar itself after mastering your maintenance routine, the Yamaha FGX5 Acoustic Guitar is one of the finest acoustic electrics available at Musicstreet, built for players who take their sound seriously.
FAQ
How often should I change acoustic guitar strings?
Regular players should change strings every 1–3 months. Heavy players who perform frequently should change them every 2–8 weeks for consistent tone and tuning stability.
Can I remove all strings at once on an acoustic guitar?
Removing all strings simultaneously is not recommended. Changing strings one at a time maintains neck and bridge tension and prevents structural shifts.
Why do my new strings keep going out of tune?
New strings stretch under tension during the first hours of play. Manual stretching 2–3 times per string after installation, followed by retuning, settles the tension and dramatically reduces detuning.
How many wraps should I use on the tuning peg?
Wound strings (low E, A, D, G) need 2–3 wraps. Plain strings (B and high e) need 3–5 wraps. Fewer wraps cause slipping; more wraps create uneven tension on the peg.
When should I get a professional guitar setup instead of just changing strings?
String changes maintain tone and playability. A professional setup every 12–18 months addresses structural issues like neck relief, nut slots, and saddle height that string changes cannot correct.









Share:
Epiphone Les Paul vs Gibson Les Paul: Is the Upgrade Worth It?
How to Tune a Guitar Accurately for Perfect Pitch