


- Fret buzz is caused by various factors such as nut issues, neck relief, or action height, and often signals underlying problems requiring precise diagnosis. Identifying the exact location of the buzz and adjusting the appropriate components can often eliminate the problem without professional help. Regular maintenance, proper environment, and careful testing ensure your guitar remains buzz-free and plays at its best.
Fret buzz is one of those problems that starts as a minor irritation and quickly becomes a genuine obstacle to enjoying your guitar. That metallic rattle against the fretboard can rob a chord of its clarity, kill a sustain mid-phrase, or simply make a well-loved instrument feel unplayable. Whether you’re a beginner who picked up your first guitar last month or a seasoned player who has owned dozens of instruments, buzz has a way of creeping in when you least expect it. The good news is that most fret buzz is entirely fixable, often without a trip to the repair shop, provided you understand what’s really going on before you reach for any tools. It’s also worth noting early on that loose hardware or rattle can mimic genuine fret buzz, so always rule out simple mechanical noises first.
Table of Contents
- Understanding what causes fret buzz
- Essential tools and preparation before adjustments
- Step-by-step: Diagnosing and fixing fret buzz
- Testing your fixes and avoiding future fret buzz
- Our perspective: The art of fret buzz prevention
- Take your playing further with expert support
- Frequently asked questions
Key Takeaways
| Point | Details |
|---|---|
| Identify buzz location | Pinpoint where fret buzz occurs to apply the right fix and avoid unnecessary adjustments. |
| Use correct workflow | Adjust relief, action, and intonation step by step to prevent new setup issues from emerging. |
| Check hardware first | Loose hardware often causes buzz-like noises, so rule this out before making setup changes. |
| Test methodically | Play every note after adjustments to confirm the issue is fully resolved and guitar performance is restored. |
Understanding what causes fret buzz
Fret buzz is a symptom, not a root cause in itself. Treating it as a standalone problem, rather than as a signal that something else needs attention, is where most players go wrong. The buzz you hear is the guitar string vibrating against a fret it shouldn’t be touching, but why it’s doing that can vary enormously depending on where on the neck the buzz occurs and under what playing conditions.
Fret buzz is your guitar telling you something specific. Learn to listen to where it happens, and the fix often becomes obvious.
The single most important diagnostic habit is location mapping. As John Soto Music explains, the first step is identifying where the buzz happens, whether on open strings, low frets, high frets, or a single isolated fret, because the likely fix differs entirely for each scenario. Open string buzz usually points to the nut. Buzz concentrated in the first through fifth frets typically suggests insufficient neck relief. Buzz appearing only higher up the neck, towards the body, tends to be a bridge or action height problem.
There are also important non-setup culprits that confuse even experienced players. A loose strap button, a rattling spring cavity cover, or a vibrating truss rod nut can all produce a sound remarkably similar to genuine fret buzz. According to The Guitar Side, if buzz persists after setup changes or behaves like a mechanical noise rather than a string-related one, you should inspect and re-tighten all parts before concluding it’s a geometry problem.
Common errors in diagnosis include jumping straight to the truss rod, assuming lighter strings will solve everything, or raising the action so dramatically that playability suffers. None of those are proper solutions if the root cause hasn’t been identified. Good guitar maintenance starts with observation, not guesswork.
Key causes to investigate include:
- Nut slots cut too deep, allowing open strings to buzz on the first fret
- Insufficient neck relief (too straight or back-bowed), causing low-fret buzz
- Action set too low at the saddle, producing high-fret buzz
- A proud or unseated fret, causing a single isolated note to buzz or choke
- Worn frets, which create inconsistent string-to-fret contact
- Loose hardware, which vibrates sympathetically and mimics buzz
Essential tools and preparation before adjustments
Before diving into step-by-step corrections, make sure you’re prepared with the right equipment. Attempting a guitar setup without the correct tools is a common route to making things worse, not better. A professional-quality setup doesn’t require a workshop full of gear, but a few precise items are genuinely essential.
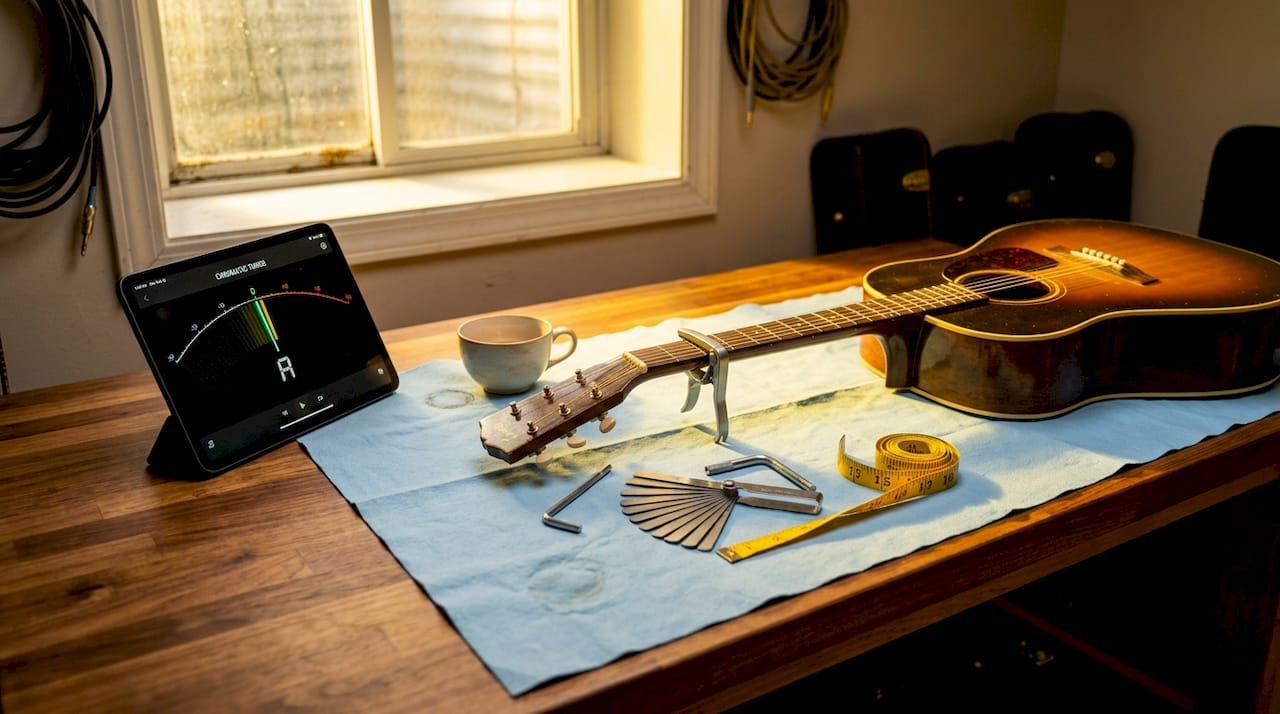
| Tool | Purpose | Notes |
|---|---|---|
| Capo | Isolates neck relief measurement | Any decent capo works |
| Feeler gauges | Measures string-to-fret clearance | Metric or imperial, your choice |
| Allen keys (hex keys) | Adjusts truss rod and saddle height | Check your guitar’s spec first |
| Straightedge or fret rocker | Identifies high or uneven frets | A steel ruler can substitute |
| String action ruler | Measures action at the nut and saddle | More precise than a standard ruler |
| Nut files (optional) | Widens or deepens nut slots | Only needed if nut work is required |
| Screwdrivers (flat and Phillips) | Adjusts saddle height and hardware | Keep several sizes to hand |
Workspace preparation matters more than players often realise. Work at a stable table with a non-scratch surface, such as a folded towel or guitar mat. Good lighting is critical because spotting a proud fret or a worn nut slot in a dimly lit room is nearly impossible. Keep all your tools within reach before you begin.
Pro Tip: Always tune your guitar to pitch before taking any measurements. String tension directly affects neck relief, and measuring a guitar with slack strings will give you completely inaccurate readings.
When it comes to workflow, Premier Guitar recommends a logical sequence: measure and adjust neck relief first, then address saddle action height, and reassess after each change. This matters because adjusting the truss rod changes the overall string height, which then affects your saddle measurements. Working out of order means you’ll be chasing your own adjustments.
For a broader overview of keeping your instrument in good condition between setups, our complete guitar maintenance guide covers everything from cleaning to fret care in one place.
Step-by-step: Diagnosing and fixing fret buzz
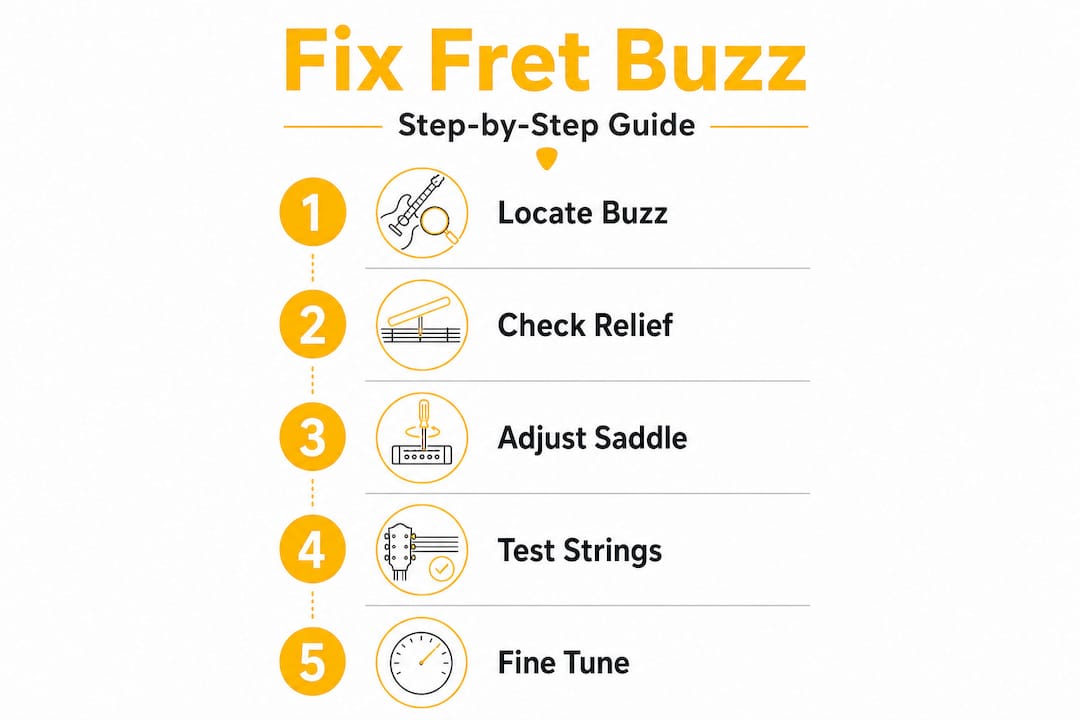
With tools in hand, follow this workflow to identify and eliminate fret buzz wherever it appears on your guitar. A methodical approach is what separates a genuine fix from a temporary patch.
- Tune to pitch. Always start here. Neck relief changes under string tension, and all measurements become meaningless on a slack guitar.
- Check the neck relief. Capo at the 1st fret, fret the string at the body joint (typically around the 14th or 17th fret), and use a feeler gauge to measure the gap at the 7th or 8th fret. A typical relief measurement for most electric guitars is 0.25mm to 0.40mm. Acoustic guitars often need slightly more.
- Identify buzz location. Play every fret on every string, one at a time, and note exactly where buzz appears. A systematic check like this takes ten minutes and tells you everything.
- Address nut issues first. If buzz only occurs on open strings, the nut slot is almost certainly too deep. A temporary fix is to add a thin shim under the nut; a permanent fix requires a new nut or careful slot filling.
- Adjust neck relief if needed. If buzz concentrates at the low frets (1st through 5th), the neck is likely too straight. Small truss rod adjustments, usually no more than a quarter turn at a time, can introduce the correct amount of forward bow (relief). Wait several hours between adjustments to let the neck settle.
- Set saddle action height. If buzz appears at the higher frets, raise the saddle height incrementally using the relevant adjustment screws. As John Soto Music notes, buzz appearing higher up the neck towards the body is more often a bridge or action height problem than a neck relief issue.
- Investigate individual frets. If a single note always buzzes on the exact same fret across all setups, The Guitar Side’s research confirms the fix is often fretwork, such as dressing a high fret or reseating a loose one, rather than truss rod or general action changes.
| Buzz location | Most likely cause | Recommended fix |
|---|---|---|
| Open strings only | Nut slots too deep | Shim or replace nut |
| Frets 1 to 5 | Insufficient neck relief | Truss rod adjustment |
| Frets above the 12th | Action too low at saddle | Raise saddle height |
| One specific fret | High or loose fret | Fret dressing or reseating |
| Across the whole neck | Multiple causes | Full setup review |
Pro Tip: Make all adjustments incrementally. A quarter turn on the truss rod, a quarter millimetre raise on the saddle. Overcorrecting is a very common mistake, and it can introduce new problems faster than it solves the original one.
For a more detailed breakdown of the full setup process, our step-by-step guitar setup guide walks through every stage clearly. If action height is your primary concern, our dedicated article on adjusting guitar action goes into greater depth on saddle and nut adjustments.
Testing your fixes and avoiding future fret buzz
Once you’ve made your adjustments, careful testing and ongoing habits will ensure your guitar remains buzz-free. Testing isn’t simply strumming a few chords and deciding it sounds better. It requires methodical note-by-note checks to confirm every area of the neck is clean.
After any fret-related repair, Premier Guitar advises that you play-test every single note on the affected frets. Don’t skip this step. A buzz that moves from the 5th string to the 4th string after your adjustment means you’re not finished yet.
A solid post-adjustment testing routine looks like this:
- Play every fret chromatically from the 1st to the highest fret on each string
- Use both light fingerpicking and firm fretting pressure to expose borderline cases
- Check open strings individually after tuning back up
- Play common chord shapes that previously triggered buzz
- Test with the volume up on an amplifier if you play electric, as amplification makes subtle buzz far more audible
Pro Tip: Test in the playing position you actually use. Sitting with the guitar flat on your lap gives different neck angles than playing upright. Buzz that hides in one position may reveal itself in another.
On the prevention side, the single biggest cause of recurring fret buzz in guitars that were previously set up correctly is environmental change. Wood responds to humidity and temperature shifts significantly. A guitar kept in a centrally heated room through a British winter can lose several millimetres of neck relief as the wood dries out. Storing your guitar in a quality case, ideally with a humidity pack, dramatically reduces seasonal drift. Aim to keep relative humidity between 45% and 55% for stable wood behaviour.
Regular string changes are also underappreciated as a buzz prevention measure. Worn, corroded strings lose their ability to vibrate cleanly and are more likely to buzz even on a properly set-up guitar. For most regular players, monthly string changes are a reasonable baseline.
A seasonal setup check, typically twice a year in spring and autumn when UK weather shifts most dramatically, keeps your guitar in consistent playing condition. Pair this with a look at the guitar maintenance checklist we’ve put together, which covers everything from tuner screws to fret condition, and your guitar should stay playable year-round.
If buzz returns persistently despite correct setup, or if you suspect uneven fret wear across the board, that’s a reliable signal to consult a luthier. Fret levelling is a skilled job that requires precise equipment and experience.
Our perspective: The art of fret buzz prevention
Here is something most setup guides won’t say outright: the most common reason guitars stay buzzy is that players skip the diagnosis and go straight to the adjustment. That’s entirely understandable. Grabbing a hex key feels like progress. Careful listening and methodical testing can feel slow and uncertain by comparison.
But years of working with guitars at every price point have taught us that careful diagnosis genuinely outperforms routine fixes every single time. We’ve seen pristine, expensive guitars buzz due to a single proud fret that no amount of truss rod adjustment would ever fix. We’ve also seen modest, budget instruments play flawlessly simply because someone took the time to set them up correctly from the start.
The uncomfortable truth is that price doesn’t protect you from fret buzz. A guitar coming off a factory line, regardless of the brand prestige attached to it, may still need proper setup work before it plays at its best. Even a guitar that played perfectly six months ago can develop buzz due to nothing more than seasonal wood movement. Setup is not a one-time event. It’s an ongoing relationship with your instrument.
What experience also teaches is how much small changes matter. Moving a saddle by half a millimetre can transform a note from buzzy to singing. A tiny adjustment to neck relief can open up the entire low register. These are not dramatic interventions. They require patience and precision rather than force.
Knowing when to hand over to a professional is just as important as knowing how to do it yourself. Mastering guitar setups is a genuinely rewarding skill, but fret dressing and nut replacement are areas where a skilled luthier’s experience pays dividends quickly. There is no shame in recognising where your skills end and where professional hands will serve the guitar better.
Take your playing further with expert support
Eliminating fret buzz is just the beginning of what good guitar care can do for your playing. A properly set-up instrument is more comfortable, more responsive, and genuinely more enjoyable to play, whether you’re practising scales at home or performing on stage.

At MusicStreet, we take setup and post-sale support seriously. Every guitar we sell at our Huntingdon store and online shop is inspected before it reaches you, and we’re here to help if anything needs attention after purchase. Whether you need guidance on ongoing care or want to explore instruments that have been professionally checked, we’ve got you covered. Our essential guitar care guide is also available for free, packed with practical advice to keep your instrument playing at its best for years to come.
Frequently asked questions
Can changing strings help with fret buzz?
Old, worn, or incorrectly gauged strings can make fret buzz noticeably worse; replacing them with fresh, correctly gauged strings is often a simple first step worth trying before adjusting the setup.
What is the fastest way to check for high frets?
Lightly run a straightedge or fret rocker along consecutive frets. If one rocks or sits proud of its neighbours, it likely needs dressing or reseating by a professional.
Should I adjust the truss rod if I hear buzzing?
Only adjust the truss rod after confirming neck relief is the cause. As John Soto Music explains, identify exactly where the buzz occurs first, since the fix differs significantly depending on whether it’s at open strings, low frets, or high frets.
Can temperature and humidity changes make fret buzz worse?
Yes, absolutely. Shifts in humidity and temperature cause wood to expand or contract, altering neck relief and string action, both of which directly affect buzz.
When should I consult a luthier about fret buzz?
If buzz persists despite setup corrections, a professional is the right call. As The Guitar Side notes, persistent buzz that doesn’t respond to setup changes may point to hardware issues or fretwork problems that need specialist diagnosis.








Share:
Top benefits of solid body guitars: tone, durability, and more
Fender Telecaster Guide